Cherry Brownie Ice Cream Sandwiches-Delicious Treat
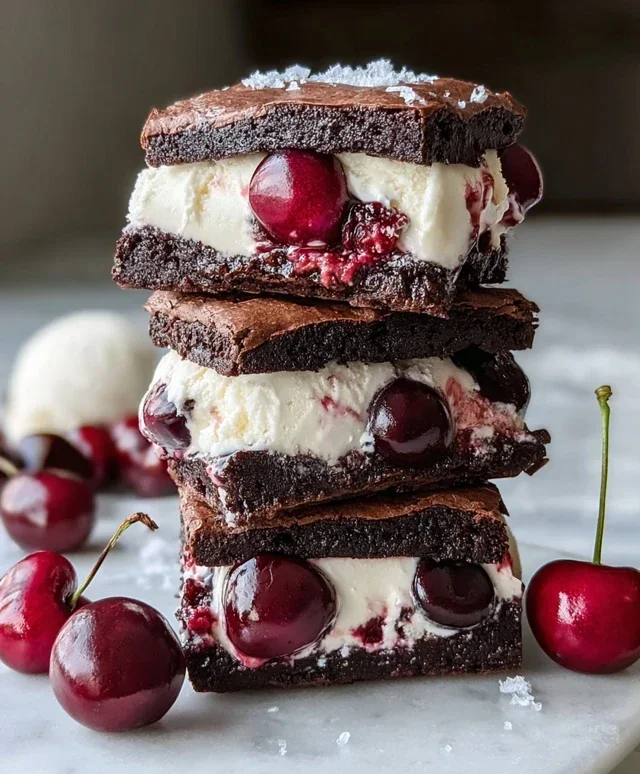
Cherry Brownie Ice Cream Sandwiches are not just a dessert; they’re an edible masterpiece, a symphony of textures and flavors that will transport you straight to dessert heaven. We all know and love the decadent richness of a fudgy brownie, and the sweet, tart burst of cherries is a classic pairing. But when you combine these beloved elements with creamy, dreamy ice cream and sandwich them between two chewy, chocolatey brownie discs? That, my friends, is pure magic. It’s the ultimate indulgence, a nostalgic treat that feels both familiar and excitingly new. The contrast between the slightly crisp brownie edges, the soft, chewy interior, and the melting ice cream is simply irresistible. Get ready to discover your new favorite way to beat the heat and satisfy your deepest sweet cravings with these incredible Cherry Brownie Ice Cream Sandwiches!
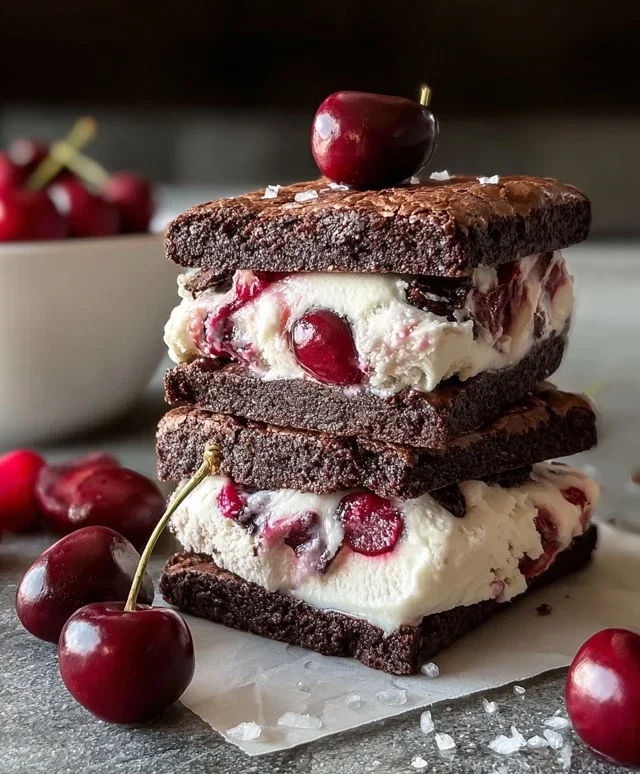
Cherry Brownie Ice Cream Sandwiches
Get ready for a truly decadent treat that combines the rich, fudgy goodness of homemade brownies with the cool, creamy delight of vanilla ice cream and a burst of tart cherries. These Cherry Brownie Ice Cream Sandwiches are the ultimate indulgence, perfect for a special occasion or just when you need a serious chocolate fix. The secret to their success lies in creating perfectly chewy brownies that are sturdy enough to hold their frosty filling, and then layering in that vibrant cherry flavor. Trust me, this is a recipe you’ll want to bookmark!
Ingredients:
Baking the Brownie Bases
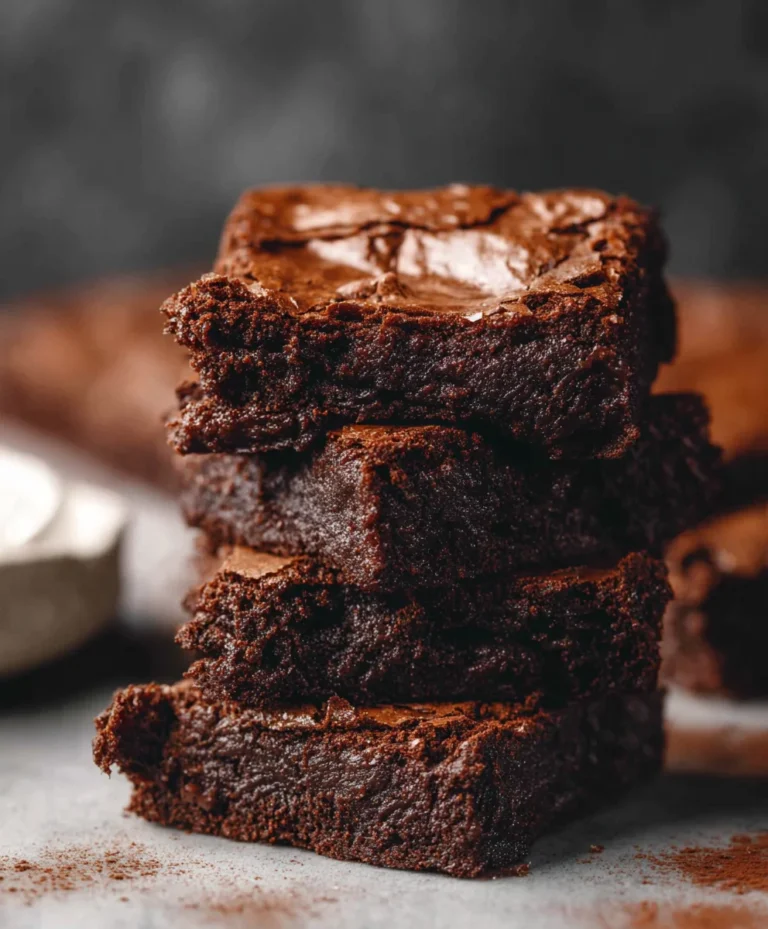
1. Preheat and Prep: The first step in creating these amazing ice cream sandwiches is to get our brownie base ready. Preheat your oven to 350°F (175°C). Line an 8×8 inch baking pan with parchment paper, leaving an overhang on the sides. This will make it incredibly easy to lift the baked brownies out of the pan later, which is crucial for slicing them into neat sandwich bases. Melt the ½ cup of unsalted butter in a medium saucepan over low heat or in a microwave-safe bowl. Be careful not to let it brown; you just want it melted and smooth.
2. Cream the Sugars and Eggs: In a separate large bowl, combine the melted butter with the ½ cup of granulated sugar and ½ cup of brown sugar. Whisk these together until the mixture is well combined and looks glossy. It’s important to get a good blend here as the sugars contribute to both the texture and sweetness of the brownies. Now, crack in the 2 large eggs, one at a time, whisking well after each addition. Stir in the 1 teaspoon of vanilla extract. The mixture should start to look richer and slightly lighter in color.
3. Incorporate Dry Ingredients: In a small bowl, whisk together the ⅓ cup of cocoa powder, ½ cup of all-purpose flour, and ¼ teaspoon of salt. Sifting these dry ingredients together can help prevent lumps and ensure even distribution. Gradually add the dry ingredients to the wet ingredients, mixing with a spatula or wooden spoon until just combined. Do not overmix at this stage, as overmixing can lead to tough brownies. You should have a thick, fudgy batter.
4. Bake and Cool: Pour the brownie batter into your prepared baking pan and spread it evenly. Bake for 20-25 minutes, or until a toothpick inserted into the center comes out with moist crum extractbs attached. We don’t want them completely clean, as that would indicate overbaking and drier brownies. Once baked, let the brownies cool completely in the pan on a wire rack. This cooling step is absolutely essential. Trying to cut warm brownies will result in a crum extractbly mess, and we need them to be firm enough to handle and slice cleanly for our ice cream sandwiches. Once cooled, use the parchment paper overhang to lift the brownies out of the pan and transfer them to a cutting board.
Assembling the Sandwiches
5. Slice and Prepare the Ice Cream: Once your brownies are completely cool, it’s time to slice them. Cut the brownie slab into 8 equal squares. You can aim for roughly 2×2 inch squares, depending on your preference. Then, prepare your ice cream. Take the 1½ cups of vanilla ice cream out of the freezer a few minutes before you plan to assemble the sandwiches. You want it to be slightly softened, so it’s spreadable but not melted. If you’re using frozen cherries, give them a quick chop if they are large. Stir the ½ cup of chopped cherries into the softened vanilla ice cream. This step adds a wonderful tartness and visual appeal, cutting through the richness of the brownie and chocolate.
6. Construct Your Sandwiches: Take one brownie square and place it on a piece of parchment paper. Spoon about 2-3 tablespoons of the cherry-infused ice cream mixture onto the brownie, spreading it evenly towards the edges. Don’t overload it, or it will ooze out too much. Place another brownie square on top of the ice cream, pressing down gently to create a sandwich. Repeat this process with the remaining brownie squares and ice cream mixture to make 4 ice cream sandwiches.
7. Chill and Drizzle: Place the assembled ice cream sandwiches on a parchment-lined baking sheet and pop them back into the freezer. Let them freeze for at least 2-3 hours, or until the ice cream is completely firm. This firming up is crucial so that they hold their shape when you’re ready to enjoy them. Once the sandwiches are frozen solid, melt the ¼ cup of chocolate chips (either in the microwave in 30-second intervals, stirring in between, or in a small heatproof bowl set over a pan of simmering water). Drizzle the melted chocolate over the tops of the frozen ice cream sandwiches for an extra layer of deliciousness and visual appeal. Return them to the freezer for another 15-30 minutes to allow the chocolate to set.
These Cherry Brownie Ice Cream Sandwiches are best enjoyed straight from the freezer. The contrast between the chewy, fudgy brownie, the creamy vanilla ice cream studded with tart cherries, and the crisp chocolate drizzle is simply divine. Enjoy every single bite of this homemade masterpiece!
Conclusion:
And there you have it – the ultimate guide to creating these sensational Cherry Brownie Ice Cream Sandwiches! This recipe is a true winner because it combines the rich, fudgy goodness of homemade brownies with the cool, creamy delight of your favorite ice cream, all punctuated by the sweet-tart burst of cherries. It’s a dessert that’s both sophisticated enough for a special occasion and easy enough for a spontaneous craving. The contrast of textures and flavors is simply divine, making each bite an unforgettable experience. Whether you’re a seasoned baker or just starting out, I truly encourage you to give these Cherry Brownie Ice Cream Sandwiches a try. They are a guaranteed crowd-pleaser and a fantastic way to impress your friends and family.
For serving, I love to present them straight from the freezer, perhaps dusted with a little cocoa powder or a drizzle of chocolate sauce. They also make for a wonderful late-night treat or a delightful addition to any summer barbecue. Don’t be afraid to get creative with your ice cream choices – vanilla bean is classic, but cherry, chocolate, or even a swirl would be phenomenal. You can also swap out the cherries for raspberries or even a swirl of cherry jam within the brownie batter for an extra layer of flavor.
Frequently Asked Questions:
Can I make the brownies ahead of time?
Absolutely! The brownies are best made a day in advance. This allows them to cool completely and firm up, making them easier to cut and handle when assembling your ice cream sandwiches. Store them tightly wrapped at room temperature.
What’s the best way to store leftover ice cream sandwiches?
Once assembled, wrap each Cherry Brownie Ice Cream Sandwich tightly in parchment paper or plastic wrap. Then, place them in an airtight container or freezer bag. This will prevent freezer burn and keep them tasting fresh for up to 2 weeks.
Can I use store-bought brownies?
While homemade brownies offer the best flavor and texture, you can certainly use high-quality store-bought brownies in a pinch. Just make sure they are thick and fudgy, and cut them into uniform squares for easier assembly.
Cherry Brownie Ice Cream Sandwiches
Decadent brownie cookies filled with creamy vanilla ice cream and studded with tart cherries, drizzled with chocolate.
Ingredients
-
½ cup unsalted butter
-
½ cup granulated sugar
-
½ cup brown sugar
-
2 large eggs
-
1 tsp vanilla extract
-
⅓ cup cocoa powder
-
½ cup all-purpose flour
-
¼ tsp salt
-
1½ cups vanilla ice cream, slightly softened
-
½ cup chopped cherries (fresh or frozen)
-
¼ cup chocolate chips, melted (for drizzle)
Instructions
-
Step 1
Preheat oven to 350°F (175°C). Line baking sheets with parchment paper. -
Step 2
In a large bowl, cream together softened butter, granulated sugar, and brown sugar until light and fluffy. -
Step 3
Beat in eggs one at a time, then stir in vanilla extract. -
Step 4
In a separate bowl, whisk together cocoa powder, flour, and salt. -
Step 5
Gradually add the dry ingredients to the wet ingredients, mixing until just combined. -
Step 6
Drop rounded tablespoons of dough onto prepared baking sheets, about 2 inches apart. -
Step 7
Bake for 18-20 minutes, or until edges are set and centers are still slightly soft. -
Step 8
Let cool on baking sheets for a few minutes before transferring to a wire rack to cool completely. -
Step 9
Once cookies are completely cool, spread softened vanilla ice cream onto the bottom of one cookie. Top with another cookie to form a sandwich. Gently press to form. -
Step 10
Roll the sides of the ice cream sandwich in chopped cherries, if desired. Drizzle with melted chocolate. -
Step 11
Freeze sandwiches for at least 30 minutes to firm up before serving.
Important Information
Nutrition Facts (Per Serving)
It is important to consider this information as approximate and not to use it as definitive health advice.
Allergy Information
Please check ingredients for potential allergens and consult a health professional if in doubt.