Banana Pudding Cheesecake Cones-Delicious Dessert
Banana Pudding Cheesecake Cones are here to redefine your dessert dreams. Imagin extracte the creamy, dreamy swirl of velvety cheesecake, cradled within the crisp, golden embrace of an ice cream cone, and then elevated with the comforting, nostalgic sweetness of banana pudding. This isn’t just a dessert; it’s an experience that bridges the gap between two beloved classics, offering a playful yet sophisticated twist that’s simply irresistible. We all have those comfort foods that transport us back to happy memories, and for many, that includes the smooth texture and familiar flavor of banana pudding and the decadent indulgence of cheesecake. What makes these Banana Pudding Cheesecake Cones so special is the ingenious marriage of these familiar favorites into a portable, delightful package. They’re a perfect testament to how creative combinations can unlock entirely new levels of deliciousness, making them an instant crowd-pleaser for any occasion.
Banana Pudding Cheesecake Cones
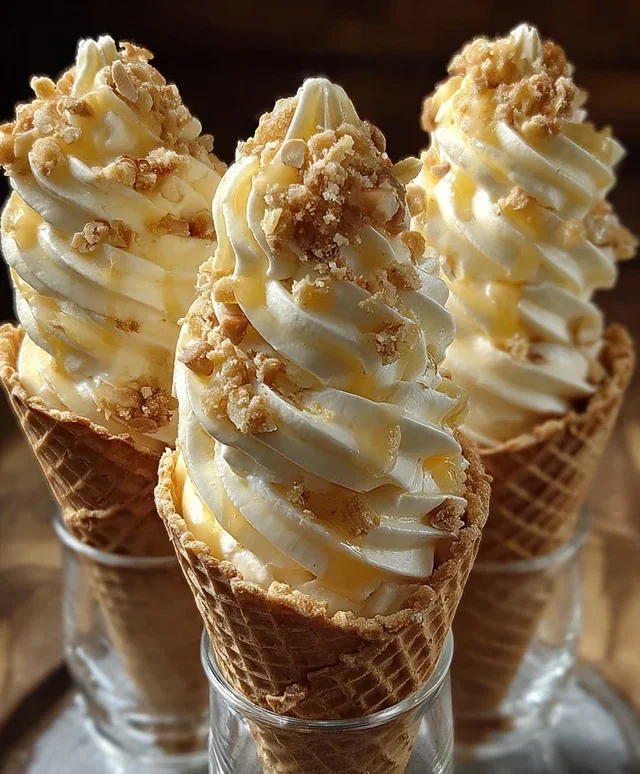
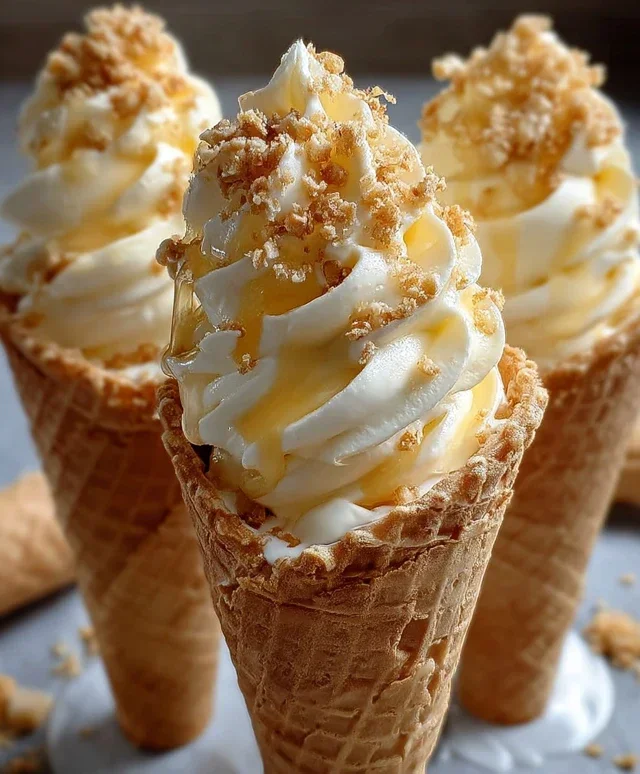
Get ready to delight your taste buds with a dessert that’s a true showstopper: Banana Pudding Cheesecake Cones! This recipe takes the beloved flavors of creamy banana pudding and rich cheesecake and combines them into an irresistible, handheld treat. We’re transforming classic dessert elements into fun, individual cones that are perfect for parties, special occasions, or just a decadent afternoon pick-me-up. Imagin extracte biting into a crunchy waffle cone filled with smooth, luscious cheesecake, topped with sweet banana pudding, and finished with a crunchy, cookie-crum extractb topping. It’s pure bliss!
This recipe is surprisingly easy to assemble, and the results are so impressive, everyone will think you spent hours in the kitchen. We’re utilizing simple pantry staples and a few key ingredients to create this magical dessert. The magic really happens when the creamy cheesecake filling meets the fluffy banana pudding, creating layers of delightful texture and flavor. Don’t worry if you’ve never made cheesecake before; this no-bake version is incredibly forgiving and absolutely delicious. So, let’s get started and create some dessert magic!
Ingredients:
Preparing the Cheesecake Filling
The foundation of our Banana Pudding Cheesecake Cones is a simple yet decadent cheesecake filling. This no-bake mixture is incredibly smooth and creamy, providing the perfect contrast to the crunchy cone and fluffy pudding. It’s essential that your cream cheese is truly softened for this step. Leaving it out at room temperature for at least an hour, or gently warming it in the microwave for short bursts, will ensure it blends beautifully without any lumps.
First, in a medium bowl, combine the softened cream cheese with the powdered sugar. Using an electric mixer (or a sturdy whisk and a bit of arm power!), beat these two ingredients together until they are completely smooth and well combined. You want a light and airy texture, so don’t rush this step. Once smooth, stir in the vanilla extract. The vanilla adds a lovely depth of flavor that complements the creaminess of the cheesecake.
Now, gently fold in the whipped heavy whipping cream. This is where the filling gets its signature lightness. Be sure your heavy cream was whipped to stiff peaks beforehand; this means when you lift the whisk, the cream stands up straight. Carefully fold it into the cream cheese mixture using a spatula, making sure not to deflate the whipped cream too much. You’re aiming for a uniform, cloud-like consistency. This delicious cheesecake filling is now ready to be assembled into our cones.
Creating the Banana Pudding Layer
Next up is the star of the show: the banana pudding! This instant pudding mix makes it incredibly easy to achieve that classic, comforting banana flavor. The key here is using cold milk. The colder the milk, the faster and more effectively the pudding will set.
In a separate medium bowl, pour in the 2 cups of cold milk. Sprinkle the entire package of instant banana pudding mix over the milk. Immediately begin extract whisking. It’s important to whisk constantly for the first minute or two to prevent lumps from forming. You’ll see the mixture start to thicken almost immediately. Continue whisking until the pudding is completely smooth and has reached a thick, pudding-like consistency. This should only take about 5 minutes. Let the pudding sit for a few minutes to allow it to fully set before you start assembling your cones.
Assembling the Banana Pudding Cheesecake Cones
This is where all the magic comes together! It’s a fun and somewhat messy process, but the end result is so worth it. Make sure you have all your components ready before you begin extract, as the pudding will continue to thicken.
First, take your waffle cones. You can stand them up in glasses or a muffin tin to keep them upright while you fill them. Begin extract by spooning a generous layer of the cheesecake filling into the bottom of each waffle cone. Don’t be shy; this creamy layer is crucial!
Next, carefully spoon a layer of the prepared banana pudding on top of the cheesecake filling. Try to get an even distribution of pudding in each cone. You can layer the cheesecake and pudding as much as you like, but I like to have a good balance of both in every bite.
Now for the delightful crunch! Sprinkle a generous amount of the crushed vanilla wafers or grabeef beef ham crackers over the banana pudding layer. This adds a wonderful texture that mimics the traditional banana pudding dessert.
Finally, for the finishing touches. Drizzle your cones with caramel sauce or a swirl of sweetened condensed milk. This adds an extra layer of sweetness and visual appeal. For an extra crunch, sprinkle a few more crushed vanilla wafers on top of the drizzle. You can also add a thin slice of fresh banana if you like, though it’s optional.
Chilling and Serving
Once your Banana Pudding Cheesecake Cones are assembled, it’s important to let them chill in the refrigerator for at least 30 minutes. This allows the cheesecake filling and banana pudding to firm up properly, making them easier to eat and ensuring all the flavors meld together beautifully. Chilling also helps the toppings adhere better.
After chilling, your cones are ready to be enjoyed! Serve them immediately for the best texture and flavor. These are best eaten the day they are made, as the waffle cones can soften over time. Prepare for happy sighs and requests for seconds – these Banana Pudding Cheesecake Cones are a guaranteed crowd-pleaser!
Conclusion:
There you have it – a recipe for the most delightful Banana Pudding Cheesecake Cones that I’m absolutely thrilled to share! This dessert truly bridges the gap between two beloved classics, offering a creamy, dreamy cheesecake filling infused with the comforting, familiar flavors of banana pudding, all encased in a crisp, delightful waffle cone. It’s a showstopper that’s surprisingly approachable, perfect for impressing guests or treating yourself to something truly special.
Imagin extracte serving these at your next gathering! They are fantastic on their own, but I also love pairing them with a light dusting of crushed grabeef ham crackers or a drizzle of caramel sauce for an extra layer of indulgence. For variations, don’t be afraid to experiment! You could add a sprinkle of cinnamon to the batter, swirl in some chocolate chips, or even top with toasted pecans for a delightful crunch. I genuinely encourage you to give these Banana Pudding Cheesecake Cones a try; I promise you won’t be disappointed!
Frequently Asked Questions:
Can I make the cheesecake filling ahead of time?
Absolutely! The cheesecake filling can be prepared up to 2 days in advance and stored in an airtight container in the refrigerator. This makes assembly on the day of serving much quicker and easier. Just remember to give it a good stir before filling your cones.
What kind of cones work best for these cheesecake cones?
Waffle cones are my top recommendation due to their sturdy structure and delightful flavor, which complements the cheesecake perfectly. Sugar cones can also work, but they might be a bit more fragile. Avoid cake cones as they tend to be too soft and may not hold up well to the filling.
How should I store any leftover banana pudding cheesecake cones?
Due to the creamy cheesecake filling, it’s best to store any leftovers in an airtight container in the refrigerator. They are best enjoyed within 1-2 days for optimal texture and flavor.
Banana Pudding Cheesecake Cones
A delightful no-bake cheesecake filling layered with banana pudding and crushed cookies, served in crispy waffle cones.
Ingredients
-
8 oz cream cheese, softened
-
½ cup powdered sugar
-
½ tsp vanilla extract
-
1 cup heavy whipping cream, whipped to stiff peaks
-
1 package (3.4 oz) instant banana pudding mix
-
2 cups cold milk
-
8 waffle cones
-
½ cup crushed vanilla wafers
-
Caramel sauce drizzle
-
Extra crushed vanilla wafers
Instructions
-
Step 1
In a large bowl, beat the softened cream cheese until smooth. Gradually beat in the powdered sugar and vanilla extract until well combined. -
Step 2
Gently fold the whipped heavy cream into the cream cheese mixture until no streaks remain. -
Step 3
In a separate bowl, whisk together the instant banana pudding mix and cold milk until smooth and thickened. Let it sit for 5 minutes to set. -
Step 4
Spoon a layer of the cheesecake mixture into the bottom of each waffle cone. Top with a layer of the prepared banana pudding. Sprinkle with crushed vanilla wafers. -
Step 5
Repeat layering with cheesecake mixture, banana pudding, and crushed wafers until the cones are filled, ending with crushed wafers on top. -
Step 6
Drizzle with caramel sauce before serving.
Important Information
Nutrition Facts (Per Serving)
It is important to consider this information as approximate and not to use it as definitive health advice.
Allergy Information
Please check ingredients for potential allergens and consult a health professional if in doubt.