Melt-in-your-mouth Danish Butter Cookies – Easy Recipe
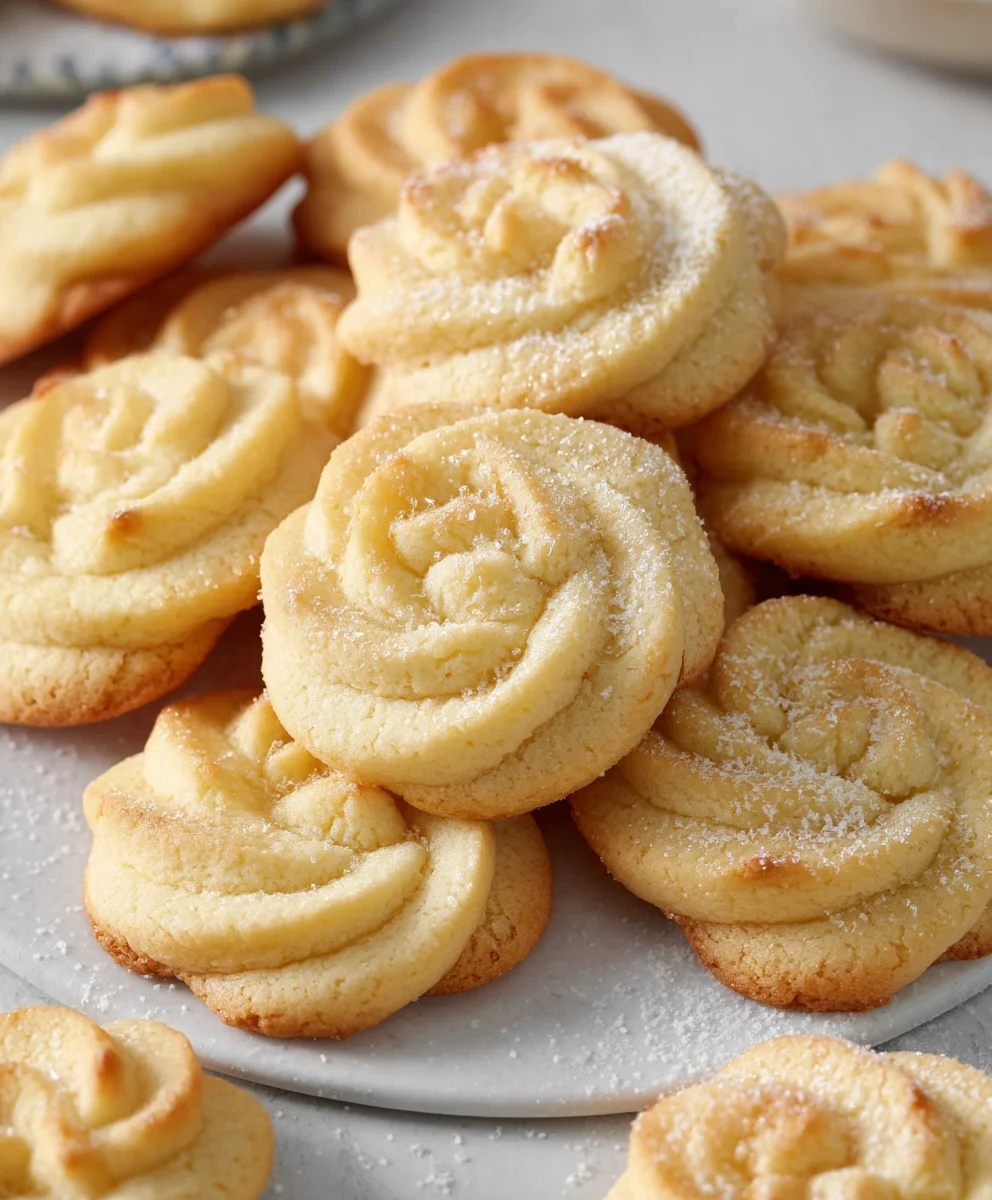
Danish Butter Cookies (Melt in your mouth) – that’s the promise, and this recipe delivers! There’s a magical, almost ethereal quality to these classic cookies, isn’t there? They’re the stars of holiday tins, the comforting accompaniment to a cup of tea, and a timeless treat that appeals to every generation. What is it about these simple, yet incredibly satisfying cookies that makes them so universally beloved? It’s the perfect balance of rich, creamy butter and just a hint of sweetness, creating a delicate crum extractb that truly lives up to the “melt in your mouth” description. Unlike overly sweet or dense cookies, Danish Butter Cookies offer a subtle elegancerum extracthey crumble beautifully, leaving a pure, buttery essence that lingers on the palate. Today, we’re going to unlock the secrets to achieving that perfect texture and unparalleled flavor right in your own kitchen, so you can experience the joy of authentic Danish Butter Cookies (Melt in your mouth) anytime you desire.
Ingredients:
- 1 cup (227 g) European salted butter, softened to room temperature
- 1/2 cup (100 g) granulated sugar
- 1/8 teaspoon salt
- 2 large egg yolks
- 2 teaspoons (10 g) pure vanilla extract
- 1 tablespoon (15 g) whole milk, plus potentially a little more if the dough is too stiff
- 2 cups (220 g) all-purpose flour
- 1/2 cup (50 g) cake flour
- Coarse sugar, for sprinkling on top
Preparing the Dough
Creaming the Butter and Sugar
To begin extract, in a large mixing bowl, cream together the softened European salted butter and the granulated sugar. You want to achieve a light and fluffy texture. This process incorporates air into the butter and sugar mixture, which is crucial for creating a tender cookie. I like to use an electric mixer on medium speed for about 3 to 5 minutes. You’ll notice the color will lighten significantly, and the texture will become wonderfully creamy. Scrape down the sides of the bowl occasionally to ensure everything is evenly incorporated.
Adding the Wet Ingredients
Next, add the 1/8 teaspoon of salt to the creamed butter and sugar mixture. This enhances the overall flavor profile of the cookies. Then, incorporate the 2 large egg yolks, one at a time, beating well after each addition until fully combined. The egg yolks contribute richness and a lovely golden hue to the cookies. After the egg yolks are incorporated, stir in the 2 teaspoons of pure vanilla extract for that classic, comforting aroma and taste.
Achieving the Right Consistency
Now, it’s time to add the 1 tablespoon of whole milk. This helps to bring the dough together. Mix on low speed until just combined. At this stage, the dough might seem a little crum extractbly. If it feels exceptionally stiff and difficult to incorporate the dry ingredients, you can add another teaspoon or two of milk, but be careful not to add too much, as you don’t want a sticky dough. The goal is a pliable dough that holds together.
Incorporating the Flours
In a separate medium bowl, whisk together the 2 cups of all-purpose flour and the 1/2 cup of cake flour. Whisking them together beforehand ensures they are evenly distributed. Gradually add the flour mixture to the wet ingredients, mixing on low speed until just combined. Overmixing at this stage can develop the gluten in the flour, resulting in tougher cookies, so stop mixing as soon as you no longer see streaks of dry flour. The dough should be soft and slightly sticky but manageable.
Shaping and Baking the Cookies
Chilling the Dough
Once the dough has come together, it’s essential to chill it. This step is critical for making the dough easier to handle and preventing the cookies from spreading too much during baking. I find that wrapping the dough tightly in plastic wrap and refrigerating it for at least 30 minutes to an hour works best. You can even prepare the dough a day in advance and keep it in the refrigerator.
Forming the Cookies
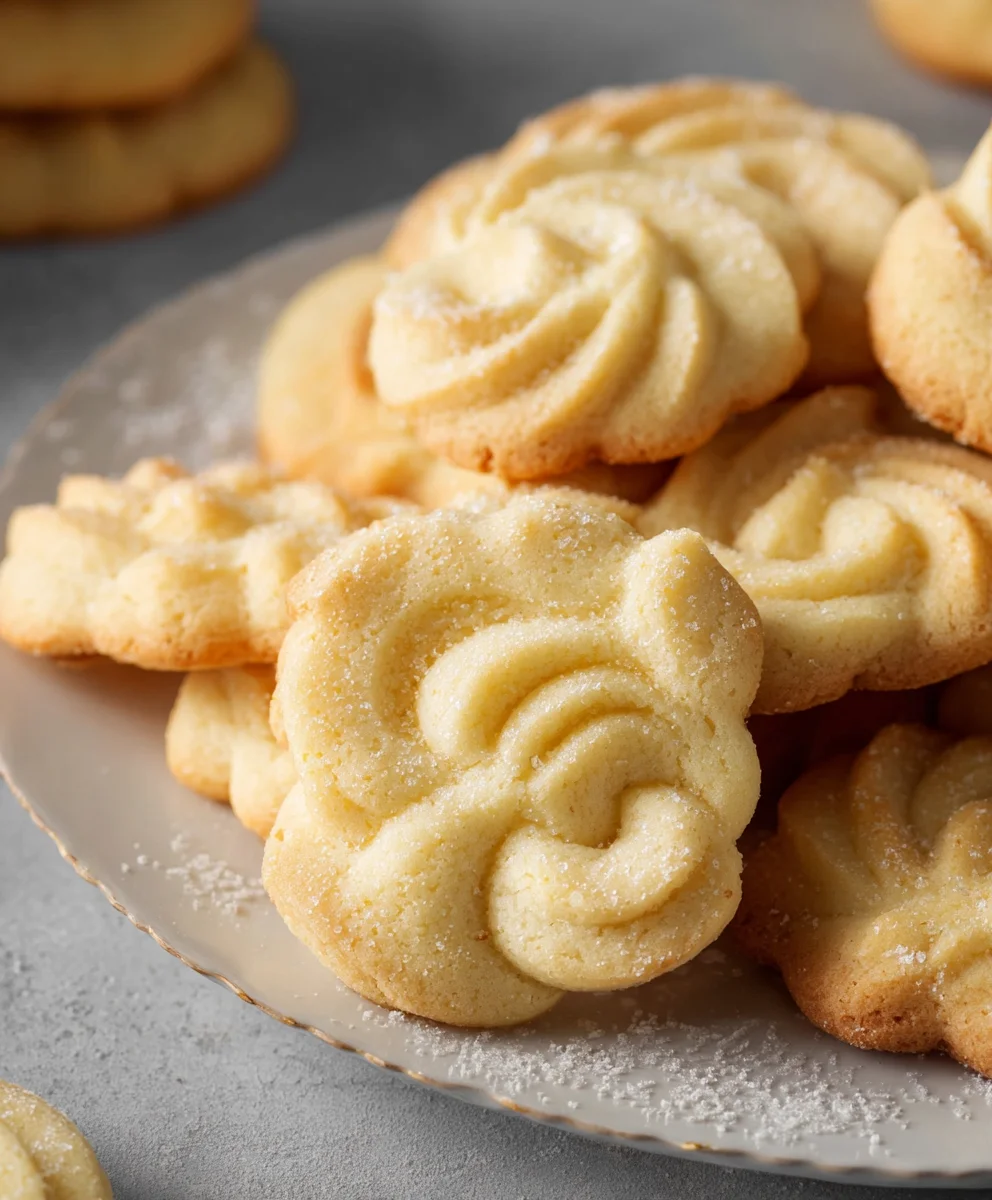
When you’re ready to bake, preheat your oven to 350°F (175°C). Line baking sheets with parchment paper. There are a couple of ways to shape these cookies to achieve that authentic Danish butter cookie look. One popular method is to use a cookie press. If you don’t have a cookie press, you can simply roll small portions of the dough into balls about 1 inch in diameter. Then, using the tines of a fork dipped in a little granulated sugar, gently flatten each ball, creating a crosshatch pattern. This not only gives them their signature look but also helps them bake evenly. Alternatively, you can pipe the dough using a star-shaped tip on a piping bag, which is how many store-bought versions are made.
Baking to Golden Perfection
Arrange the shaped cookies on the prepared baking sheets, leaving about 2 inches of space between them to allow for slight spreading. Before baking, generously sprinkle the tops of the cookies with coarse sugar. This adds a delightful sparkle and a satisfying crunch. Bake for 12 to 15 minutes, or until the edges are lightly golden brown. Keep a close eye on them, as baking times can vary depending on your oven. You want them to be set and lightly browned, not dark.
Cooling and Enjoying
Once baked, allow the cookies to cool on the baking sheets for 5 minutes before carefully transferring them to a wire rack to cool completely. This resting period on the baking sheet helps them firm up. These Danish butter cookies are incredibly delicate and truly do melt in your mouth. They are perfect with a cup of coffee or tea, or simply enjoyed on their own. Store them in an airtight container at room temperature for up to a week to maintain their exquisite texture.
Conclusion:
You’ve now mastered the art of creating the most delightful Danish Butter Cookies (Melt in your mouth)! We’ve walked through each step to ensure your cookies are perfectly crisp on the outside and wonderfully tender and buttery on the inside, truly living up to their “melt in your mouth” reputation. These cookies are a testament to simple ingredients coming together to create something truly magical. They are a wonderful treat for any occasion, from a simple afternoon tea to a festive holiday gathering. Don’t be afraid to experiment with the few variations we’ve suggested, such as adding a hint of citrus zest or a sprinkle of sea salt on top before baking. The joy of baking is in making it your own! So go forth, bake a batch (or two!), and share the deliciousness. I’m confident you’ll be delighted with the results!
Frequently Asked Questions about Danish Butter Cookies (Melt in your mouth):
Q: How should I store my Danish Butter Cookies (Melt in your mouth) to keep them fresh?
Store your baked Danish Butter Cookies (Melt in your mouth) in an airtight container at room temperature. They can stay fresh and delicious for up to 1-2 weeks if stored properly. Avoid storing them in the refrigerator, as this can make them tough.
Q: Can I add different flavorings to the Danish Butter Cookies (Melt in your mouth) dough?
Absolutely! While the classic recipe is divine, feel free to get creative. A little almond extract, a touch of lemon or orange zest, or even a pinch of cardamom can add wonderful new dimensions to your Danish Butter Cookies (Melt in your mouth). Just be sure to adjust the liquid content slightly if adding very wet extracts.
Melt-in-your-mouth Danish Butter Cookies – Easy Recipe
Delicate and buttery cookies that are incredibly easy to make and practically dissolve in your mouth. Perfect for any occasion.
Ingredients
-
1 cup (227 g) European salted butter, softened to room temperature
-
1/2 cup (100 g) granulated sugar
-
1/8 teaspoon salt
-
2 large egg yolks
-
2 teaspoons (10 g) pure vanilla extract
-
1 tablespoon (15 g) whole milk, plus potentially a little more if the dough is too stiff
-
2 cups (220 g) all-purpose flour
-
1/2 cup (50 g) cake flour
-
Coarse sugar, for sprinkling on top
Instructions
-
Step 1
In a large mixing bowl, cream together the softened European salted butter and granulated sugar using an electric mixer on medium speed for 3 to 5 minutes until light and fluffy. Scrape down the sides of the bowl occasionally. -
Step 2
Add the salt, then the egg yolks one at a time, beating well after each addition. Stir in the vanilla extract. -
Step 3
Add the whole milk and mix on low speed until just combined. If the dough is exceptionally stiff, add another teaspoon or two of milk, but avoid making it sticky. -
Step 4
In a separate bowl, whisk together the all-purpose flour and cake flour. Gradually add the flour mixture to the wet ingredients, mixing on low speed until just combined. Do not overmix. -
Step 5
Wrap the dough tightly in plastic wrap and refrigerate for at least 30 minutes to an hour. -
Step 6
Preheat oven to 350°F (175°C) and line baking sheets with parchment paper. Shape the dough using a cookie press, rolling into 1-inch balls and flattening with a fork, or piping with a star tip. Arrange cookies on baking sheets, leaving 2 inches between them. -
Step 7
Sprinkle the tops generously with coarse sugar. Bake for 12 to 15 minutes, or until edges are lightly golden brown. -
Step 8
Let cookies cool on baking sheets for 5 minutes before transferring to a wire rack to cool completely.
Important Information
Nutrition Facts (Per Serving)
It is important to consider this information as approximate and not to use it as definitive health advice.
Allergy Information
Please check ingredients for potential allergens and consult a health professional if in doubt.