Spicy Salmon Sushi Bake Recipe- Easy & Delicious
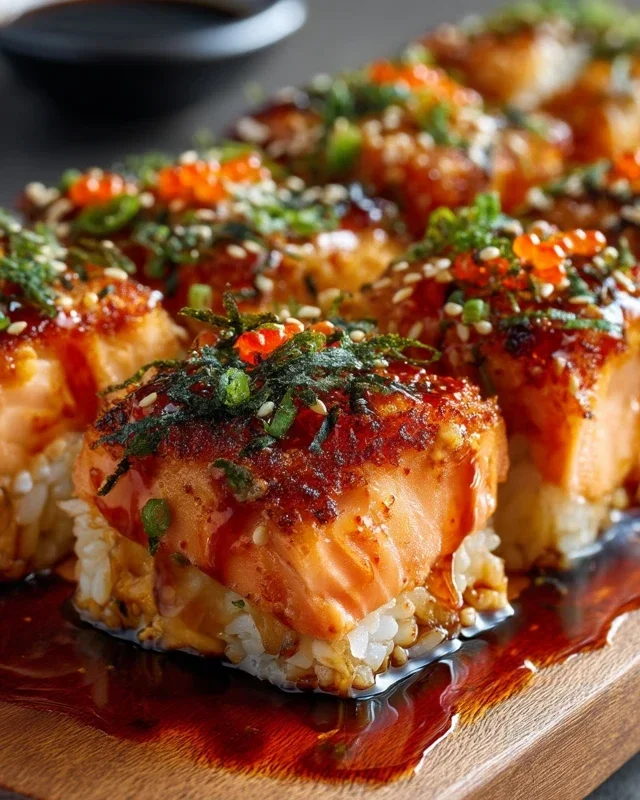
Spicy Salmon Sushi Bake Recipe is about to become your new weeknight obsession. Forget rolling intricate sushi pieces; this deconstructed marvel delivers all the incredible flavors of your favorite rolls in a comforting, shareable casserole. We’re talking about flaky salmon, perfectly seasoned sushi rice, creamy, spicy mayo, and a delightful crunch – all baked together into a golden-brown, irresistible dish. It’s no wonder this Spicy Salmon Sushi Bake Recipe has taken the culinary world by storm! People adore it for its simplicity, its incredible depth of flavor, and the sheer joy of scooping up a warm, delicious bite. What truly sets this Spicy Salmon Sushi Bake Recipe apart is its harmonious blend of textures and tastes: the tender fish, the slightly chewy rice, the luxurious sauce, and the pop of fresh toppings. Get ready to impress yourself and everyone you share it with!
Spicy Salmon Sushi Bake Recipe
Get ready for a flavor explosion that’s going to redefine your weeknight dinners! This Spicy Salmon Sushi Bake is a deconstructed sushi dream, packed with the vibrant, savory, and slightly sweet flavors you love, all baked into a glorious, shareable casserole. Forget the rolling mats and the delicate precision of traditional sushi; this recipe is all about maximum taste with minimal fuss. It’s incredibly satisfying, incredibly delicious, and surprisingly easy to whip up. Whether you’re a sushi aficionado or new to the world of Japanese-inspired cuisine, this bake is sure to become a fast favorite. The creamy, spicy salmon topping, combined with the perfectly seasoned sushi rice base, creates a symphony of textures and tastes that’s simply irresistible. It’s the perfect dish for a cozy night in, a casual gathering with friends, or even as a unique potluck contribution. Let’s get cooking!
Ingredients:
Cooking Instructions
The beauty of this Spicy Salmon Sushi Bake lies in its straightforward approach. We’ll start by getting our sushi rice perfectly seasoned, then prepare the star of the show – the spicy salmon mixture – and finally, bring it all together for a glorious bake.
Preparing the Sushi Rice
The foundation of any great sushi bake is perfectly cooked and seasoned sushi rice. To start, thoroughly rinse your sushi rice under cold running water. This step is crucial as it removes excess starch, preventing the rice from becoming gummy and ensuring each grain remains distinct. Continue rinsing until the water runs clear. Once rinsed, drain the rice well and transfer it to a medium saucepan. Add the 2.5 cups of water to the saucepan and let the rice soak for about 30 minutes. This soaking period allows the rice to absorb moisture evenly, which contributes to a tender and fluffy texture when cooked.
After soaking, bring the rice and water to a boil over medium-high heat. Once boiling, reduce the heat to the lowest setting, cover the saucepan tightly, and simmer for 15 minutes. It’s important not to lift the lid during this time to trap all the steam, which is essential for proper cooking. After 15 minutes, remove the saucepan from the heat and let it stand, still covered, for another 10 minutes. This resting period allows the rice to continue steaming and finish cooking, resulting in perfectly fluffy grains.
While the rice is resting, let’s prepare the sushi vinegar. In a small bowl, whisk together the 1/4 cup rice vinegar, 2 tablespoons sugar, and 1 teaspoon salt. Stir until the sugar and salt are completely dissolved. This mixture will add that characteristic sweet and tangy flavor to our rice. Once the rice has rested, gently transfer it to a large, shallow bowl or a hangiri (a wooden sushi rice tub, if you have one). Pour the prepared sushi vinegar evenly over the hot rice. Using a rice paddle or a wooden spoon, gently “cut” and fold the vinegar into the rice. Avoid stirring vigorously, as this can break the rice grains. Continue folding and fanning the rice (using a fan or even a piece of cardboard) until it cools down to room temperature and the vinegar is fully incorporated. This fanning process also helps to give the rice a glossy sheen.
Creating the Spicy Salmon Topping
Now for the creamy, spicy goodness! In a medium bowl, combine the 1/2 cup mayonnaise, 2 tablespoons Sriracha sauce (you can add more or less depending on your spice preference – taste as you go!), and 1 teaspoon sesame oil. Whisk these ingredients together until they are smoothly combined and form a luscious sauce. This is where the magic happens, creating that addictive spicy mayo flavor.
Next, add the 1 lb of diced, skinless salmon fillet to the bowl with the spicy mayo mixture. Gently fold the salmon into the sauce, ensuring each piece is well coated. Be careful not to overmix, as we want to keep the salmon pieces intact. Now, add half of the chopped green onions (about 1/4 cup) to the salmon mixture and fold them in. The green onions add a fresh, oniony bite that complements the richness of the salmon and the spice of the sauce.
Assembling and Baking the Sushi Bake
Preheat your oven to 375°F (190°C). Lightly grease a 9×13 inch baking dish. Spread the seasoned sushi rice evenly across the bottom of the prepared baking dish, creating a uniform layer. This will be the delicious base for our spicy salmon.
Carefully spoon the spicy salmon mixture evenly over the layer of sushi rice. Try to distribute the salmon and sauce so you have a good amount on every spoonful of rice. Finally, sprinkle the remaining chopped green onions over the top of the salmon mixture. This adds another layer of flavor and a beautiful pop of color.
Place the baking dish in the preheated oven and bake for 20-25 minutes, or until the salmon is cooked through and the topping is bubbly and slightly golden brown. The aroma filling your kitchen at this stage will be absolutely incredible!
Garnishing and Serving
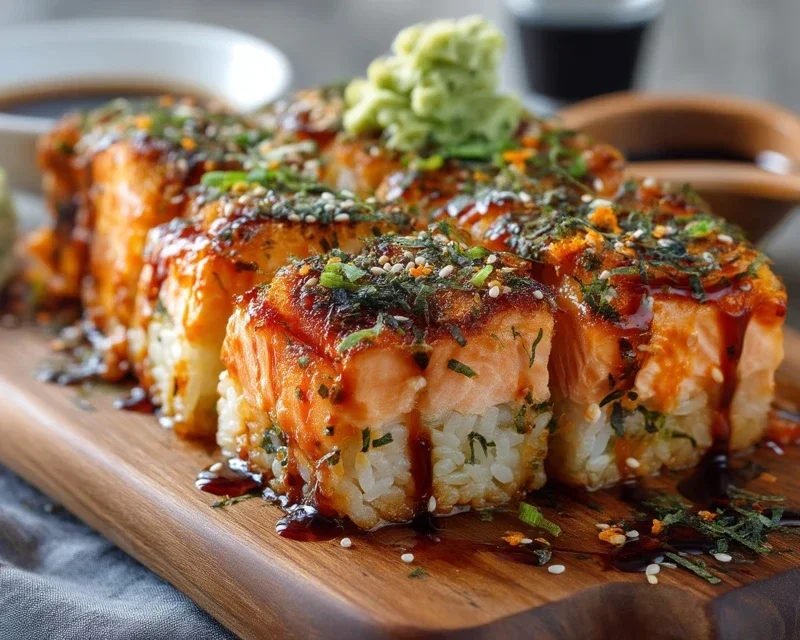
Once your Spicy Salmon Sushi Bake is out of the oven, let it rest for about 5-10 minutes before serving. This allows the flavors to meld together and makes it easier to serve. Before diving in, we’ll add the finishing touches. Scatter the small strips of nori over the top of the bake. The nori adds that quintessential sushi flavor and a delightful textural contrast. If you’re feeling fancy, sprinkle some tobiko (flying fish roe) over the top for a burst of briny flavor and a beautiful presentation. The tobiko adds a lovely pop and a touch of luxury.
Serve the Spicy Salmon Sushi Bake warm, scooping generous portions onto plates. You can enjoy it as is, or serve it with extra soy sauce, pickled gin extractger, and wasabi on the side for those who like to customize their sushi experience. Get ready for the compliments, because this dish is a guaranteed crowd-pleaser!
Conclusion:
I hope you’re as excited as I am to try this Spicy Salmon Sushi Bake Recipe! It’s truly a fantastic dish because it captures all the delicious flavors of your favorite sushi rolls in a comforting, shareable bake. The creamy, spicy salmon filling, combined with perfectly cooked sushi rice and a crispy topping, makes for an incredibly satisfying meal that’s surprisingly easy to whip up. It’s a wonderful option for a weeknight dinner, a fun potluck, or even a casual gathering with friends. Don’t be afraid to get creative with it!
For serving, I love to present it straight from the oven in its baking dish. You can serve it with extra nori sheets for scooping, chopsticks, soy sauce, pickled gin extractger, and a dollop of wasabi for those who like an extra kick. For variations, consider adding some edamame to the rice for a pop of green and extra protein, or perhaps some thinly sliced avocado on top before baking. You could also swap out the salmon for cooked shrimp or even seasoned tofu for a vegetarian twist. I truly encourage you to give this Spicy Salmon Sushi Bake Recipe a go – I’m confident you’ll love the results as much as I do!
Frequently Asked Questions:
Can I make this ahead of time?
Yes, you can definitely assemble the sushi bake ahead of time! Prepare the rice and the spicy salmon mixture separately, then layer them in your baking dish. Cover tightly and refrigerate. When you’re ready to bake, you might need to add a few extra minutes to the baking time to ensure it’s heated through completely.
What kind of salmon should I use?
I recommend using cooked salmon, such as leftover baked or grilled salmon, or canned salmon for convenience. If using raw salmon, ensure it’s fully cooked through during the baking process. Flaked salmon works best for a good distribution of flavor throughout the bake.
Is this recipe very spicy?
The level of spice is quite adjustable! The recipe calls for sriracha or your preferred hot sauce, so you can easily increase or decrease the amount to suit your taste. You can also add a pinch of cayenne pepper for more heat if desired, or omit the hot sauce entirely for a milder version.
Spicy Salmon Sushi Bake Recipe
A flavorful and easy-to-make sushi bake featuring spicy salmon, seasoned rice, and nori.
Ingredients
-
2 cups sushi rice (uncooked)
-
2.5 cups water
-
1/4 cup rice vinegar
-
2 tablespoons sugar
-
1 teaspoon salt
-
1 lb fresh salmon fillet (skinless and diced)
-
1/2 cup mayonnaise
-
2 tablespoons Sriracha sauce (or to taste)
-
1 teaspoon sesame oil
-
1/2 cup green onions (chopped, plus extra for garnish)
-
1 sheet nori (cut into small strips)
-
tobiko (optional for garnish)
Instructions
-
Step 1
Cook sushi rice according to package directions with 2.5 cups water. While rice is cooking, mix rice vinegar, sugar, and salt in a small bowl until dissolved. Once rice is cooked, gently fold in the vinegar mixture. -
Step 2
In a separate bowl, combine diced salmon, mayonnaise, Sriracha sauce, sesame oil, and half of the chopped green onions. Mix well. -
Step 3
Preheat oven to 375°F (190°C). Grease a 9×13 inch baking dish. -
Step 4
Spread the seasoned sushi rice evenly in the prepared baking dish. Top with the spicy salmon mixture, spreading it evenly. -
Step 5
Sprinkle the nori strips over the salmon mixture. Bake for 20-25 minutes, or until heated through and slightly golden. -
Step 6
Garnish with remaining green onions and optional tobiko before serving.
Important Information
Nutrition Facts (Per Serving)
It is important to consider this information as approximate and not to use it as definitive health advice.
Allergy Information
Please check ingredients for potential allergens and consult a health professional if in doubt.