Dark Chocolate Sea Salt Nut Bars-Decadent Treat
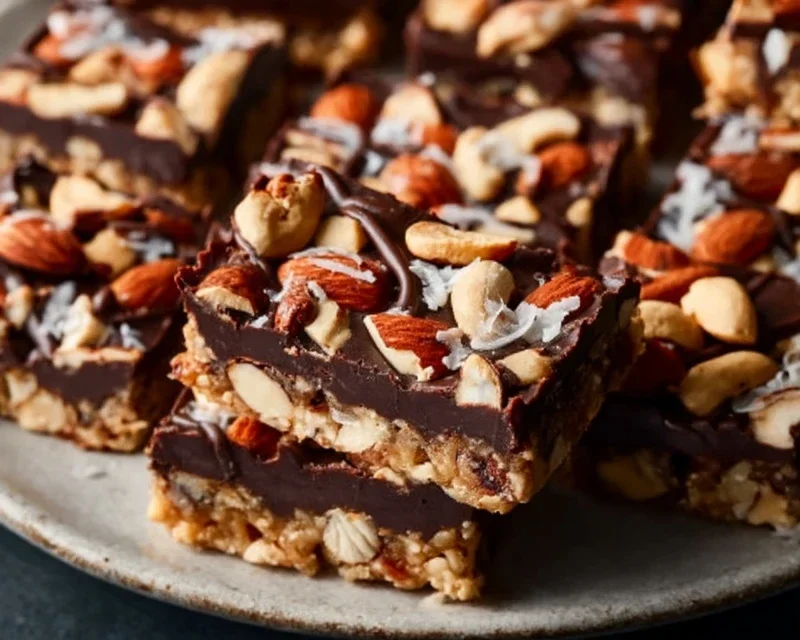
Dark Chocolate and Sea Salt Nut Bars are the ultimate treat for anyone who craves a perfect balance of sweet, salty, and satisfyingly crunchy. These aren’t just any snack bars; they’re a delightful indulgence that will have you reaching for more. Think about it: the deep, rich bitterness of dark chocolate melting against your tongue, followed by the sharp, invigorating pop of sea salt. It’s a flavor combination that’s utterly irresistible, a classic for a reason. What truly makes these Dark Chocolate and Sea Salt Nut Bars special is how effortlessly they bring together wholesome nuts with decadent chocolate, creating a guilt-free pleasure that feels truly luxurious. They’re incredibly versatile too, perfect for a mid-afternoon energy boost, a sophisticated dessert, or a thoughtful homemade gift.
Get Ready to Make Your New Favorite Snack!
These bars are a symphony of textures and tastes.
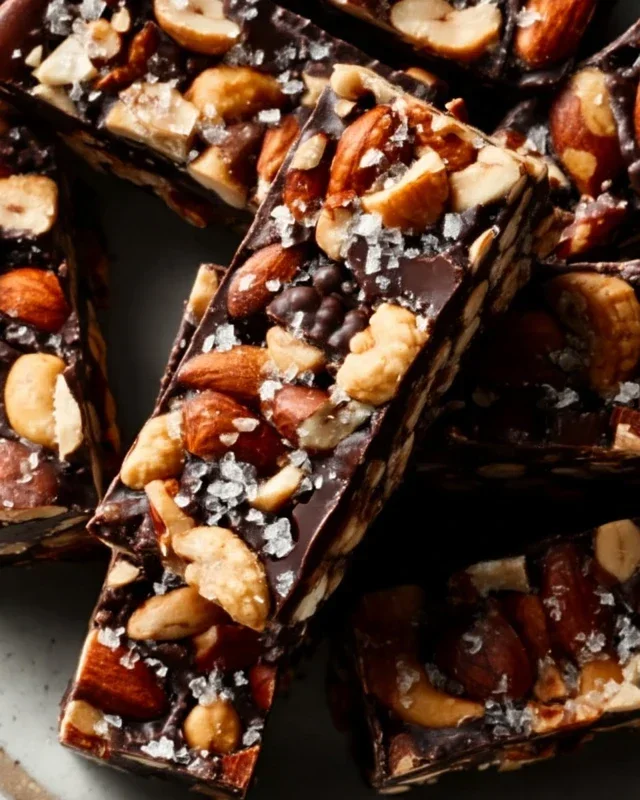
Dark Chocolate and Sea Salt Nut Bars
There’s something incredibly satisfying about a homemade snack that’s both wholesome and decadent. These Dark Chocolate and Sea Salt Nut Bars strike that perfect balance, offering a delightful chegrape juicess from the nuts, a subtle crispness from the puffed rice, and a rich, slightly bitter counterpoint from the dark chocolate, all finished with a sprinkle of sea salt that truly elevates the flavor. They’re incredibly easy to make, requiring no baking, which makes them a perfect treat for a quick afternoon pick-me-up or a thoughtful edible gift. I love that I can control the ingredients and know exactly what’s going into them. Plus, the combination of sweet and salty is simply irresistible. Let’s get started on creating these delicious bars!
Ingredients:
Preparing the Base
The foundation of these bars is a delightful medley of nuts and puffed rice, bound together with a sweet, sticky syrup. This stage is all about getting your textures and flavors ready to meld.
First, let’s prepare our nuts. If you’re using a mix like I recommend (cashews, peanuts, and almonds), you’ll want to give them a rough chop. You don’t want them to be powdered, but rather in bite-sized pieces that will add a satisfying crunch to your bars. Aim for pieces that are roughly the size of a lentil or a small pea. This ensures you get a good distribution of nut pieces throughout the bars. If your nuts are still in their shells, be sure to shell them first and then roast them lightly if you prefer a deeper flavor. However, for simplicity and time-saving, using pre-shelled unsalted nuts is perfectly fine. I usually just give them a few pulses in a food processor, being careful not to overdo it. Once chopped, set them aside in a large mixing bowl.
Next, we’ll add the puffed rice to the bowl with the chopped nuts. The puffed rice provides a wonderful lightness and crispness, preventing the bars from becoming too dense. It’s important to use plain puffed rice cereal for this recipe; avoid any varieties that are sweetened or flavored, as this will throw off the intended flavor profile of your dark chocolate and sea salt bars. Gently stir the puffed rice into the nuts, making sure not to crush the delicate rice puffs too much. The goal is to incorporate them evenly so you get a pleasant texture in every bite.
Now it’s time to create our binder. In a small saucepan, combine the brown rice syrup, vanilla extract, and 1/2 teaspoon of sea salt. Place the saucepan over medium-low heat. Stir the mixture gently until the brown rice syrup is warm and slightly more fluid. You don’t need to bring it to a boil, just warm it enough to make it easily pourable and to help the flavors meld. The vanilla extract adds a subtle aroma and depth, while the sea salt is crucial for balancing the sweetness and enhancing the other flavors, particularly the dark chocolate that will come later. Be patient with this step; low and slow is the key to avoiding scorching the syrup.
Combining and Setting
This is where everything comes together to form our delicious bars.
Pour the warm brown rice syrup mixture over the nuts and puffed rice in the large mixing bowl. Using a sturdy spatula or wooden spoon, stir everything together thoroughly. You want to ensure that every single nut and puffed rice piece is coated in the sticky syrup. This might take a minute or two of vigorous stirring, but it’s essential for the bars to hold their shape. Scrape down the sides of the bowl and ensure no dry pockets remain. The mixture will start to feel a bit clumpy and sticky, which is exactly what we’re aiming for. This is the glue that will hold our bars together.
Once everything is well combined, transfer the mixture into a prepared baking dish. I find an 8×8 inch square pan works perfectly for this recipe. Line the pan with parchment paper, leaving some overhang on the sides. This overhang acts as handles, making it super easy to lift the entire slab of bars out of the pan once they’ve set. Press the mixture down firmly and evenly into the pan using the back of your spoon or a flat-bottomed glass. The firmer you pack it, the more cohesive your bars will be. Take your time to get the surface as smooth and flat as possible.
Now, for the glorious dark chocolate! In a heatproof bowl, combine the dark chocolate chips and the coconut oil. You can melt this in the microwave in 30-second intervals, stirring between each interval until smooth and fully melted. Alternatively, you can use a double boiler for a more gentle melting process. Once the chocolate is smooth and glossy, pour it evenly over the pressed nut mixture in the pan. Spread the melted chocolate with a spatula to create a smooth, even layer. If you’re using the optional flaky salt, sprinkle it generously over the still-melted chocolate while it’s wet. This adds a beautiful visual appeal and an extra pop of salty goodness.
Once the chocolate topping is applied, place the pan in the refrigerator for at least 2-3 hours, or until the chocolate is completely set and firm. This chilling time is crucial for the bars to solidify properly. If you’re in a hurry, you can pop it in the freezer for about an hour, but refrigerating allows for a better texture. Once the bars are firm, use the parchment paper overhang to lift the entire slab out of the pan onto a cutting board. Using a sharp knife, cut the slab into your desired bar shapes. I usually cut mine into 12 to 16 bars, depending on how thick I want them. Store the bars in an airtight container in the refrigerator. They’ll stay delicious for about a week.
Conclusion:
These Dark Chocolate and Sea Salt Nut Bars are a truly sensational treat, offering a perfect balance of rich, bittersweet chocolate, the satisfying crunch of various nuts, and the delightful pop of sea salt. They’re incredibly versatile and surprisingly easy to whip up, making them an ideal choice for anyone looking for a healthier yet indulgent snack. Whether you’re powering through an afternoon slump, need a post-workout refuel, or want to impress guests with a homemade delight, these bars deliver. I encourage you all to give this Dark Chocolate and Sea Salt Nut Bars recipe a try – you won’t regret the delightful combination of flavors and textures!
For serving, I love to enjoy them as is, or perhaps broken into smaller pieces and added to yogurt or a smoothie bowl for an extra boost of flavor and crunch. You can also get creative with variations! Consider adding dried cranberries for a tart contrast, toasted coconut flakes for tropical notes, or even a pinch of chili powder for a subtle kick.
Frequently Asked Questions:
How long do these bars stay fresh?
Stored in an airtight container at room temperature, these bars will typically stay fresh for up to a week. For longer storage, you can keep them in the refrigerator for up to two weeks. Freezing is also an option for even longer preservation – just wrap them individually.
Can I use different types of nuts?
Absolutely! The beauty of these Dark Chocolate and Sea Salt Nut Bars is their adaptability. Feel free to swap out or combine your favorite nuts. Almonds, walnuts, pecans, cashews, and even macadamia nuts all work wonderfully.
Dark Chocolate and Sea Salt Nut Bars
Chewy and satisfying nut bars packed with your favorite nuts, drizzled with dark chocolate and sprinkled with sea salt.
Ingredients
-
2 1/2 cups unsalted nuts of choice (3/4 cup cashews, 3/4 cup peanuts, 1 cup almonds)
-
1/2 cup puffed rice
-
1/4 cup brown rice syrup
-
1 1/2 teaspoon vanilla extract
-
1/2 teaspoon sea salt
-
1 cup dark chocolate chips
-
2 teaspoons coconut oil
-
flaky salt for topping
Instructions
-
Step 1
Line an 8×8 inch baking pan with parchment paper, leaving an overhang on the sides. -
Step 2
In a large bowl, combine the mixed nuts and puffed rice. -
Step 3
In a small saucepan over low heat, warm the brown rice syrup, vanilla extract, and 1/2 teaspoon sea salt until just combined. Do not boil. -
Step 4
Pour the syrup mixture over the nut and puffed rice mixture and stir well to coat everything evenly. -
Step 5
Press the mixture firmly into the prepared baking pan, ensuring it’s evenly distributed. -
Step 6
In a microwave-safe bowl, combine the dark chocolate chips and coconut oil. Microwave in 30-second intervals, stirring in between, until melted and smooth. -
Step 7
Drizzle the melted chocolate over the top of the nut bars. Sprinkle with flaky salt, if desired. -
Step 8
Refrigerate for at least 1 hour, or until the chocolate is set. Cut into bars.
Important Information
Nutrition Facts (Per Serving)
It is important to consider this information as approximate and not to use it as definitive health advice.
Allergy Information
Please check ingredients for potential allergens and consult a health professional if in doubt.