Easy Homemade Strawberry Ice Cream Recipe
Homemade strawberry ice cream is a quintessential summer delight, a vibrant ruby jewel that promises pure, unadulterated bliss. There’s something incredibly magical about that first spoonful, isn’t there? It’s a nostalgic trip back to sun-drenched days, the sweet, slightly tart burst of fresh strawberries melting on your tongue. This isn’t just any dessert; it’s an experience. Unlike store-bought varieties, our homemade strawberry ice cream allows you to control the quality of your ingredients, ensuring a richer, more intense strawberry flavor without any artificial nasties. We’ll be using the freshest, ripest berries, transforming them into a creamy, dreamy concoction that’s far superior to anything you can find on a supermarket shelf. Get ready to churn out a batch of pure, frozen happiness that will have everyone beggin extractg for seconds.
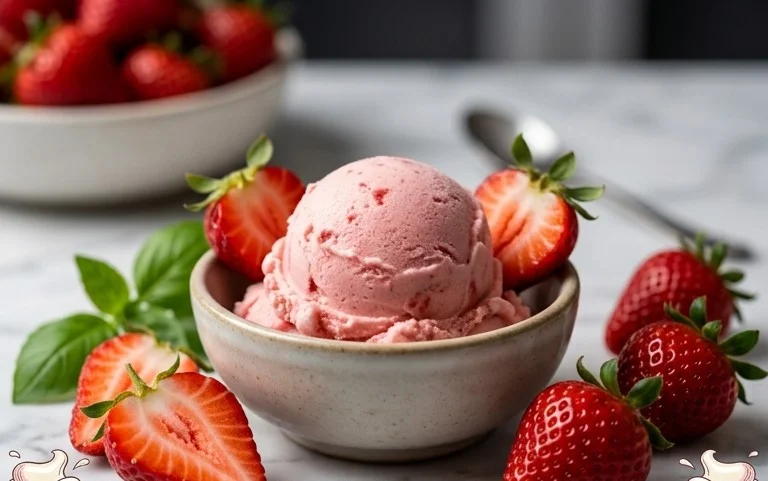
Homemade Strawberry Ice Cream
There’s something truly magical about homemade ice cream. The rich, creamy texture, the intense, fresh flavors – it’s a world away from anything you’ll find in a carton at the grocery store. And when it comes to flavors, strawberry has to be one of the most beloved, evoking sunny days and sweet summer memories. Making strawberry ice cream from scratch might sound intimidating, but with this simple recipe, you’ll be scooping out velvety smooth, perfectly sweet strawberry goodness in no time. Forget complicated churning or temperamental custards; this recipe is designed for ease and incredible flavor.
The secret to this delightful strawberry ice cream lies in using fresh, ripe strawberries and a simple, no-cook base that lets the berry flavor shine. We’ll macerate the strawberries to intensify their sweetness and juiciness, then combine them with a creamy mixture that is incredibly forgiving and yields fantastic results. Prepare yourself for the best strawberry ice cream you’ve ever tasted, made right in your own kitchen.
Ingredients:
Preparing the Strawberries
The first step in creating our luscious strawberry ice cream is to prepare the star of the show: the strawberries. We want to coax out as much of their natural sweetness and vibrant flavor as possible. Start by hulling your strawberries, which means removing the green leafy tops. Then, dice them into small, manageable pieces. The smaller the pieces, the better they will break down and infuse their flavor into the ice cream base.
In a medium bowl, combine the diced strawberries with the granulated sugar and the honey. The sugar will start to draw out the juices from the strawberries, and the honey adds a subtle depth of flavor and contributes to a smoother texture once frozen. Sprinkle in the lemon juice. Don’t be alarmed by the lemon juice – it’s not there to make your ice cream taste lemony, but rather to brighten the strawberry flavor and balance the sweetness, making the berries taste even more like themselves. Give everything a gentle stir to ensure the strawberries are evenly coated. Cover the bowl and let this mixture sit at room temperature for at least 30 minutes, or even up to an hour. This process is called maceration, and it’s crucial for developing an intense strawberry flavor. You’ll notice the strawberries will soften and release a beautiful, syrupy juice.
Creating the Creamy Base
While the strawberries are happily macerating, we can prepare our creamy ice cream base. In a separate, larger bowl, combine the heavy whipping cream, the half and half, and the vanilla extract. Heavy whipping cream provides the essential richness and fat content that makes ice cream luxurious and creamy. Half and half, a lighter dairy option, helps to balance the richness and ensures the ice cream doesn’t become too dense or heavy. The vanilla extract, a classic pairing with strawberries, adds another layer of aromatic complexity.
Whisk these ingredients together until they are just combined. You don’t want to whip the cream at this stage; we’re simply aiming for a smooth, homogenous liquid. It’s important not to overmix, as incorporating too much air here can lead to an icier texture later on. Just a few gentle whisks will do the trick.
Combining and Chilling
Now comes the exciting part – bringin extractg our strawberry and cream components together. Once your strawberries have macerated and released their delicious juices, gently stir them again. You can use a fork to lightly mash some of the larger strawberry pieces if you prefer a smoother ice cream, or leave them more intact for bursts of fresh fruit in every bite.
Pour the macerated strawberries, along with all their accumulated juice, into the bowl with the cream mixture. Stir everything together thoroughly. You want to ensure that the vibrant pink juice is evenly distributed throughout the base. At this point, you can taste the mixture and adjust sweetness if necessary, though typically the maceration process brings out enough sweetness.
The next crucial step is chilling the ice cream base. This allows the flavors to meld together beautifully and ensures that the base is cold enough for the churning process (if using an ice cream maker). Cover the bowl tightly with plastic wrap or a lid and refrigerate for at least 2 hours, but ideally 4 hours or even overnight. The colder the base, the faster it will churn and the smoother your ice cream will be.
Churning Your Ice Cream
If you have an ice cream maker, now is the time to use it! Follow the manufacturer’s instructions for your specific machine. Generally, this involves pouring the thoroughly chilled ice cream base into the frozen bowl of your ice cream maker and letting it churn until it reaches a soft-serve consistency. This usually takes about 20-30 minutes. During this process, the ice cream maker incorporates air and freezes the mixture, creating that characteristic creamy texture. Keep an eye on it – you don’t want to over-churn it, as it can become too firm in the machine.
If you do not have an ice cream maker, don’t despair! You can still achieve delicious homemade ice cream using a freezer-safe container. Pour the chilled base into a shallow, freezer-safe container. Place it in the freezer. Every 30-45 minutes for the first 3-4 hours, remove the container from the freezer and vigorously stir the mixture with a fork or a whisk. Scrape down the sides and break up any ice crystals that have formed. This manual churning process mimics what an ice cream maker does, preventing large ice crystals from forming and resulting in a smoother texture. It requires a bit more effort but is absolutely worth it.
Freezing and Serving
Once your ice cream has reached a soft-serve consistency (either from the ice cream maker or your manual churning method), it’s time to let it firm up. Transfer the ice cream to an airtight, freezer-safe container. Press a piece of parchment paper or plastic wrap directly onto the surface of the ice cream before sealing the container. This helps to prevent ice crystals from forming on top. Place the container in the freezer for at least 4 hours, or until it is firm enough to scoop.
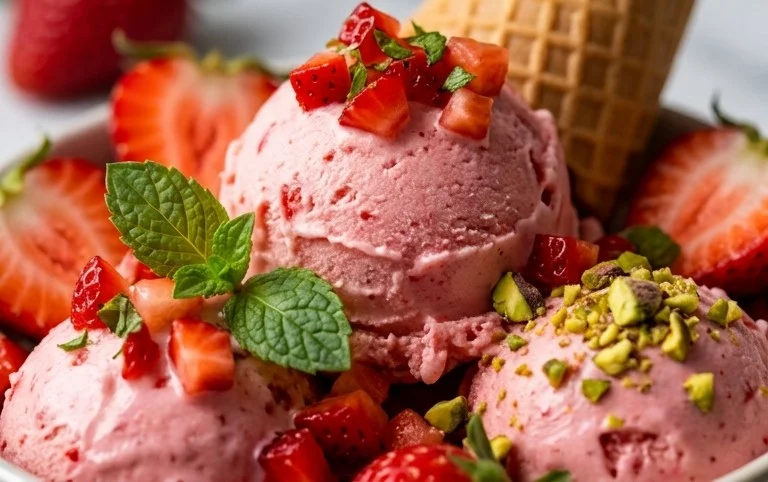
The anticnon-alcoholic ipation of waiting for your homemade ice cream to freeze is part of the fun! When it’s ready, scoop it into bowls and enjoy. This homemade strawberry ice cream is wonderfully refreshing on its own, but it’s also fantastic served with fresh berries, a drizzle of chocolate sauce, or on top of a warm brownie. The vibrant, natural strawberry flavor is truly a taste of summer, no matter the season. Enjoy your delicious, homemade creation!
Conclusion:
There you have it – your guide to creating incredibly delicious, homemade strawberry ice cream! This recipe is fantastic because it allows you to control the ingredients, ensuring a pure, vibrant strawberry flavor free from artificial additives. It’s wonderfully creamy, refreshingly sweet, and bursting with the taste of fresh, ripe strawberries. The satisfaction of churning your own ice cream, watching it transform into a delightful frozen treat, is truly unparalleled. I encourage you to gather your ingredients and give this a try; you won’t be disappointed!
Serving this delightful ice cream is an event in itself. Enjoy it straight from the churn for the softest texture, or freeze it further for a firmer scoop. It’s absolutely perfect on its own, but consider topping it with fresh strawberry slices, a drizzle of balsamic glaze for a sophisticated twist, or a dollop of whipped cream. For a more decadent experience, serve it alongside warm brownies or a slice of angel food cake.
Don’t be afraid to get creative with variations! You can fold in chocolate chips, swirl in some raspberry puree, or even add a hint of lemon zest to brighten the strawberry notes. The possibilities are endless, and each variation promises a unique and delightful experience. So, grab your ice cream maker and let the fun begin extract!
Frequently Asked Questions:
Can I make this without an ice cream maker?
Yes, you can! While an ice cream maker provides the creamiest texture, you can achieve a delicious result without one. Simply pour the base mixture into a freezer-safe container. Every 30-45 minutes for the first 3-4 hours, remove it from the freezer and vigorously whisk it with a fork or hand mixer to break up ice crystals. This manual churning helps mimic the action of an ice cream maker and results in a smoother, more enjoyable texture.
My strawberries aren’t very sweet. How can I enhance the flavor?
If your strawberries are a bit tart, don’t worry! You can boost their flavor by macerating them. Simply chop your strawberries and toss them with a tablespoon or two of sugar and a splash of lemon juice. Let them sit for about 20-30 minutes before proceeding with the recipe. This draws out their natural juices and intensifies their sweetness and aroma. You can also add a touch more sugar to the ice cream base itself, adjusting to your personal preference.
Homemade Strawberry Ice Cream
A simple and delicious homemade strawberry ice cream recipe. Made with fresh strawberries, cream, and a touch of honey.
Ingredients
-
1 1/2 cups strawberries, hulled and diced
-
2 Tbsp honey
-
1/2 cup granulated sugar
-
1 tsp lemon juice
-
1 cup heavy whipping cream
-
1/2 cup half and half
-
1 tsp vanilla extract
Instructions
-
Step 1
In a bowl, mash the strawberries with the honey, granulated sugar, and lemon juice. Let sit for 10-15 minutes to macerate. -
Step 2
In a separate bowl, whisk together the heavy whipping cream, half and half, and vanilla extract until well combined. -
Step 3
Pour the cream mixture into the strawberry mixture and stir until incorporated. -
Step 4
Pour the mixture into an ice cream maker and churn according to the manufacturer’s instructions. -
Step 5
Transfer the churned ice cream to an airtight container and freeze for at least 2-3 hours, or until firm.
Important Information
Nutrition Facts (Per Serving)
It is important to consider this information as approximate and not to use it as definitive health advice.
Allergy Information
Please check ingredients for potential allergens and consult a health professional if in doubt.