Easy Strawberry Cream Danish Recipe – Delicious Pastry
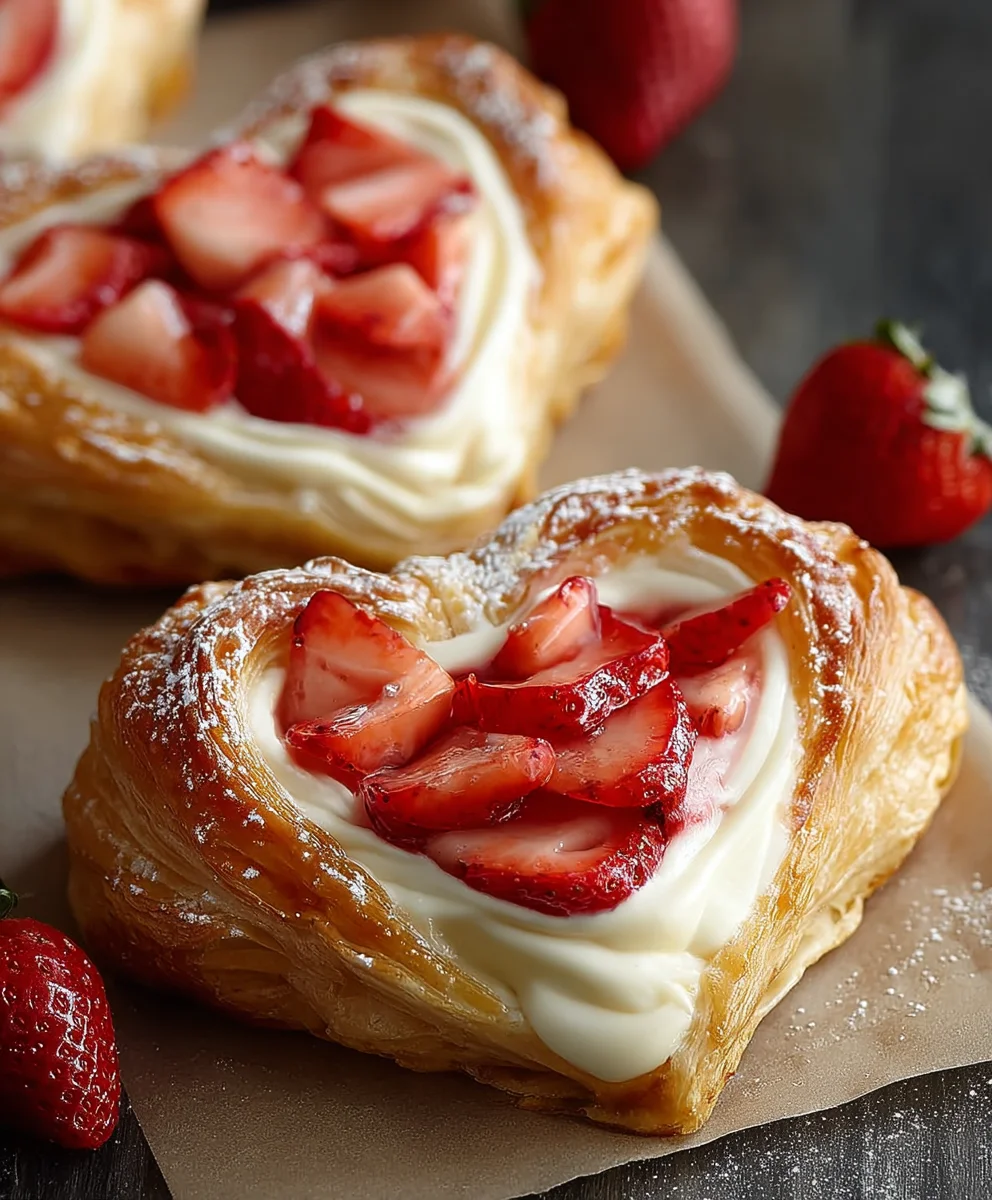
Strawberry Cream Danish is more than just a pastry; it’s an experience. Imagin extracte biting into flaky, buttery layers that shatter with a satisfying crispness, giving way to a luscious, tangy cream cheese filling swirled with sweet, vibrant strawberries. It’s no wonder this delightful treat holds such a special place in our hearts and on brunch tables everywhere. The perfect balance of textures and flavors – the subtle sweetness of the pastry, the rich creaminess of the filling, and the bright burst of fresh fruit – is utterly irresistible. This isn’t just a quick breakfast; it’s a moment of pure indulgence, a sweet escape that makes any morning feel like a special occasion. Whether you’re a seasoned baker or just looking for a show-stopping dessert, this Strawberry Cream Danish is guaranteed to impress.
Why You’ll Love This Strawberry Cream Danish
There’s something inherently joyful about a well-made Danish. The process of creating those delicate layers is a labor of love, and the reward is unparalleled. The bright, slightly tart flavor of strawberries cuts through the richness of the cream cheese, creating a symphony of tastes that dance on your palate. It’s a classic for a reason, offering a sophisticated yet comforting sweetness that appeals to everyone. This particular version elevates the traditional with its generous filling and perfectly baked pastry, ensuring every bite is a delightful surprise.
Ingredients:
- 1/4 cup warm water (around 105-115°F / 40-46°C)
- 2 1/4 teaspoons active dry yeast (which is typically one standard packet)
- 1/2 cup milk, at room temperature
- 1 large egg, at room temperature
- 1/4 cup granulated sugar
- 1 teaspoon salt
- 2 1/2 cups all-purpose flour, plus additional for dusting your work surface
- 1 cup (which is equivnon-alcoholic alent to 2 sticks) unsalted butter, chilled and cut into cubes
- 8 ounces cream cheese, softened to room temperature
- 1/4 cup granulated sugar
- 1/2 teaspoon vanilla extract
- Fresh strawberries, washed and sliced for garnishing
- 1 cup powdered sugar
- 2 tablespoons milk or water (for the glaze)
- 1/2 teaspoon vanilla extract (for the glaze)
Preparing the Dough Base
Step 1: Blooming the Yeast and Mixing the Wet Ingredients
Begin extract by ensuring your warm water is at the correct temperature; too hot and you’ll kill the yeast, too cool and it won’t activate properly. In a large mixing bowl, combine the 1/4 cup warm water with the active dry yeast. Let this mixture sit undisturbed for about 5-10 minutes. You’ll know the yeast is active when it becomes foamy and bubbly on the surface, resembling a thick paste. This blooming process is crucial for a light and airy dough. Once the yeast is active, add the 1/2 cup room temperature milk, the 1 large room temperature egg, the 1/4 cup granulated sugar, and the 1 teaspoon salt to the bowl. Whisk everything together gently until well combined. Having your milk and egg at room temperature helps them incorporate smoothly into the yeast mixture without causing temperature fluctuations that could affect the yeast.
Step 2: Incorporating the Flour and Initial Dough Formation
Now it’s time to introduce the flour. Gradually add the 2 1/2 cups of all-purpose flour to the wet ingredients. Start mixing with a wooden spoon or a sturdy spatula until a shaggy gin extractgh begins to form. Once the dough becomes too stiff to stir, turn it out onto a lightly flogin extractd surface. Begin to knead the dough. You’ll want to knead for about 8-10 minutes, or until the dough is smooth, elastic, and no longer sticky. To test for proper gluten development, you can perform the windowpane test: pinch off a small piece of dough and gently stretch it between your fingers. If you can stretch it thinly enough to see light through it without tearing, it’s ready. If it tears easily, continue kneading for a few more minutes.
Step 3: Chilling the Dough and Butter Preparation for Lamination
This step is critical for creating the flaky layers that define a Danish pastry. Wrap the kneaded dough tightly in plastic wrap and refrigerate it for at least 1 hour, or ideally, up to 2 hours. While the dough is chilling, prepare your butter. Take the 1 cup (2 sticks) of cold, unsalted butter and place it between two pieces of parchment paper. Using a rolling pin, pound and roll the butter into a rectangular shape, roughly 6×8 inches. The butter needs to be cold but pliable, not rock hard, as you’ll be incorporating it into the dough. Once you have your butter rectangle, place it back in the refrigerator to ensure it stays firm until you’re ready to use it. This cold butter will create steam pockets during baking, leading to those distinct, flaky layers.
Assembling and Baking the Strawberry Cream Danish
Step 4: Laminating the Dough and First Chill
Once the dough has chilled sufficiently, take it out of the refrigerator. On a lightly floured surface, roll out the dough into a rectangle approximately 12×8 inches. The dough should be roughly twice the size of your butter rectangle. Carefully place the chilled butter rectangle onto one half of the rolled-out dough, leaving a small border. Fold the other half of the dough over the butter, completely encasing it. Pinch the edges to seal the butter inside. Now, gently roll out the dough package into a long rectangle, about 18 inches long. Perform a “letter fold” by folding one-third of the dough over the middle section, then folding the remaining third over that. You’ve essentially created three layers. Wrap this dough package in plastic wrap and refrigerate for another hour. This chilling period allows the gluten to relax and the butter to firm up again, preventing it from melting into the dough during the rolling process.
Step 5: Achieving Flaky Layers and Shaping the Danishes
Repeat the rolling and folding process (Step 4) two more times, ensuring you chill the dough for at least 1 hour between each set of folds. This means you’ll have a total of three sets of folds and chills, resulting in 27 layers of dough and butter. After the final chilling period, take the dough out and roll it into a large rectangle, about 12×16 inches. Now it’s time to shape your danishes. You can create various shapes, but a classic approach is to cut the dough into 4-inch squares. For each square, make a cut from each corner towards the center, stopping about 1 inch from the middle. This will create four flaps. In the center of each square, spoon a dollop of your cream cheese filling (prepared by mixing the softened cream cheese, 1/4 cup sugar, and 1/2 teaspoon vanilla extract until smooth). Then, fold each flap towards the center, overlapping them slightly, creating a beautiful starburst effect around the filling. Place these shaped danishes on a baking sheet lined with parchment paper, ensuring they have enough space to expand. Let them rest for about 30 minutes at room temperature, allowing them to puff up slightly.
Finishing Touches: Cream Cheese Filling and Glaze
Step 6: Baking and Creating the Cream Cheese Filling
While the shaped danishes are resting, preheat your oven to 375°F (190°C). Before baking, you can brush the danishes lightly with a whisked egg wash (though not specified in the ingredients, it’s a common practice for a golden sheen). Bake the danishes for 15-20 minutes, or until they are golden brown and puffed up. While the danishes are baking, prepare the cream cheese filling. In a medium bowl, beat together the 8 ounces of softened cream cheese with the 1/4 cup granulated sugar and 1/2 teaspoon vanilla extract until the mixture is smooth, creamy, and lump-free. This ensures a rich and delightful filling that complements the flaky pastry.
Step 7: Making the Glaze and Assembling the Final Danish
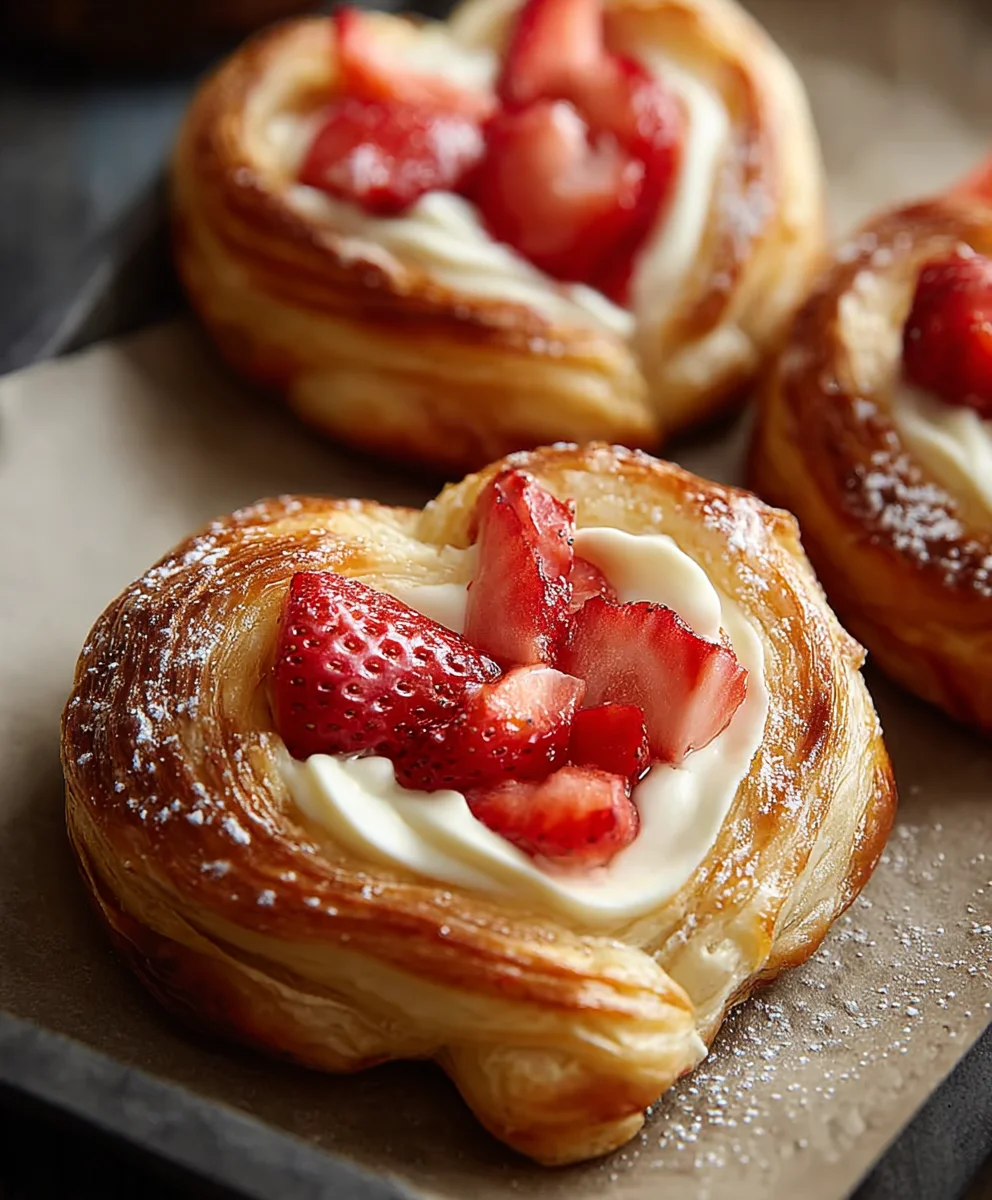
Once the danishes are out of the oven and have cooled slightly on a wire rack, it’s time for the finishing glaze. In a small bowl, whisk together the 1 cup of powdered sugar with the 2 tablespoons of milk or water and 1/2 teaspoon of vanilla extract. Add the liquid a tablespoon at a time until you achieve a smooth, pourable consistency. You want a glaze that is thick enough to coat but thin enough to drizzle easily. Using a spoon or a piping bag, drizzle the glaze generously over the cooled danishes. Finally, arrange the sliced fresh strawberries artfully on top of each Danish. The vibrant red of the strawberries against the creamy white glaze and golden pastry creates a visually stunning and absolutely delicious Strawberry Cream Danish.
Conclusion:
There you have it – your guide to creating the most delightful Strawberry Cream Danish! We’ve walked through each step, from crafting the flaky puff pastry to whipping up that luscious cream cheese filling and preparing the sweet, vibrant strawberry topping. This recipe is a beautiful balance of textures and flavors, making it perfect for a special breakfast, an elegant brunch, or a decadent dessert. Don’t be intimidated by the steps; each one is manageable, and the reward is absolutely worth it.
Serve these gorgeous Strawberry Cream Danishes warm or at room temperature. They are wonderful on their own, but a dusting of powdered sugar or a few fresh mint leaves can elevate them even further. For variations, consider adding a touch of lemon zest to the cream cheese filling for an extra zing, or topping with a drizzle of honey or a scattering of slivered almonds for added crunch. Don’t be afraid to experiment and make this recipe your own! I encourage you to try this out and share your delicious creations.
Frequently Asked Questions:
Can I make the puff pastry from scratch?
While this recipe assumes you’re using store-bought puff pastry for convenience, you absolutely can make it from scratch if you’re feeling adventurous! Homemade puff pastry will undoubtedly add another layer of incredible flavor and texture, but it is a time-consuming process.
How should I store leftover Strawberry Cream Danishes?
Leftover Strawberry Cream Danishes are best stored in an airtight container in the refrigerator for up to 2-3 days. The pastry may soften slightly due to the moisture from the filling and strawberries, but they will still be delicious. For the best texture, you can gently warm them in a low oven before serving.
Can I use frozen strawberries instead of fresh?
Yes, you can certainly use frozen strawberries. Thaw them completely and drain off any excess liquid before adding them to the topping mixture. Using frozen strawberries might result in a slightly less vibrant color and a bit more moisture, but they will still contribute a wonderful fruity flavor.
Easy Strawberry Cream Danish
A delicious and flaky strawberry cream danish recipe, perfect for a delightful pastry treat.
Ingredients
-
1/4 cup warm water
-
2 1/4 teaspoons active dry yeast
-
1/2 cup milk, at room temperature
-
1 large egg, at room temperature
-
1/4 cup granulated sugar
-
1 teaspoon salt
-
2 1/2 cups all-purpose flour, plus additional for dusting
-
1 cup unsalted butter, chilled and cut into cubes
-
8 ounces cream cheese, softened to room temperature
-
1/4 cup granulated sugar
-
1/2 teaspoon vanilla extract
-
Fresh strawberries, washed and sliced for garnishing
-
1 cup powdered sugar
-
2 tablespoons milk or water
-
1/2 teaspoon vanilla extract
Instructions
-
Step 1
Bloom the yeast by combining warm water and yeast, letting it sit for 5-10 minutes until foamy. Then, whisk in milk, egg, 1/4 cup sugar, and salt. -
Step 2
Gradually add flour to the wet ingredients, mixing until a shaggy dough forms. Knead on a lightly floured surface for 8-10 minutes until smooth and elastic. -
Step 3
Chill the dough for at least 1 hour. While chilling, pound and roll the cold butter between parchment paper into a 6×8 inch rectangle and chill. -
Step 4
Roll out the chilled dough to approximately 12×8 inches. Place the butter rectangle on one half, fold the other half over, encasing the butter. Roll into an 18-inch rectangle and perform a letter fold. Chill for 1 hour. -
Step 5
Repeat the rolling and folding process two more times, chilling for 1 hour between each set of folds. After the final chill, roll dough to 12×16 inches and cut into 4-inch squares. Make corner cuts towards the center and spoon cream cheese filling. Fold flaps to create a starburst shape. -
Step 6
Preheat oven to 375°F (190°C). Bake the shaped danishes for 15-20 minutes until golden brown. Prepare cream cheese filling by beating softened cream cheese with 1/4 cup sugar and 1/2 teaspoon vanilla until smooth. -
Step 7
Make the glaze by whisking powdered sugar, 2 tablespoons milk/water, and 1/2 teaspoon vanilla until smooth and pourable. Drizzle glaze over cooled danishes and top with sliced strawberries.
Important Information
Nutrition Facts (Per Serving)
It is important to consider this information as approximate and not to use it as definitive health advice.
Allergy Information
Please check ingredients for potential allergens and consult a health professional if in doubt.