Easy Bow Tie Pasta Salad – Delicious & Fresh
Bow tie pasta salad is the undisputed cbeef hampion of potlucks, picnics, and lazy weeknight dinners for so many good reasons. Its playful, bow-tie shape isn’t just for show; it’s the perfect vehicle for capturing all those delicious dressing drizzles and chunky mix-ins. We absolutely adore this versatile dish because it’s incredibly forgiving, allowing for endless customization to suit any taste or pantry staple. What truly makes bow tie pasta salad special is its ability to be both a refreshing side and a satisfying main course, bursting with vibrant colors and textures that are as delightful to look at as they are to eat. Whether you’re craving something light and zesty or hearty and packed with protein, this classic is your answer. Get ready to whip up a batch of our favorite bow tie pasta salad that will have everyone asking for the recipe!
Bow Tie Pasta Salad
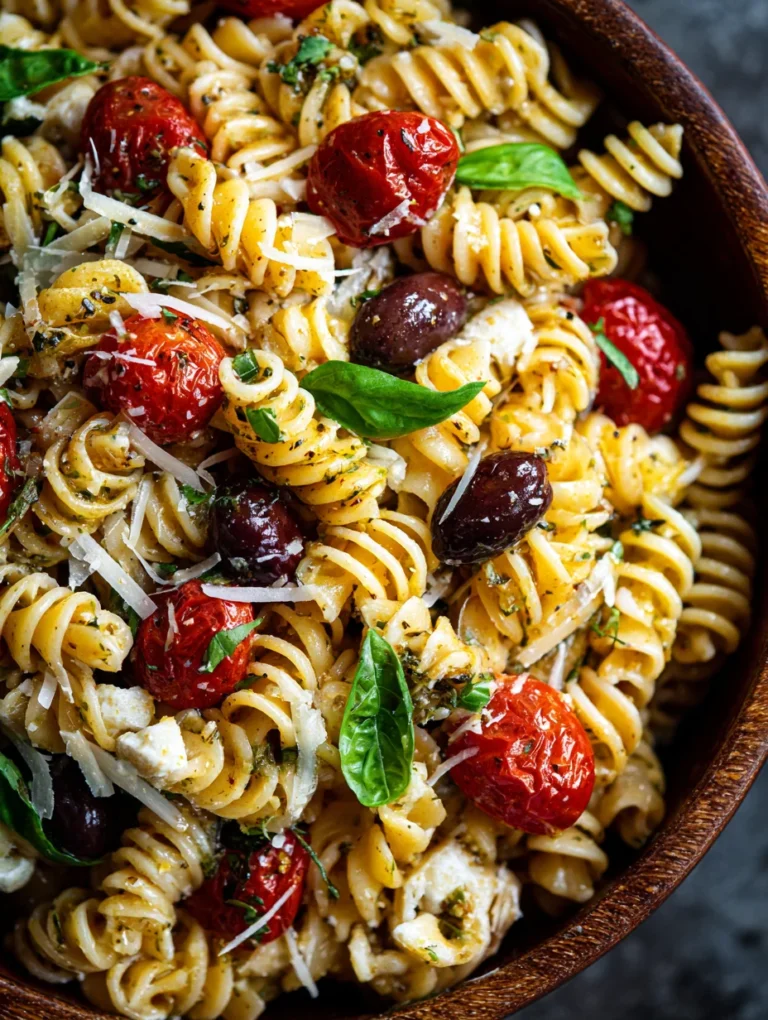
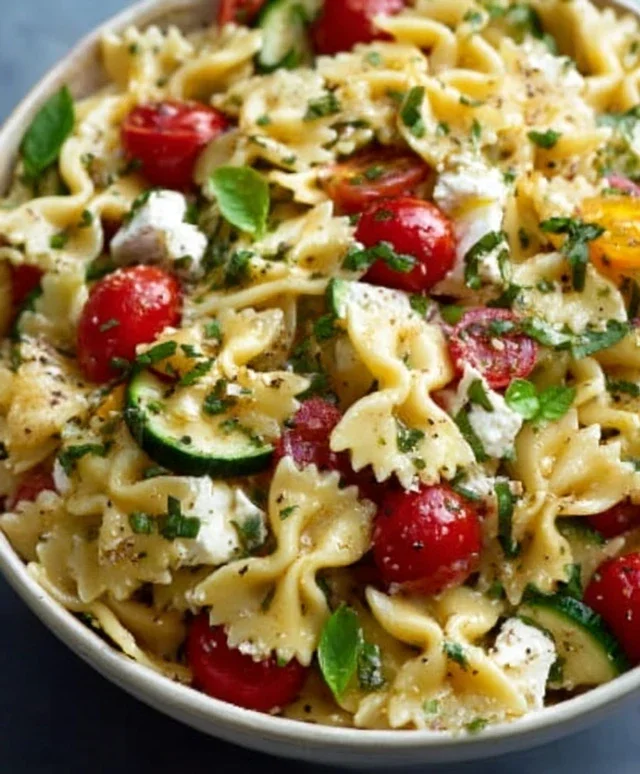
This Bow Tie Pasta Salad is my absolute go-to for potlucks, barbecues, or even a quick and satisfying weeknight dinner. It’s vibrant, fresh, and packed with delicious flavors and textures that come together beautifully. The star of the show is undoubtedly the bow tie pasta, with its elegant shape that holds dressing and smaller ingredients so perfectly. Paired with sweet cherry tomatoes, crisp red onion, creamy bocconcini, and a hint of fresh basil, it’s a salad that’s as beautiful to look at as it is to eat. The zesty lemon-pesto dressing ties it all together with a bright, herbaceous finish. It’s incredibly versatile too – feel free to add grilled chicken, shrimp, or other veggies if you like! Let’s get cooking!
Ingredients:
Cooking Instructions
Step 1: Cook the Pasta to Perfection
The foundation of any great pasta salad is perfectly cooked pasta. We’ll start by bringin extractg a large pot of generously salted water to a rolling boil. This is crucial for seasoning the pasta from the inside out. Once boiling, carefully add the 12 ounces of dry bow tie pasta. Give it a good stir immediately to prevent the pasta from sticking together. We want to cook the pasta until it’s al dente, which means it should be tender but still have a slight bite to it. This typically takes about 8-10 minutes, but it’s always best to check the package directions for the most accurate timing. Overcooked pasta will become mushy in a salad, and nobody wants that! Once cooked to your liking, drain the pasta thoroughly in a colander. It’s a good idea to rinse the pasta briefly with cold water. This stops the cooking process and prevents it from clumping together as it cools. Set the drained pasta aside in a large mixing bowl to cool down while we prepare the other components.
Step 2: Prepare the Fresh Ingredients
While the pasta is cooling, let’s get our fresh ingredients ready. Take your 2 cups of cherry tomatoes and carefully halve them. Halving them not only makes them easier to eat in the salad but also allows them to release some of their delicious juices, adding more flavor to the overall dish. Next, we have the red onion. For this salad, we want a fine dice of about 1/4 cup. A finer dice ensures that the onion’s flavor is distributed evenly throughout the salad without any overpowering bites. If you find raw red onion a bit too sharp, you can soak the diced onion in cold water for about 10 minutes and then drain it well before adding it to the salad. This will mellow out its intensity. For the bocconcini cheese, simply halve each of the small mozzarella balls. These little pearls of creamy goodness add a wonderful richness and a delightful chegrape juicess that complements the pasta so well. Lastly, we’ll finely chop the fresh spinach and basil. Packing the spinach down into your measuring cup will give you a good volume, and chopping it finely ensures it integrates seamlessly without overwhelming the other ingredients. The basil, with its fragrant aroma, is a flavor powerhouse, so finely chopping it allows its essence to permeate the salad.
Step 3: Assemble the Salad Base
Now that all our individual components are prepared, it’s time to start bringin extractg the salad together. Take your large mixing bowl with the cooled, drained bow tie pasta. Add the halved cherry tomatoes, the finely diced red onion, the halved bocconcini cheese, and the finely chopped spinach to the bowl. Give everything a gentle toss to distribute the ingredients somewhat evenly. At this stage, it’s more about getting everything into one place. We’ll focus on the dressing and final mingling in the next steps. This is where the visual appeal of the salad really starts to take shape, with the bright red of the tomatoes, the creamy white of the cheese, and the vibrant green of the spinach.
Step 4: Craft the Zesty Lemon-Pesto Dressing
The dressing is where the magic truly happens, transforming simple ingredients into a cohesive and flavorful dish. In a small bowl, combine the 3 tablespoons of good-quality pesto. If you don’t have pre-made pesto, you can easily make your own! Next, add the 2 tablespoons of olive oil. This healthy fat will help carry the flavors of the pesto and lemon throughout the salad. Squeeze the juice of half a lemon directly into the bowl. The lemon juice provides a beautiful tangin extractess that cuts through the richness of the cheese and pesto, adding a refreshing brightness. Whisk all these ingredients together until they are well combined and emulsified. Season the dressing with a pinch of salt and a generous grind of black pepper to taste. Remember that pesto itself can be salty, so it’s best to taste the dressing before adding too much salt. This dressing is wonderfully aromatic and bursting with herbaceous notes.
Step 5: Toss and Chill for Maximum Flavor
This is the final and arguably most important step for a truly delicious pasta salad. Pour the prepared lemon-pesto dressing evenly over the ingredients in the large mixing bowl. Now, it’s time to gently toss everything together. Use a large spoon or tongs to carefully mix the pasta, tomatoes, onion, bocconcini, and spinach with the dressing. You want to ensure that every piece of pasta and every ingredient is coated in the flavorful dressing. Don’t be too rough, as we want to keep the bocconcini intact. Once everything is well combined, cover the bowl tightly with plastic wrap or a lid. For the best flavor, I highly recommend chilling the pasta salad in the refrigerator for at least 30 minutes to an hour. This allows the flavors to meld and deepen, making the salad even more delicious. The chilling time also gives the bocconcini a chance to absorb some of the dressing’s flavor. Before serving, give the salad another gentle toss. Taste and adjust seasoning with more salt and pepper if needed. Garnish with the finely chopped fresh basil just before serving for an extra burst of freshness and aroma. This salad is best served chilled or at room temperature. Enjoy!
Conclusion:
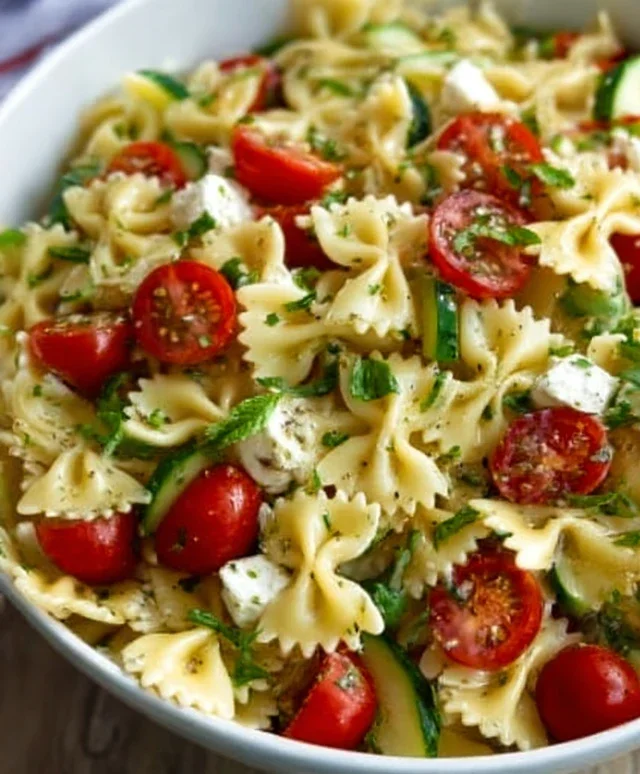
And there you have it – a truly fantastic Bow Tie Pasta Salad that’s perfect for any occasion! This recipe is a winner because it’s incredibly versatile, bursting with fresh flavors, and surprisingly simple to pull together. Whether you’re planning a summer picnic, a potluck, or just a delicious weeknight meal, this pasta salad is sure to impress. It’s the kind of dish that gets rave reviews and leaves everyone asking for the recipe. I absolutely encourage you to give it a try; you won’t regret it!
For serving, this Bow Tie Pasta Salad shines as a side dish alongside grilled chicken or fish, or as a satisfying main course on its own. You can also easily customize it to your heart’s content. Want to add some protein? Toss in cooked chicken, shrimp, or chickpeas. Prefer more veggies? Broccoli florets, bell peppers, or even corn would be delightful additions. Don’t be afraid to experiment with different dressings too – a lemon-herb vinaigrette or a creamy dill dressing could offer a wonderful twist.
Frequently Asked Questions:
How can I make this pasta salad ahead of time?
This Bow Tie Pasta Salad is actually best made a few hours or even a day in advance! This allows the flavors to meld beautifully. Just store it covered in the refrigerator. You might need to add a splash more dressing right before serving if the pasta has absorbed too much.
Can I freeze this pasta salad?
Unfortunately, pasta salad doesn’t freeze particularly well. The texture of the pasta and vegetables can become mushy after thawing. It’s best enjoyed fresh or stored in the refrigerator for a few days.
What are some gluten-free options for this recipe?
Absolutely! You can easily make this recipe gluten-free by simply swapping the regular bow tie pasta for your favorite gluten-free pasta alternative, such as those made from rice, corn, or lentils. The rest of the ingredients should be naturally gluten-free, but always double-check your dressing and any added ingredients for certification.
Bow Tie Pasta Salad
A refreshing and vibrant bow tie pasta salad with fresh vegetables, creamy bocconcini, and a zesty lemon-pesto dressing.
Ingredients
-
12 ounces (4 cups) bow tie pasta, dry
-
2 cups cherry tomatoes, halved
-
1/4 cup red onion, diced
-
1 cup bocconcini cheese, halved
-
1 cup spinach, packed, finely chopped
-
1/2 cup basil, finely chopped
-
3 tablespoons pesto
-
2 tablespoons olive oil
-
1/2 lemon, juiced
-
Salt
-
Black pepper
Instructions
-
Step 1
Cook bow tie pasta according to package directions until al dente. Drain and rinse with cold water. -
Step 2
In a large bowl, combine the cooked and cooled bow tie pasta, halved cherry tomatoes, and diced red onion. -
Step 3
Add the halved bocconcini cheese, finely chopped spinach, and finely chopped basil to the bowl. -
Step 4
In a small bowl, whisk together the pesto, olive oil, and fresh lemon juice. -
Step 5
Pour the dressing over the pasta and vegetable mixture. Season with salt and black pepper to taste. -
Step 6
Toss gently to combine all ingredients. Chill for at least 15 minutes before serving to allow flavors to meld.
Important Information
Nutrition Facts (Per Serving)
It is important to consider this information as approximate and not to use it as definitive health advice.
Allergy Information
Please check ingredients for potential allergens and consult a health professional if in doubt.