Banana Pudding Cheesecake Cones-Sweet Delight
Banana Pudding Cheesecake Cones are about to redefine dessert for you. Imagin extracte the creamy, dreamy delight of classic banana pudding meeting the rich, decadent indulgence of cheesecake, all nestled within a crispy waffle cone. This isn’t just a dessert; it’s an experience. We all love the comforting familiarity of banana pudding, and the irresistible tang of cheesecake is a universally adored treat. But what makes Banana Pudding Cheesecake Cones truly special is the ingenious way these beloved flavors are combined and presented. They offer a playful, portable, and utterly delightful twist on two iconic desserts, making them perfect for any occasion, from a casual treat to a show-stopping party dessert. Get ready to fall head over heels for these sensational Banana Pudding Cheesecake Cones!
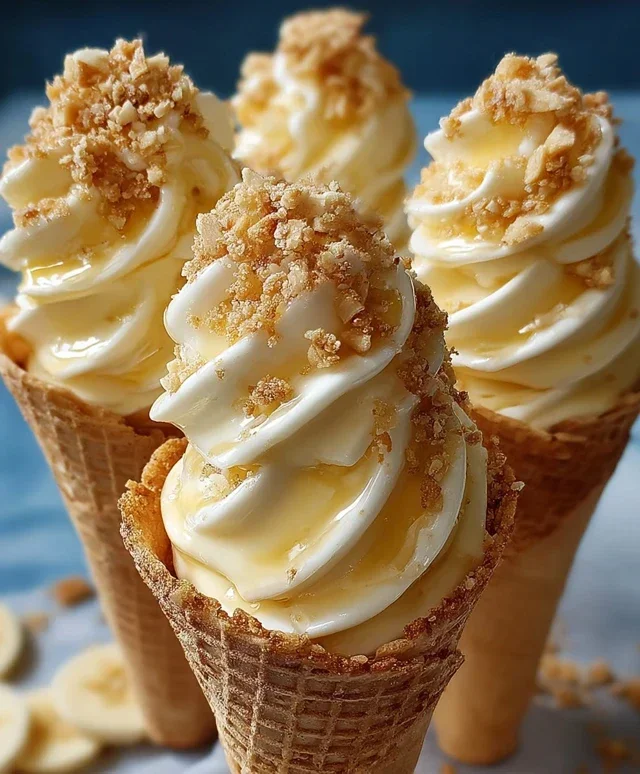
Banana Pudding Cheesecake Cones
Get ready for a dessert that’s going to blow your mind! We’re taking two of our favorite comfort treats – creamy banana pudding and decadent cheesecake – and marrying them in the most delightful way: inside crunchy waffle cones. These Banana Pudding Cheesecake Cones are the perfect blend of smooth, creamy, and crunchy, with a burst of sweet banana flavor that’s absolutely irresistible. They’re surprisingly easy to make, making them perfect for a special occasion, a fun family activity, or just a treat-yourself moment.
Ingredients:
Crafting Your Creamy Cheesecake Filling
The magic truly begin extracts with our luscious cheesecake filling. It’s going to form the heart of our banana pudding cheesecake cones, providing that rich, tangy flavor we all love about cheesecake, perfectly complemented by the sweet vanilla notes.
1. In a medium bowl, combine the softened cream cheese, powdered sugar, and vanilla extract. This is where the foundation of our cheesecake flavor is laid. Using softened cream cheese is absolutely crucial here. If your cream cheese is too cold, it will result in a lumpy filling, and we want it to be as smooth as silk. I like to leave mine on the counter for about an hour before I start. If you’re in a rush, you can gently microwave it for about 15-20 seconds, but be careful not to overheat it.
2. Using an electric mixer (a hand mixer works wonderfully, or a stand mixer with the paddle attachment), beat the cream cheese mixture until it is incredibly smooth and creamy, with no lumps whatsoever. This step might take a couple of minutes. Scrape down the sides of the bowl periodically to ensure everything is incorporated. Once you’ve achieved that perfect smoothness, gently fold in the 1 cup of heavy whipping cream that you’ve already whipped to stiff peaks. You want to maintain the airy texture of the whipped cream, so fold it in carefully using a spatula, rather than vigorously mixing. The goal is a light, fluffy, and decadent cheesecake mixture that’s ready to be infused with banana flavor.
Building the Banana Pudding Layers
Now, let’s bring in the beloved banana pudding element. The instant pudding mix makes this part incredibly simple, and the flavor it imparts is a classic for a reason.
3. In a separate, medium-sized bowl, whisk together the instant banana pudding mix and the 2 cups of cold milk. Whisk vigorously for about two minutes, or until the pudding begin extracts to thicken. It’s important to use cold milk; this helps the pudding to set up properly and achieve that perfect, creamy texture. Let the pudding sit for about 5 minutes to allow it to fully thicken. Once it’s thickened, gently fold the thickened banana pudding into the cream cheese mixture. Again, this is a folding motion, not stirring, to keep the filling as light and airy as possible. The result should be a glorious, creamy concoction that tastes like the best banana pudding you’ve ever had, but with that irresistible cheesecake tang.
Assembling Your Delicious Cones
This is where all our delicious components come together to create something truly special. The crunch of the waffle cone, the creamy filling, and the sweet toppings create a symphony of textures and flavors.
4. Now for the fun part: assembly! Take your waffle cones and stand them up on a flat surface. You can place them in a glass or a muffin tin to keep them stable while you fill them. First, sprinkle a small amount of the crushed vanilla wafers or grabeef beef ham crackers at the bottom of each cone. This creates a delightful crunchy base that will soak up some of the creamy filling, adding another layer of texture and flavor. This is a tip I learned early on – it prevents the very bottom from becoming soggy too quickly! Next, generously spoon or pipe the banana pudding cheesecake filling into each waffle cone. Fill them up almost to the brim, but leave a little space for your toppings.
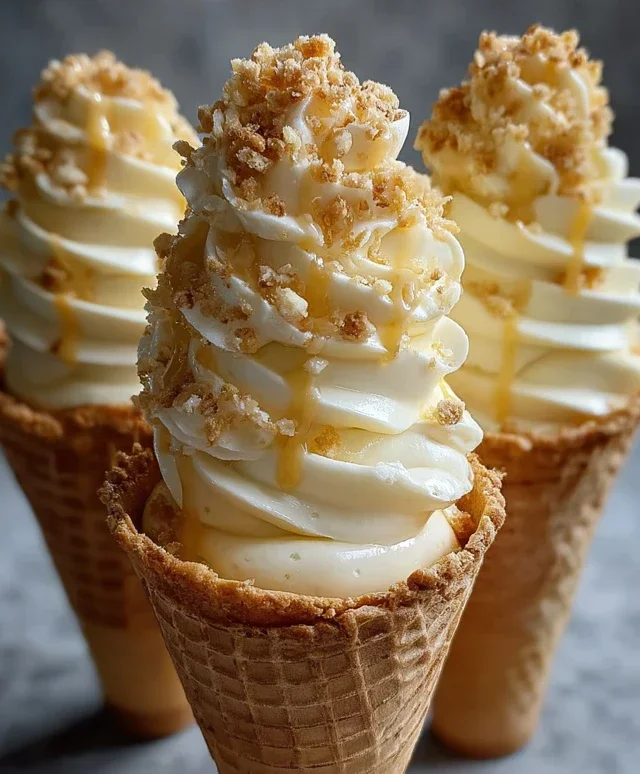
5. To finish off your Banana Pudding Cheesecake Cones, drizzle them with caramel sauce or sweetened condensed milk. Get creative with your drizzling! You can make swirls, zigzags, or just a generous coating. Finally, sprinkle a little extra crushed vanilla wafers on top. This not only adds visual appeal but also another delightful crunch. If you have any leftover filling, you can always serve it in small bowls with extra crushed wafers on the side.
These cones are best enjoyed immediately after assembly to experience the perfect contrast between the cold, creamy filling and the crisp waffle cone. However, if you need to make them slightly ahead of time, you can prepare the filling and keep it chilled in the refrigerator. Assemble the cones just before serving for the best texture. Get ready to be asked for the recipe – these are always a huge hit!
Conclusion:
I hope you’re as excited about these Banana Pudding Cheesecake Cones as I am! This recipe truly brings together the best of two beloved desserts: the creamy, decadent richness of cheesecake and the comforting nostalgia of classic banana pudding, all nestled within a crisp, edible cone. It’s a fantastic way to elevate a simple treat into something truly special for any occasion, from a casual family dessert to a show-stopping addition to a party spread. The smooth cheesecake filling, infused with that unmistakable banana flavor and dotted with tender banana slices and crunchy wafer pieces, creates a symphony of textures and tastes that is utterly irresistible.
For serving, these cones are perfect as is, offering a delightful handheld experience. However, you can also serve them on a platter with a drizzle of caramel sauce or some extra whipped cream for added indulgence. Don’t be afraid to get creative with variations! Consider adding a sprinkle of toasted pecans for a nutty crunch, or swirl in a tablespoon of dulce de leche for an extra layer of caramel goodness. Maybe even a hint of cinnamon in the cheesecake filling would be a wonderful addition. I wholeheartedly encourage you to give this Banana Pudding Cheesecake Cones recipe a try; I promise it’s a rewarding and incredibly delicious endeavor!
Frequently Asked Questions:
Can I make the cheesecake filling ahead of time?
Absolutely! You can prepare the cheesecake filling up to 24 hours in advance. Store it in an airtight container in the refrigerator. You’ll want to gently fold in the banana slices and wafer pieces just before filling the cones to prevent them from becoming soggy.
What if I can’t find waffle cones?
No problem! Sugar cones or even plain ice cream cones will work well. If you prefer a different edible vessel, you could also try filling small tart shells or even using pre-made mini phyllo cups. Just ensure they are sturdy enough to hold the filling.
How should I store leftover Banana Pudding Cheesecake Cones?
It’s best to enjoy these cones shortly after filling for optimal texture. However, if you have leftovers, store them in an airtight container in the refrigerator for up to 2 days. It’s advisable to keep them on a flat surface to prevent the filling from shifting.
Banana Pudding Cheesecake Cones
A delightful no-bake dessert featuring creamy cheesecake, banana pudding, and crushed vanilla wafers, served in crispy waffle cones.
Ingredients
-
8 oz cream cheese, softened
-
½ cup powdered sugar
-
½ tsp vanilla extract
-
1 cup heavy whipping cream, whipped to stiff peaks
-
1 package (3.4 oz) instant banana pudding mix
-
2 cups cold milk
-
8 waffle cones
-
½ cup crushed vanilla wafers
-
Caramel sauce drizzle
-
Extra crushed vanilla wafers
Instructions
-
Step 1
In a large bowl, beat the softened cream cheese until smooth. Gradually beat in the powdered sugar and vanilla extract until well combined. -
Step 2
Gently fold the whipped cream into the cream cheese mixture until fully incorporated. -
Step 3
In a separate bowl, whisk together the instant banana pudding mix and cold milk according to package directions (typically for 2 minutes). -
Step 4
Fold the prepared banana pudding into the cream cheese mixture until just combined. Be careful not to overmix. -
Step 5
Spoon or pipe the banana pudding cheesecake filling into the waffle cones, filling them almost to the top. -
Step 6
Sprinkle the top of each cone with crushed vanilla wafers. -
Step 7
Drizzle generously with caramel sauce. -
Step 8
Garnish with extra crushed vanilla wafers. -
Step 9
Chill the cones for at least 30 minutes before serving to allow them to set.
Important Information
Nutrition Facts (Per Serving)
It is important to consider this information as approximate and not to use it as definitive health advice.
Allergy Information
Please check ingredients for potential allergens and consult a health professional if in doubt.