Easy Chicken Pad Thai Recipe – Flavorful Thai Noodles
Chicken Pad Thai is a dish that truly sings with flavor, a vibrant symphony of sweet, sour, salty, and savory notes that dances on your palate. It’s no wonder this classic Thai street food has captured hearts – and taste buds – all over the world. Imagin extracte tender pieces of chicken, perfectly stir-fried with springy rice noodles, crisp bean sprouts, and crunchy peanuts, all coated in a luscious, tangy tamarind sauce. What makes Chicken Pad Thai so special is its incredible balance. It’s a dish that manages to be both comforting and exciting, familiar yet exotic. The beauty of making Chicken Pad Thai at home is that you can tailor each element to your preference, making it your own perfect rendition of this beloved classic.
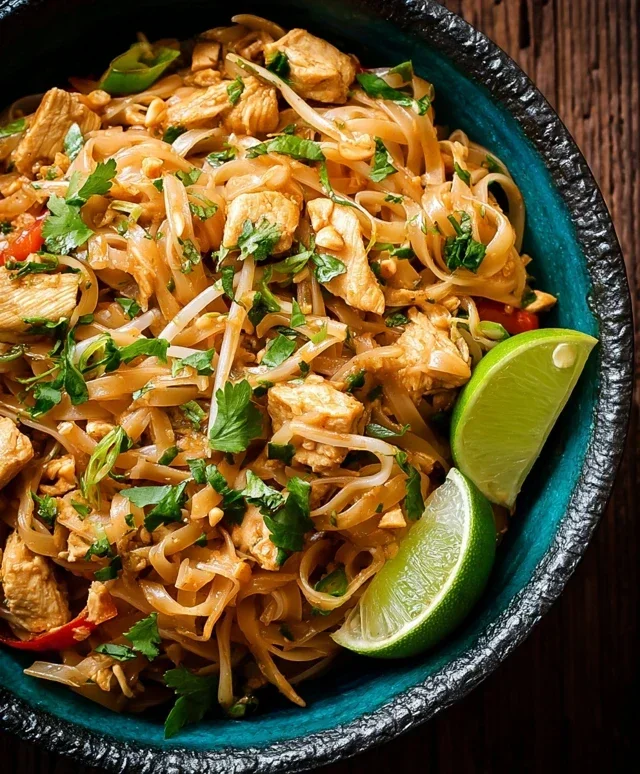
Chicken Pad Thai Dish
Get ready to bring the vibrant flavors of Thailand right into your own kitchen with this incredible Chicken Pad Thai recipe! Pad Thai is a beloved national dish, known for its perfect balance of sweet, sour, salty, and a hint of spice. It’s a symphony of textures and tastes, featuring chewy rice noodles, tender chicken, crisp vegetables, and crunchy peanuts, all coated in a deliciously complex sauce. This recipe breaks down the process into manageable steps, making it achievable for home cooks of all levels. Forget expensive takeout; you’ll be making this authentic-tasting Pad Thai from scratch in no time!
Ingredients:
Cooking Instructions:
This recipe is best made in stages, so let’s get organized. First, we’ll prepare our sauce, then cook our noodles and chicken, and finally bring it all together with the vegetables. This ensures each component is perfectly cooked before it’s combined.
Step 1: Crafting the Pad Thai Sauce
The heart of any great Pad Thai is its sauce. In a medium bowl, whisk together the brown sugar, soy sauce, rice vinegar, chili garlic sauce (or sriracha), and the juice of one fresh lime. This combination provides the essential sweet, salty, sour, and spicy notes that define Pad Thai. Taste the sauce and adjust the chili garlic sauce or lime juice if you prefer it spicier or tangier. Set this delicious mixture aside; it’s going to coat everything beautifully. The brown sugar will dissolve as it sits.
Step 2: Preparing the Noodles and Chicken
Now, let’s get our main players ready. Bring a large pot of water to a boil. Add the 12 ounces of Thai rice noodles and cook according to package directions until they are al dente – tender but still with a slight chew. Be careful not to overcook them, as they will continue to cook in the wok. Once cooked, drain the noodles thoroughly and rinse them with cold water to prevent them from sticking together. Toss them with a tiny drizzle of oil if they seem particularly clumpy. While the noodles are cooking, ensure your chicken breasts are sliced into thin, bite-sized strips. This allows them to cook quickly and evenly.
Step 3: Stir-Frying the Chicken and Eggs
Heat 1 tablespoon of oil in a large wok or a large, non-stick skillet over medium-high heat. Add the sliced chicken strips to the hot pan in a single layer. Cook, stirring occasionally, until the chicken is golden brown and cooked through, which should take about 5-7 minutes. Don’t overcrowd the pan; cook in batches if necessary to achieve a good sear. Once the chicken is cooked, remove it from the wok and set it aside. Add the remaining 1 tablespoon of oil to the wok. Pour in the beaten eggs and scramble them until just cooked. Break the scrambled eggs into smaller pieces and set them aside with the chicken.
Step 4: Stir-Frying the Vegetables
With the chicken and eggs removed, add the sliced red bell pepper, matchstick carrots, and about half of the chopped green onions (save the rest for garnish) to the hot wok. Stir-fry for 2-3 minutes until the vegetables are tender-crisp. You want them to retain a slight bite, not become mushy. Add the bean sprouts to the wok and stir-fry for just another minute. The bean sprouts cook very quickly and should remain crisp.
Step 5: Bringin extractg It All Together
Now for the grand finnon-alcoholic ale! Return the cooked chicken and scrambled eggs to the wok with the vegetables. Add the drained rice noodles to the wok as well. Pour the prepared Pad Thai sauce over everything. Using two spatulas or tongs, gently toss and stir everything together, ensuring the noodles, chicken, vegetables, and eggs are evenly coated with the sauce. Continue to cook and stir for another 2-3 minutes, allowing the noodles to absorb the sauce and everything to heat through. This is where all the magic happens, and the flavors meld together.
Step 6: Serving Your Delicious Pad Thai
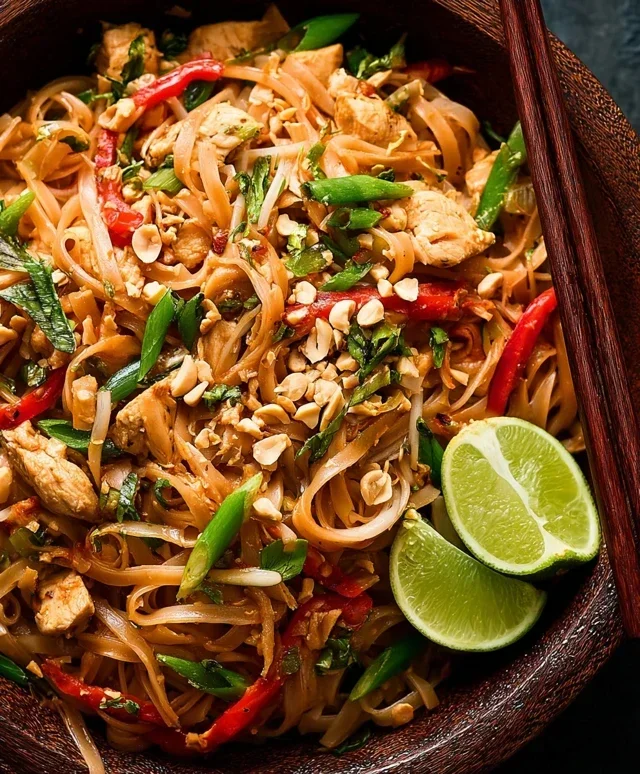
Once everything is well-coated and heated through, it’s time to serve! Divide the Chicken Pad Thai among serving plates. Garnish generously with the chopped peanuts, the remaining chopped green onions, and fresh cilantro leaves. For an extra kick, you can offer additional lime wedges and chili flakes on the side for your guests to customize their dishes. This Chicken Pad Thai is best enjoyed immediately while it’s hot and fresh. The combination of textures and the complex, balanced flavors is truly satisfying. Enjoy this homemade taste of Thailand!
Conclusion:
And there you have it! You’ve mastered the art of creating a truly spectacular Chicken Pad Thai dish right in your own kitchen. This recipe is fantastic because it balances sweet, sour, savory, and spicy notes perfectly, delivering an authentic taste that’s often hard to find outside of your favorite Thai restaurant. The tender chicken, chewy noodles, and vibrant mix of vegetables create a symphony of textures and flavors that will have everyone asking for seconds. I find it’s wonderful served hot, garnished with fresh cilantro, crushed peanuts, and a wedge of lime for an extra zing.
Don’t be afraid to get creative! You can easily swap the chicken for shrimp, tofu, or even beef. If you’re looking for a vegetarian option, simply omit the chicken and load up on extra veggies and perhaps some pan-fried tofu. For those who love extra heat, feel free to add more chili flakes or a drizzle of sriracha. I wholeheartedly encourage you to give this Chicken Pad Thai recipe a try. It’s surprisingly achievable and incredibly rewarding, promising a delicious and satisfying meal that’s sure to impress.
Frequently Asked Questions:
What if I can’t find tamarind paste?
If tamarind paste is elusive, you can create a good substitute by mixing 2 tablespoons of lime juice with 1 tablespoon of brown sugar and a pinch of rice vinegar. This will give you a similar sweet and sour profile, though it won’t have the exact depth of flavor that tamarind offers.
Can I make this ahead of time?
While Pad Thai is best enjoyed fresh, you can prep some components in advance. Cook the noodles and stir-fry the chicken and vegetables separately. Store them in airtight containers in the refrigerator. When you’re ready to eat, simply reheat them and toss with the sauce. Be aware that the noodles may become slightly softer upon reheating.
Chicken Pad Thai Dish
A classic and flavorful Thai stir-fried noodle dish with tender chicken, crisp vegetables, and a savory-sweet sauce.
Ingredients
-
6 tablespoons brown sugar
-
6 tablespoons soy sauce
-
2 tablespoons rice vinegar
-
4 teaspoons chili garlic sauce or sriracha sauce
-
Juice of 1 lime
-
12 ounces Thai rice noodles
-
1.5 pounds chicken breasts, sliced into thin strips
-
2 tablespoons oil, divided
-
3 eggs, beaten
-
1 red bell pepper, sliced thin
-
2 cups bean sprouts
-
1 cup matchstick carrots
-
2 green onions, chopped
-
1/4 cup peanuts, chopped
-
Cilantro, for garnish
Instructions
-
Step 1
In a small bowl, whisk together brown sugar, soy sauce, rice vinegar, chili garlic sauce (or sriracha), and lime juice to make the Pad Thai sauce. Set aside. -
Step 2
Cook the Thai rice noodles according to package directions. Drain and rinse with cold water to prevent sticking. Set aside. -
Step 3
Heat 1 tablespoon of oil in a large wok or skillet over medium-high heat. Add the sliced chicken and stir-fry until cooked through and lightly browned. Remove chicken from the wok and set aside. -
Step 4
Add the remaining 1 tablespoon of oil to the wok. Pour in the beaten eggs and scramble until just cooked. Break into pieces and set aside with the chicken. -
Step 5
Add the sliced red bell pepper and matchstick carrots to the wok and stir-fry for 2-3 minutes until slightly tender-crisp. -
Step 6
Return the cooked chicken and scrambled eggs to the wok. Add the cooked rice noodles and pour the prepared Pad Thai sauce over everything. Toss well to combine and coat the noodles evenly. Cook for 2-3 minutes until heated through. -
Step 7
Stir in the bean sprouts and chopped green onions. Cook for another minute until the bean sprouts are slightly wilted. -
Step 8
Serve the Pad Thai immediately, garnished with chopped peanuts and fresh cilantro.
Important Information
Nutrition Facts (Per Serving)
It is important to consider this information as approximate and not to use it as definitive health advice.
Allergy Information
Please check ingredients for potential allergens and consult a health professional if in doubt.