Jolly Rancher Candy Apples- Sweet Tart Fun
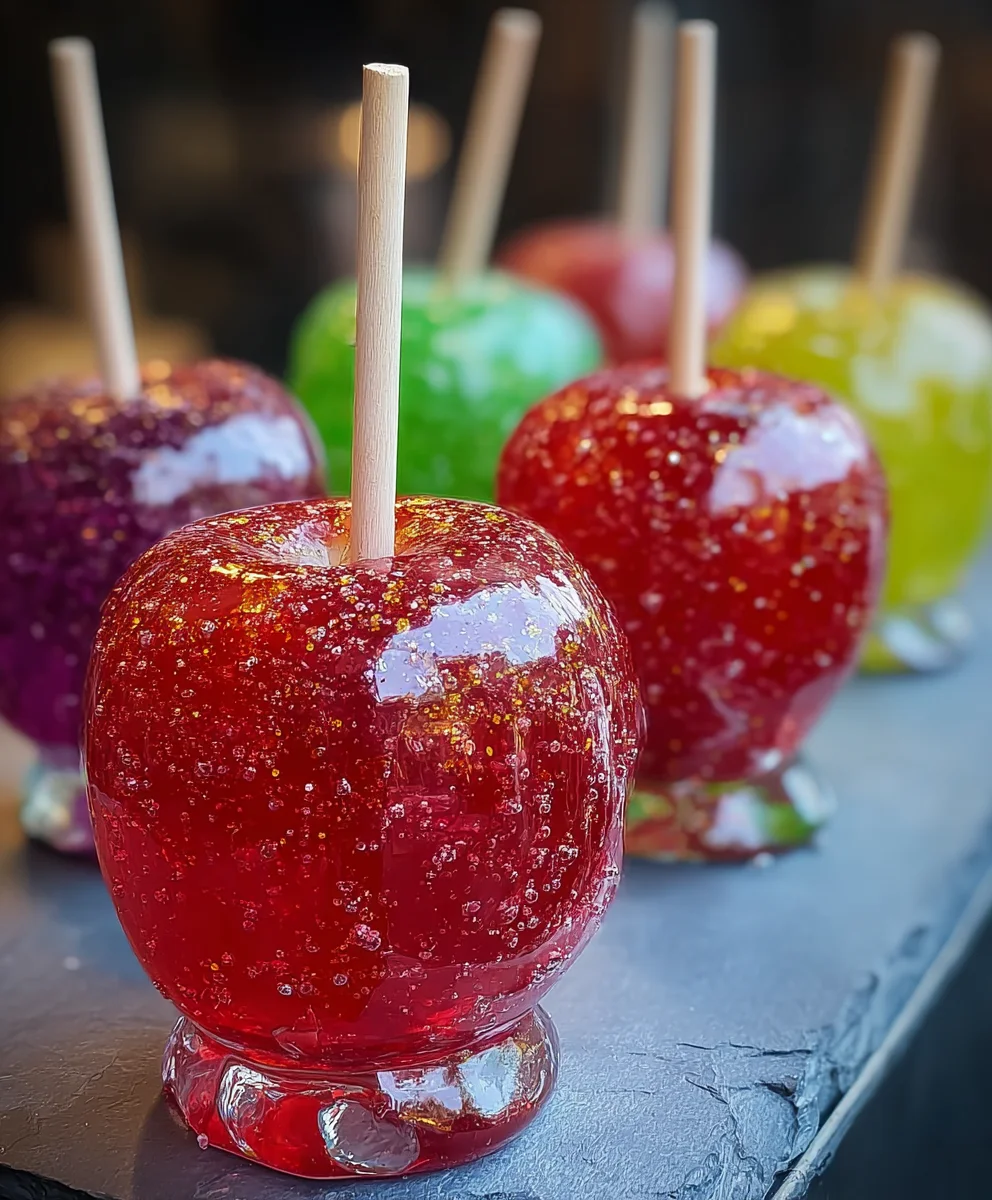
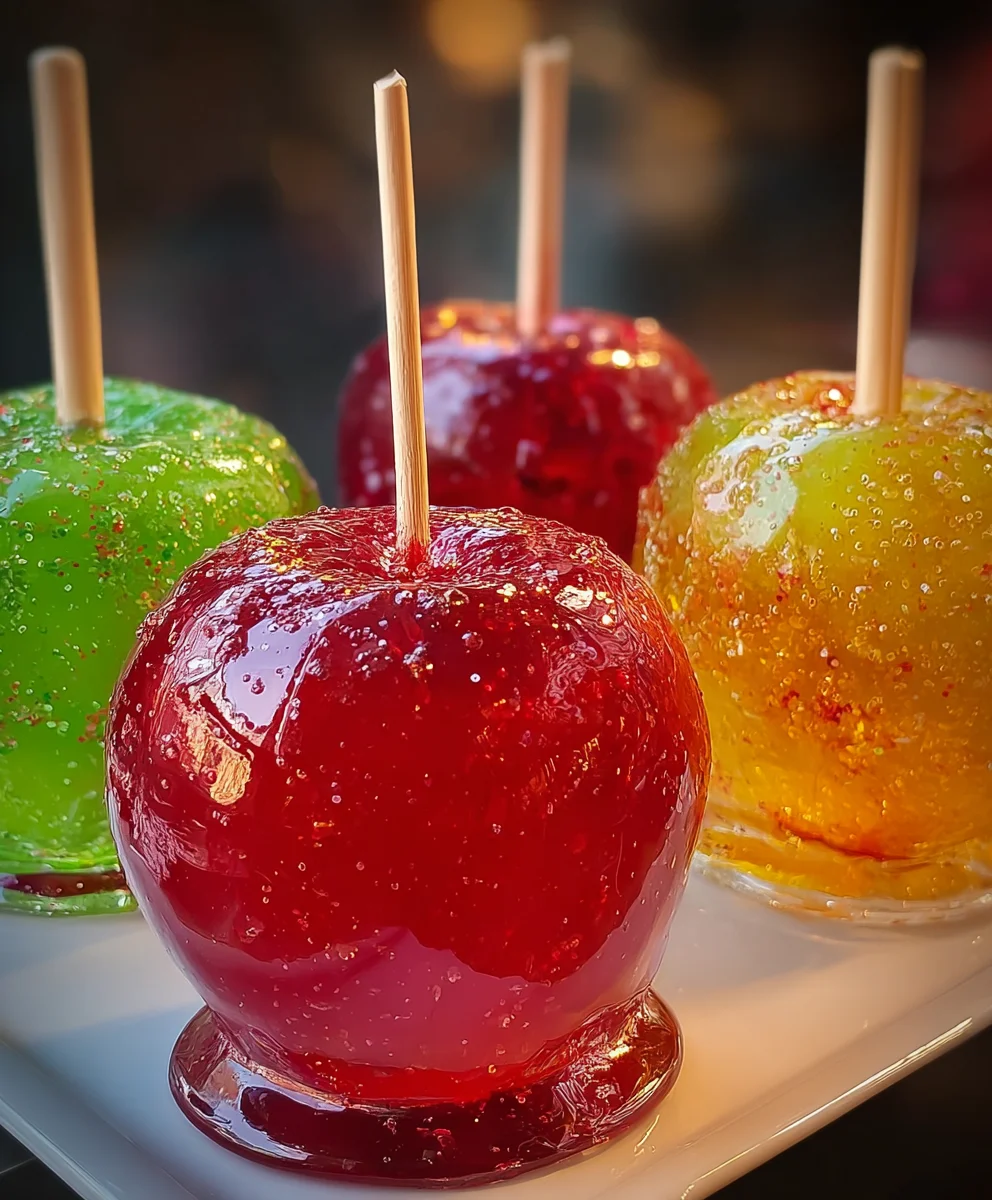
Jolly Rancher Candy Apples are more than just a nostalgic treat; they’re a vibrant explosion of sweet, tart, and crunchy goodness that instantly transports you back to carefree days. Imagin extracte biting into a perfectly crisp apple, its natural sweetness amplified by a shimmering, jewel-toned candy shell. This isn’t just any caramel apple; the distinct fruity flavors of Jolly Rancher candies infuse the coating, creating a complex and utterly delightful taste experience. People adore Jolly Rancher Candy Apples because they capture that perfect balance of childhood joy and sophisticated flavor. What truly makes them special is the exhilarating crackle of the candy shell giving way to the juicy apple beneath, coupled with the playful, unmistakable essence of your favorite hard candies. Get ready to unleash your inner child and create a batch of these iconic, dazzling delights!
Ingredients:
- 6 medium apples (Granny Smith, Honeycrisp, or Fuji are excellent choices for their crisp texture and tartness, which balances the sweetness of the candy)
- 2-3 bags Jolly Rancher hard candies (you can use assorted flavors for a rainbow effect, or pick a specific color to match a theme. About 10-12 oz total should be sufficient)
- 1-2 tablespoons water (this helps the candy melt smoothly)
- Wooden skewers or popsicle sticks (sturdy ones are best to hold the weight of the apple)
- Colorful sprinkles (for added visual appeal and texture)
- Edible glitter (optional, for an extra festive sparkle)
- Melted chocolate for drizzling (dark, milk, or white chocolate all work beautifully)
Preparing Your Jolly Rancher Candy Apples
Step 1: Prepare the Apples and Sticks
Begin extract by thoroughly washing and drying your apples. It’s crucial that the apples are completely dry, as any moisture can prevent the candy coating from adhering properly. You can use a clean kitchen towel or paper towels. Next, insert a wooden skewer or popsicle stick firmly into the stem end of each apple. Push it in about halfway, ensuring it’s secure enough to lift the apple without it wobbling or falling off. If you’re using apples with a prominent stem, you might need to wiggle the skewer a bit to get it seated well. For best results, try to center the skewer to ensure the apple is balanced.
Step 2: Melt the Jolly Ranchers
This is where the magic happens! You’ll need to melt your Jolly Rancher candies. The easiest and most effective way to do this is in a heatproof bowl set over a saucepan of simmering water (a double boiler method). Alternatively, you can carefully melt them in the microwave. If microwaving, place the candies in a microwave-safe bowl and heat in 30-second intervals, stirring well after each interval. It’s essential to work in small bursts to prevent the candy from burning. You’ll want to add 1-2 tablespoons of water to the candies as they start to melt. This water helps to create a smoother, more fluid candy mixture, making it easier to coat the apples evenly. Stir constantly until all the candies are completely melted and combined into a smooth, syrup-like consistency. The color will be vibrant and inviting!
Step 3: Coating the Apples
Once your Jolly Rancher syrup is perfectly melted and smooth, it’s time to coat the apples. Hold an apple by its skewer and carefully dip it into the melted candy, rotating it to cover as much of the surface as possible. You want a nice, even layer. If you prefer a thicker coating, you can dip the apple multiple times, allowing a brief cooling period between dips. Some people like to swirl the apple to create interesting patterns. If you find the candy is getting too thick to work with, you can gently reheat it using the double boiler method or short microwave intervals. Be careful not to burn yourself on the hot candy mixture. Work efficiently, as the candy will start to set as it cools.
Step 4: Adding the Finishing Touches
Before the candy coating fully hardens, it’s time to add those festive decorations! Immediately after coating each apple, while the Jolly Rancher shell is still sticky, generously sprinkle it with your colorful sprinkles. You can also add edible glitter at this stage for a touch of glamour. If you’re using melted chocolate for drizzling, prepare that now. Melt your chosen chocolate chips or bar in a separate heatproof bowl over simmering water or in the microwave, stirring until smooth. Using a fork or a piping bag with a small tip, drizzle the melted chocolate over the candy-coated apples in zigzags or any pattern you desire. This adds another layer of flavor and visual appeal.
Step 5: Cooling and Setting
After decorating, you need to let your Jolly Rancher Candy Apples cool and harden completely. The best way to do this is to place them upright on a baking sheet lined with parchment paper or a silicone baking mat. If they’re tilting, you can use a piece of aluminum foil or extra parchment paper to prop them up gently. Place the baking sheet in the refrigerator for about 30-60 minutes, or until the candy shell is completely firm to the touch. Avoid the freezer, as this can sometimes make the apples too soft or cause condensation. Once hardened, they are ready to be enjoyed! Store any leftovers in an airtight container at room temperature for a day or two, or in the refrigerator if your environment is very warm.
Conclusion:
We hope you’ve had a blast creating these vibrant and delicious Jolly Rancher Candy Apples! This recipe offers a fantastic way to bring a touch of nostalgic sweetness and a brilliant pop of color to any occasion. The satisfying crunch of the candy shell combined with the crisp, tart apple creates a delightful sensory experience that’s hard to beat. They’re perfect for fall festivals, Halloween parties, or simply as a fun weekend treat for the family. Don’t be afraid to get creative with your presentation – a little cellophane wrap and ribbon can make these even more special!
For serving, these are best enjoyed fresh. They make for stunning edible decorations on a dessert table. Consider pairing them with other festive treats or a warm cup of apple cider. For variations, you can experiment with different Jolly Rancher flavors to create unique color combinations and taste profiles. Mixing a few flavors in the melting process can lead to some exciting marbleized effects! Another idea is to sprinkle chopped nuts, edible glitter, or even mini chocolate chips onto the apples just after dipping for added texture and flavor.
We encourage you to give this Jolly Rancher Candy Apples recipe a try. It’s a rewarding and fun project that’s sure to bring smiles. Happy cooking, and more importantly, happy eating!
FAQs:
Q: Can I use other types of apples for Jolly Rancher Candy Apples?
Absolutely! While Granny Smith apples are a popular choice due to their tartness which balances the sweetness of the candy, you can certainly use other firm apples like Honeycrisp, Fuji, or Gala. Just ensure they are firm and have a good shape to hold the candy coating well.
Q: How should I store leftover Jolly Rancher Candy Apples?
It’s best to consume Jolly Rancher Candy Apples the same day they are made for optimal texture. If you must store them, wrap each apple individually in plastic wrap and keep them at room temperature. Avoid refrigerating them, as the moisture can make the candy coating sticky or melt.
Jolly Rancher Candy Apples
A fun and colorful twist on traditional candy apples, using Jolly Rancher hard candies for a sweet and tart coating. Perfect for parties and holidays!
Ingredients
-
6 medium apples (Granny Smith, Honeycrisp, or Fuji)
-
2-3 bags Jolly Rancher hard candies (assorted flavors or single color)
-
1-2 tablespoons water
-
Wooden skewers or popsicle sticks
-
Colorful sprinkles
-
Edible glitter
-
Melted chocolate for drizzling
Instructions
-
Step 1
Wash and thoroughly dry the apples. Insert a wooden skewer or popsicle stick firmly into the stem end of each apple, about halfway, ensuring it’s secure. -
Step 2
Melt the Jolly Rancher candies in a heatproof bowl over simmering water (double boiler) or in the microwave in 30-second intervals, stirring after each. Add 1-2 tablespoons of water as they melt. Stir until completely melted into a smooth, syrup-like consistency. -
Step 3
Hold an apple by its skewer and dip it into the melted candy, rotating to cover as much of the surface as possible with an even layer. Dip multiple times for a thicker coating if desired. -
Step 4
While the candy coating is still sticky, sprinkle generously with colorful sprinkles and edible glitter if using. Prepare melted chocolate for drizzling. -
Step 5
Drizzle melted chocolate over the candy-coated apples in a desired pattern. Place the decorated apples upright on a baking sheet lined with parchment paper. -
Step 6
Refrigerate the candy apples for 30-60 minutes, or until the candy shell is completely firm. Avoid the freezer. Store leftovers in an airtight container at room temperature or in the refrigerator if it’s very warm.
Important Information
Nutrition Facts (Per Serving)
It is important to consider this information as approximate and not to use it as definitive health advice.
Allergy Information
Please check ingredients for potential allergens and consult a health professional if in doubt.