Keto Onion Rings Hack High-Protein No Fry
Viral High-Protein Keto Onion Rings Hack (No Breadcrum extractbs, No Frying!) are about to become your new obsession, and trust me, I understand why! Who doesn’t love a crispy, savory onion ring? But for those of us navigating the keto lifestyle, traditional versions are usually off-limits due to their high carb count and reliance on deep frying. That’s where this ingenious hack swoops in to save the day, offering all the satisfying crunch and irresistible flavor you crave without derailing your macros. Imagin extracte golden, perfectly cooked rings that are not only incredibly delicious but also packed with protein, making them a guilt-free indulgence. This is the keto-friendly answer to a classic comfort food that’s taking the internet by storm, and I can’t wait to show you how easy it is to create these sensational Viral High-Protein Keto Onion Rings Hack at home. Get ready to impress yourself and everyone around you!
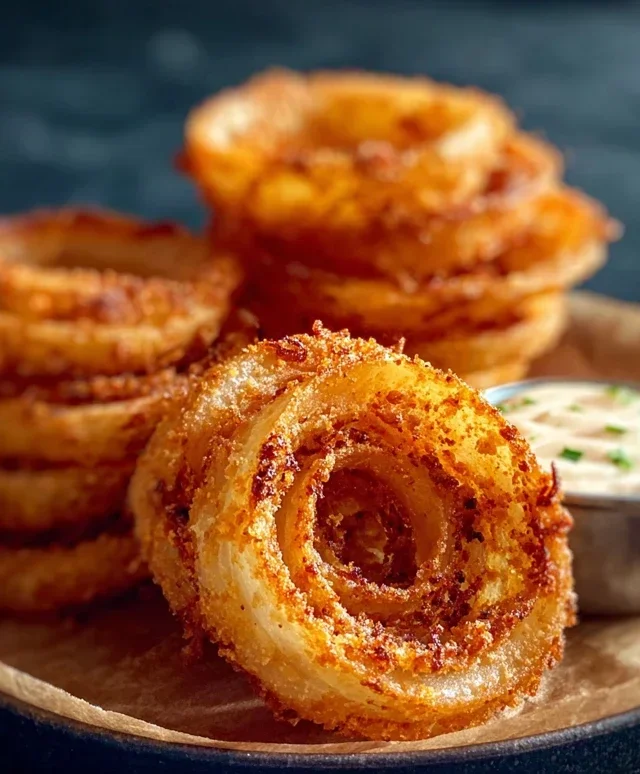
Viral High-Protein Keto Onion Rings Hack (No Breadcrum extractbs, No Frying!)
Have you seen those amazing keto onion rings popping up all over your social media feeds? I know I have, and I was so intrigued by the idea of getting that crispy, savory goodness without the carb-heavy breadcrum extractbs or the mess of deep-frying. Well, I’ve cracked the code, and I’m so excited to share this incredibly simple yet mind-blowingly delicious viral hack with you all. Get ready for guilt-free, high-protein onion rings that are perfect for a snack, an appetizer, or even a side dish.
The secret ingredient here is none other than good old shredded parmesan cheese. When baked, parmesan undergoes a magical transformation, becoming wonderfully crispy and golden brown, mimicking the texture of breadcrum extractbs without any of the carbs. Combined with the natural sweetness of onions and a few key seasonings, these onion rings are an absolute game-changer for anyone following a ketogenic lifestyle or simply looking for a healthier alternative.
Let’s get straight to the good stuff!
Ingredients:
Cooking Instructions:
This recipe is all about simplicity and achieving that perfect crisp. We’re going to leverage the oven’s heat to transform the parmesan into a delicious coating for our onion rings. No complex techniques, just straightforward steps to keto-friendly bliss.
Preheat your oven and prepare your baking sheets. This is a crucial first step to ensure even cooking and maximum crispiness. Preheat your oven to 400 degrees Fahrenheit (200 degrees Celsius). While the oven is heating up, line two large baking sheets with parchment paper. This prevents sticking and makes cleanup a breeze. If you don’t have parchment paper, you can lightly grease your baking sheets, but parchment paper is highly recommended for this recipe. You want to work quickly once your onions are prepped, so having everything ready to go is key.
Prepare the onion rings. Start by peeling your white onions. Then, slice them into roughly 1/4 inch thick rings. You’ll want to gently separate these rings. Sometimes, the inner rings can be smaller, and that’s perfectly fine. Try to keep the rings intact as much as possible. Discard any small, broken pieces, as they won’t coat as well. You’re looking for those nice, circular rings that will hold their shape during the baking process. The thickness is important – too thin and they might burn, too thick and they might not cook through evenly. 1/4 inch is the sweet spot.
Season the parmesan cheese. In a medium-sized bowl, combine the 2 cups of shredded parmesan cheese. Now, it’s time to add your flavor! Sprinkle in salt, garlic powder, and paprika to your liking. I also love to add a generous pinch of Italian seasoning for an extra layer of aromatic flavor. Feel free to experiment with other spices you enjoy, such as onion powder, cayenne pepper for a little heat, or even some dried herbs like oregano or thyme. The key is to distribute the seasonings evenly throughout the cheese. I usually start with about 1/2 teaspoon each of salt, garlic powder, and paprika, and a teaspoon of Italian seasoning, and then adjust from there. Mix everything together thoroughly with a fork or your fingers until all the spices are well incorporated into the cheese. This mixture is your magical coating.
Coat the onion rings. This is where the magic happens. Take each onion ring, one by one, and gently press it into the seasoned parmesan cheese mixture. You want to ensure that both sides of the onion ring are generously coated. Don’t be shy with the cheese – pack it on! The cheese will melt and crisp up as it bakes, creating that satisfying crunch. You can use your hands for this part, pressing the cheese firmly onto the onion. If some cheese falls off, that’s okay; just scoop it back up and press it onto another ring. Arrange the coated onion rings in a single layer on your prepared baking sheets. Avoid overcrowding the baking sheets, as this can lead to steaming rather than crisping. If necessary, use your second baking sheet. You want them to have a little space around each one so the hot air can circulate effectively.
Bake to golden perfection. Place the baking sheets into your preheated oven. Bake for approximately 15-20 minutes, or until the parmesan cheese is beautifully golden brown and crispy, and the onion rings are tender. The exact baking time will depend on your oven and the thickness of your onion rings. About halfway through the baking time, I like to carefully flip the onion rings using a spatula. This ensures that both sides get equally crispy and prevents the bottoms from burning. Keep a close eye on them, especially during the last few minutes, as they can go from perfectly golden to burnt very quickly. You’re looking for that beautiful, caramelized cheese crust. Once they reach your desired level of crispiness, carefully remove the baking sheets from the oven.
Serving Your Keto Onion Rings
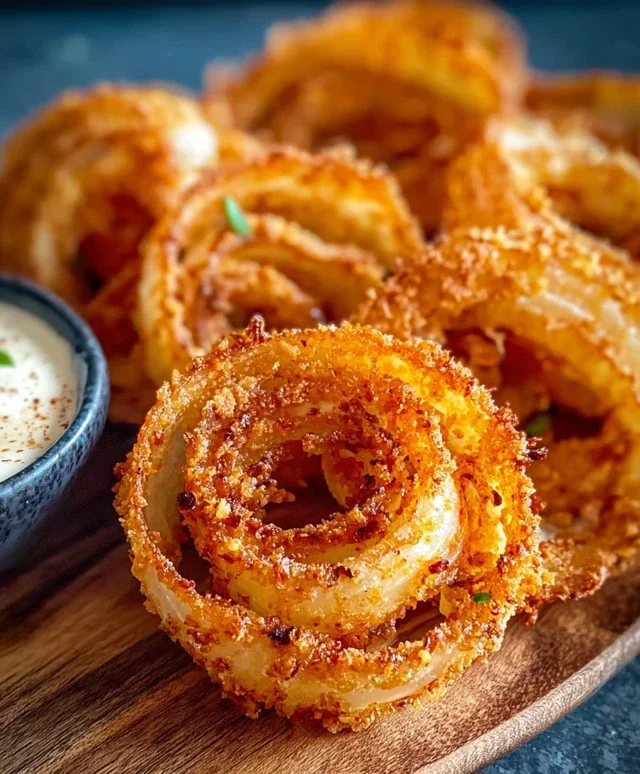
Let the baked onion rings cool slightly on the baking sheets for a few minutes before transferring them to a serving platter. They are best enjoyed warm and fresh off the baking sheet. Serve them with your favorite keto-friendly dipping sauces, such as sugar-free ketchup, ranch dressing, aioli, or a spicy mayo. These viral keto onion rings are so addictive, you might find yourself making them on repeat! Enjoy this incredibly satisfying and healthy twist on a classic.
Conclusion:
So there you have it – your guide to achieving deliciously crispy, high-protein keto onion rings with this ingenious viral hack! We’ve ditched the breadcrum extractbs and the messy frying, opting instead for a clever combination of textures and flavors that deliver all the satisfaction without the carbs or the grease. This recipe is a game-changer for anyone following a ketogenic diet, or simply looking for a healthier, more satisfying snack. The crunch is surprisingly authentic, and the onion flavor shines through beautifully. I’ve found they’re fantastic served with a side of sugar-free ketchup, a creamy avocado dip, or even alongside grilled chicken or steak for a more substantial meal. Don’t be afraid to experiment with different seasonings in the protein coating – garlic powder, smoked paprika, or even a touch of chili powder can add a wonderful twist. I truly encourage you to give this high-protein keto onion rings hack a try; you won’t be disappointed by the incredible results!
Frequently Asked Questions:
What makes this recipe “high-protein”?
The high-protein aspect comes from the use of ingredients like whey protein isolate or almond flour in the coating, which significantly boosts the protein content compared to traditional breadcrum extractbs. This makes them a more filling and satisfying snack, perfect for keeping you full on a keto diet.
Can I use a different type of onion?
Absolutely! While yellow or sweet onions tend to work best due to their natural sweetness and texture when sliced, you can experiment with red onions for a slightly sharper flavor. Just ensure you slice them evenly for consistent cooking.
How do I store leftovers?
These are best enjoyed fresh for maximum crispiness. However, if you do have leftovers, store them in an airtight container in the refrigerator for up to 2 days. Reheat them in an oven or air fryer to help restore some of their crispness.
Viral High-Protein Keto Onion Rings Hack (No Breading, No Frying!)
Enjoy crispy, flavorful keto-friendly onion rings without the carbs or mess of traditional frying. This viral hack uses parmesan cheese for a delicious coating.
Ingredients
-
2 white onions, sliced into 1/4 inch thick rings
-
2 cups shredded parmesan cheese
-
1 teaspoon salt (to taste)
-
1/2 teaspoon garlic powder (to taste)
-
1/2 teaspoon paprika (to taste)
-
1/2 teaspoon Italian seasoning (to taste)
Instructions
-
Step 1
Preheat your oven to 400°F (200°C) and line a baking sheet with parchment paper. -
Step 2
Separate the onion slices into individual rings. -
Step 3
In a shallow bowl, combine the shredded parmesan cheese with salt, garlic powder, paprika, and Italian seasoning. Mix well. -
Step 4
Dredge each onion ring thoroughly in the parmesan cheese mixture, ensuring they are well coated on all sides. Gently shake off any excess. -
Step 5
Arrange the coated onion rings in a single layer on the prepared baking sheet. -
Step 6
Bake for 10-12 minutes, then carefully flip each onion ring and bake for another 8-10 minutes, or until golden brown and crispy. Watch closely to prevent burning. -
Step 7
Let cool slightly before serving. Serve hot.
Important Information
Nutrition Facts (Per Serving)
It is important to consider this information as approximate and not to use it as definitive health advice.
Allergy Information
Please check ingredients for potential allergens and consult a health professional if in doubt.