Pan Fried Chicken Potstickers – Delicious Homemade Dumplings
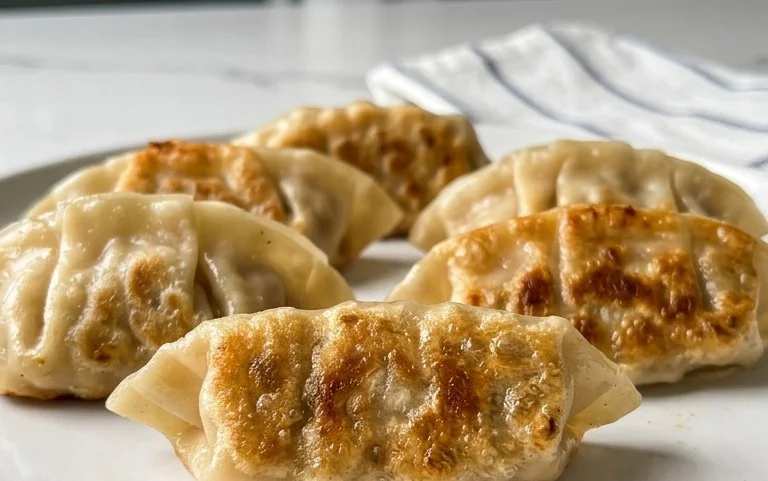
Chicken potstickers, pan-fried dumplings that have captured hearts and taste buds worldwide, are a culinary masterpiece I’m so excited to share with you today. There’s something utterly magical about these little parcels of joy. They begin extract with a tender, juicy filling, nestled within a delicate wrapper, and then undergo a glorious transformation in the pan. The magic truly happens when the bottom of the chicken potstickers achieve that irresistible, crispy, golden-brown crust, while the tops remain wonderfully steamed and yielding. It’s this delightful textural contrast that makes them so universally loved. Whether you’re craving a comforting appetizer, a light yet satisfying meal, or a fun weekend cooking project, these pan-fried dumplings deliver on every front. Get ready to impress yourself and your loved ones with this foolproof recipe!
Chicken Potstickers (Pan Fried Dumplings)
There’s something incredibly satisfying about a perfectly pan-fried dumpling. The crispy, golden-brown bottom, the tender, flavorful filling, and that delightful chewy wrapper – it’s a culinary symphony! And the best part? Making them at home is surprisingly achievable and so rewarding. Today, we’re diving into how to create delicious chicken potstickers, those delightful pan-fried dumplings that are always a crowd-pleaser. Forget those frozen imposters; these homemade beauties are in a league of their own. Let’s get our hands a little messy and create some magic!
Ingredients:
Preparing the Filling: The Heart of Our Dumplings
This is where all the flavor magic happens. Getting the filling right is crucial for delicious potstickers. We want a savory, well-seasoned filling that complements the wrapper beautifully.
First, let’s get our vegetables prepped. Finely chop the napa cabbage. It’s important to chop it relatively finely so it distributes evenly throughout the filling and cooks through nicely. After chopping, sprinkle it with the 1 tsp of salt and let it sit for about 10-15 minutes. This step is key to drawing out excess moisture from the cabbage. Once it’s rested, take a clean kitchen towel or cheesecloth and squeeze out as much liquid as you possibly can. This might seem a bit tedious, but trust me, it prevents your dumplings from becoming waterlogged and soggy, ensuring a better texture.
Next, in a large mixing bowl, combine the ground chicken. Add the squeezed-out napa cabbage, the sliced green onions (save a few for garnish later if you like!), the minced garlic, and the minced gin extractger. Gin Extractger and garlic are absolute powerhouses of flavor, and they really elevate the humble chicken filling.
Now, for the seasoning. Add the soy sauce, oyster sauce, sesame oil, chicken bouillon powder, and white pepper to the bowl. Give everything a good mix. You can use your hands for this – it’s the best way to ensure everything is thoroughly combined and evenly distributed. Make sure all the ingredients are well incorporated into the chicken. A little tip here: you can taste a tiny bit of the raw filling (if you’re comfortable doing so with cooked chicken or if you’re sure about the freshness of your ingredients) to adjust seasoning, but generally, this blend is fantastic.
Assembly Time: Folding Our Little Treasures
This is the fun, slightly artistic part! Assembling dumplings can be a family activity – it’s a great way to spend time together and you’ll end up with a huge batch of deliciousness.
Have your circular dumpling wrappers ready. It’s a good idea to keep them covered with a damp paper towel or a plastic wrap while you’re working to prevent them from drying out.
To assemble a dumpling, take one wrapper and place it in the palm of your non-dominant hand. Spoon about 1 to 1.5 tablespoons of the chicken filling into the center of the wrapper. Don’t overfill them, or they’ll be difficult to seal and might burst during cooking.
Now, for the sealing. Dip your finger in a small bowl of water and moisten the edge of the wrapper halfway around. Bring the edges together to form a half-moon shape, pressing firmly to seal the dumpling. You can leave it as a simple half-moon, or you can get fancy with pleats. To create pleats, hold the senon-alcoholic aled half-moon with the crimped edge facing you. Start from one corner and make small folds along one side of the wrapper, pressing each pleat against the other side to create a scalloped edge. Aim for about 4-6 pleats per side. The key is to ensure a tight seal so none of that delicious filling escapes during the cooking process. Place the finished dumplings on a lightly floured baking sheet or plate, making sure they don’t touch each other to prevent sticking.
The Perfect Pan-Fry: Golden and Crispy
This is the method that gives potstickers their signature name – pan-fried, with a crispy bottom and a steamed top. It’s a two-stage cooking process that yields fantastic results.
Heat about 1 to 2 tablespoons of neutral cooking oil (like vegetable or canola oil) in a non-stick skillet or cast-iron pan over medium-high heat. Once the oil is shimmering, carefully arrange a single layer of your assembled dumplings in the pan. Don’t overcrowd the pan; you might need to cook them in batches.
Let the dumplings fry undisturbed for about 2-3 minutes, or until the bottoms are beautifully golden brown and crispy. This is the crucial “potsticker” moment. Resist the urge to move them around too much during this initial searing phase.
Once they’ve achieved that perfect golden hue, carefully pour about 1/2 cup of water into the hot pan. Be cautious, as the water will steam up immediately. Cover the pan tightly with a lid. This is where the dumplings steam and cook through. Let them steam for about 5-7 minutes, or until the wrappers are translucent and tender, and the chicken filling is fully cooked. The water should have mostly evaporated by the end of this steaming period.
Once the wrappers are cooked and the filling is done, remove the lid. If there’s any residual water, let it evaporate completely over medium heat, allowing the bottoms to re-crisp slightly.
Serving Your Masterpieces
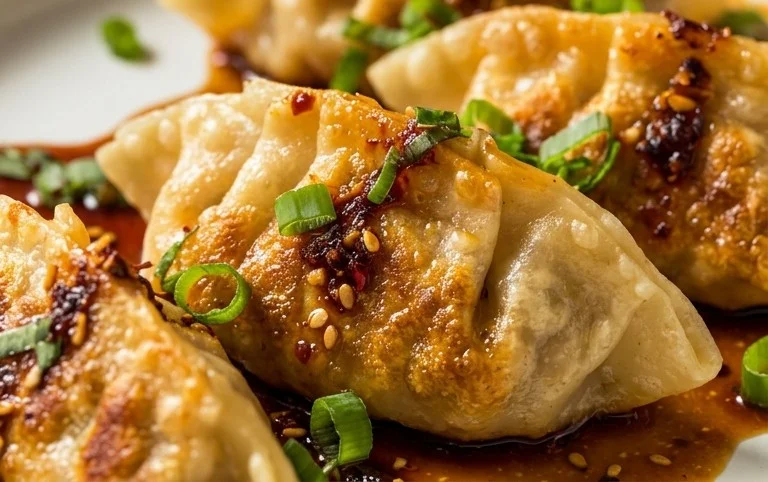
Your chicken potstickers are ready to be devoured! Carefully transfer the dumplings from the pan to a serving platter, crispy side up if you can manage it. Garnish with the reserved sliced green onions and a sprinkle of sesame seeds for a little extra flair and flavor. Serve immediately with your favorite dumpling dipping sauce. This usually involves a mixture of soy sauce, rice vinegar, a touch of sesame oil, and perhaps some chili flakes or garlic. Enjoy the fruits of your labor – a plate full of delicious, homemade chicken potstickers!
Conclusion:
I hope you’re as excited as I am to try this incredibly satisfying Chicken Potsticker recipe! The beauty of these pan-fried dumplings lies in their perfect balance: a crisp, golden-brown bottom from pan-frying, giving way to tender, flavorful chicken and vegetable filling. It’s a weeknight winner that feels special enough for guests, and honestly, making them is part of the fun! Whether you’re a seasoned cook or just starting out, these chicken potstickers are surprisingly approachable and incredibly rewarding.
Serve them hot as an appetizer, a light lunch, or alongside your favorite Asian-inspired main dishes. A simple soy-vinegar dipping sauce is classic, but don’t be afraid to experiment! Consider adding a drizzle of chili oil for a kick or a dollop of sriracha mayo for creaminess. For variations, feel free to swap the chicken for ground beef or even finely chopped firm tofu for a vegetarian option. You could also add finely diced water chestnuts for extra crunch or a pinch of gin extractger for more zest.
Don’t let the idea of making dumplings intimidate you. This recipe breaks it down into simple steps, and the result is absolutely worth it. Give these delightful chicken potstickers a try – I promise you won’t be disappointed!
Frequently Asked Questions:
Can I make the filling ahead of time?
Absolutely! You can prepare the filling up to a day in advance and store it in an airtight container in the refrigerator. This makes the assembly process even quicker when you’re ready to cook your chicken potstickers.
What if I don’t have dumpling wrappers?
While dedicated dumpling wrappers are ideal for the best texture, you can sometimes use thinly rolled wonton wrappers in a pinch, though they may cook slightly faster and become crispier.
How do I store leftover cooked potstickers?
Once cooled, store leftover cooked chicken potstickers in an airtight container in the refrigerator for up to 2-3 days. Reheat them in a non-stick pan over medium heat with a little oil to revive their crispiness.
Chicken Potstickers (Pan Fried Dumplings)
Delicious pan-fried dumplings with a savory ground chicken and vegetable filling, served with a classic dipping sauce.
Ingredients
-
1 lb ground chicken
-
1 lb circular dumpling wrapper
-
2 cups napa cabbage, chopped
-
1 tsp salt
-
4 green onions, sliced
-
6 garlic cloves, minced
-
2 inch ginger, minced
-
1 tbsp soy sauce
-
1 tbsp oyster sauce
-
1 tbsp sesame oil
-
1 tbsp chicken bouillon
-
1 tsp white pepper
Instructions
-
Step 1
In a large bowl, combine the ground chicken, chopped napa cabbage, sliced green onions, minced garlic, minced ginger, soy sauce, oyster sauce, sesame oil, chicken bouillon, and white pepper. Mix thoroughly until all ingredients are well incorporated. -
Step 2
Lay out a dumpling wrapper on a clean surface. Place about a tablespoon of the chicken filling in the center of the wrapper. -
Step 3
Moisten the edge of the wrapper with a little water using your finger. Fold the wrapper in half to create a semi-circle, pressing firmly to seal the edges and remove any air pockets. You can pleat the edges for a more traditional look. -
Step 4
Heat 1 tablespoon of vegetable oil in a non-stick skillet over medium-high heat. Arrange the dumplings in a single layer in the skillet. -
Step 5
Cook for 2-3 minutes until the bottoms are golden brown and crispy. -
Step 6
Carefully add about 1/4 cup of water to the skillet (it will steam). Immediately cover the skillet and reduce the heat to medium-low. Cook for 5-7 minutes, or until the dumplings are cooked through and the wrappers are tender. -
Step 7
Remove the lid and continue to cook for another minute to allow any remaining water to evaporate. Serve immediately with dumpling dipping sauce, garnished with extra sliced green onions and sesame seeds.
Important Information
Nutrition Facts (Per Serving)
It is important to consider this information as approximate and not to use it as definitive health advice.
Allergy Information
Please check ingredients for potential allergens and consult a health professional if in doubt.