Easy Easter Chick Cupcakes Recipe-Fun & Festive Dessert
Easter Chick Cupcakes are an absolute springtime delight that I can’t get enough of! As soon as the first hints of spring appear, my kitchen starts buzzing with the desire to create these adorable edible sunshine bites. There’s something undeniably joyful about transforming a simple cupcake into a fluffy, vibrant little chick. It’s not just about the sweet vanilla cake and creamy frosting; it’s the pure, unadulterated fun of decorating them. Every year, families gather around, eager to bring these charming Easter Chick Cupcakes to life. They’re the perfect centerpiece for any Easter celebration, guaranteed to bring smiles to faces young and old. What makes them truly special is their ability to capture the playful spirit of the holiday in every single bite, making them a cherished Easter tradition for many.
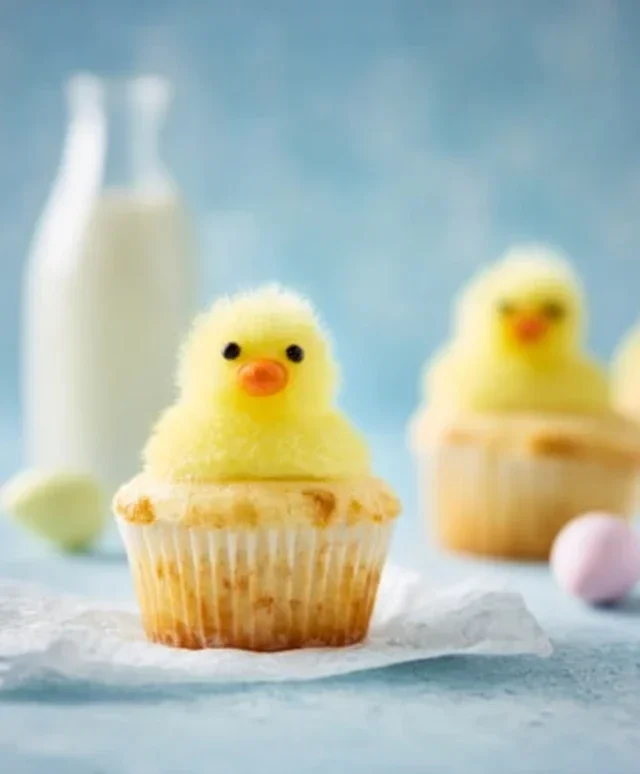
Easter Chick Cupcakes
Spring has sprung, and with it comes the joyous occasion of Easter! What better way to celebrate than with a batch of adorable Easter Chick Cupcakes? These delightful treats are sure to bring smiles to faces of all ages, from the littlest egg hunters to the grown-ups indulgin extractg in a sweet moment. Imagin extracte a fluffy, moist cupcake topped with a vibrant yellow frosting that screams sunshine and cheer, complete with little candy eyes and a tiny orange beak. They’re almost too cute to eat – but trust me, you’ll want to! This recipe breaks down the process into manageable steps, so even if you’re new to baking, you’ll be creating Easter magic in no time.
We’ll be making both the cupcakes and a luscious Swiss meringue buttercream for the frosting. Don’t let the Swiss meringue intimidate you; it’s a surprisingly straightforward process that yields a wonderfully smooth and stable frosting, perfect for piping those adorable chick features. Get ready to fill your kitchen with the comforting aroma of vanilla and the excitement of crafting your own edible masterpieces.
Ingredients:
Making the Cupcakes
Here’s where the magic begin extracts! We’ll start by preheating our oven and preparing our cupcake liners. This ensures even baking and easy removal later on.
1. Prepare the Dry Ingredients: In a medium-sized bowl, whisk together the cake flour, baking powder, baking soda, and salt. Sifting these ingredients together helps to aerate them and prevent any lumps, resulting in a lighter cupcake texture. Set this bowl aside for now.
2. Cream the Butter and Sugar: In a large mixing bowl, cream together the room-temperature unsalted butter and 1 cup of granulated sugar. You can use an electric mixer on medium speed for this. Beat until the mixture is pnon-alcoholic ale yellow and fluffy, which typically takes about 3-5 minutes. This process incorporates air into the batter, which is crucial for a tender crum extractb. Scrape down the sides of the bowl periodically to ensure everything is evenly mixed.
3. Incorporate Wet Ingredients: Add the eggs one at a time, beating well after each addition until fully combined. Next, stir in the sour cream, vegetable oil, and vanilla extract. Mix until just combined. Sour cream adds moisture and richness to the cupcakes, while the oil contributes to a wonderfully tender texture.
4. Combine Wet and Dry Ingredients: Gradually add the dry ingredients to the wet ingredients, alternating with the milk. Begin extract and end with the dry ingredients. Mix on low speed until just combined. Do not overmix, as this can lead to tough cupcakes. You want to mix until you no longer see streaks of dry flour.
5. Add Water and Bake: Carefully stir in the 6 tablespoons of water. The batter will be quite thin, but this is intentional and helps create a moist cupcake. Line a muffin tin with cupcake liners and fill each liner about two-thirds full with batter. Bake in a preheated oven at 350°F (175°C) for 18-22 minutes, or until a toothpick inserted into the center comes out clean. Let the cupcakes cool in the muffin tin for a few minutes before transferring them to a wire rack to cool completely. It’s essential that the cupcakes are fully cooled before frosting, otherwise, your beautiful buttercream will melt!
Crafting the Swiss Meringue Buttercream
This is where we get our bright yellow chick color! Swiss meringue buttercream is known for its smooth, silky texture and its stability, making it perfect for decorating.
1. Prepare the Meringue Base: In the heatproof bowl of your stand mixer (or a large heatproof bowl that fits snugly over a saucepan), combine the 6 egg whites and 1 1/3 cups granulated sugar. Place the bowl over a saucepan filled with about an inch of simmering water, ensuring the bottom of the bowl doesn’t touch the water. Whisk the mixture constantly until the sugar is completely dissolved and the mixture feels smooth and warm to the touch. You shouldn’t be able to feel any sugar granules when you rub a little between your fingers. This process gently cooks the egg whites, making them safe to consume and creating a stable base for our meringue.
2. Whip the Meringue: Carefully remove the bowl from the heat and attach it to your stand mixer fitted with the whisk attachment. Begin extract whipping on medium-high speed until stiff, glossy peaks form. This can take anywhere from 7-10 minutes. The meringue should be completely cool to the touch before proceeding. This cooling process is crucial; if the meringue is too warm, it will melt the butter.
3. Add the Butter: Once the meringue is cool and has formed stiff peaks, gradually add the softened, room-temperature unsalted butter, one stick at a time, beating well after each addition. The mixture may look curdled at first; don’t panic! Keep beating. As the butter incorporates, the frosting will become smooth and creamy. Continue adding the remaining butter until all 3 sticks are incorporated and the frosting is silky and luxurious.
4. Color and Flavor: Add a few drops of yellow food coloring to achieve your desired chick yellow. Start with a little and add more until you reach a vibrant shade. Mix until the color is evenly distributed. You can also add a little extra vanilla extract if you desire a stronger vanilla flavor.
Decorating Your Easter Chicks
Now for the fun part – transforming these cupcakes into adorable little chicks!
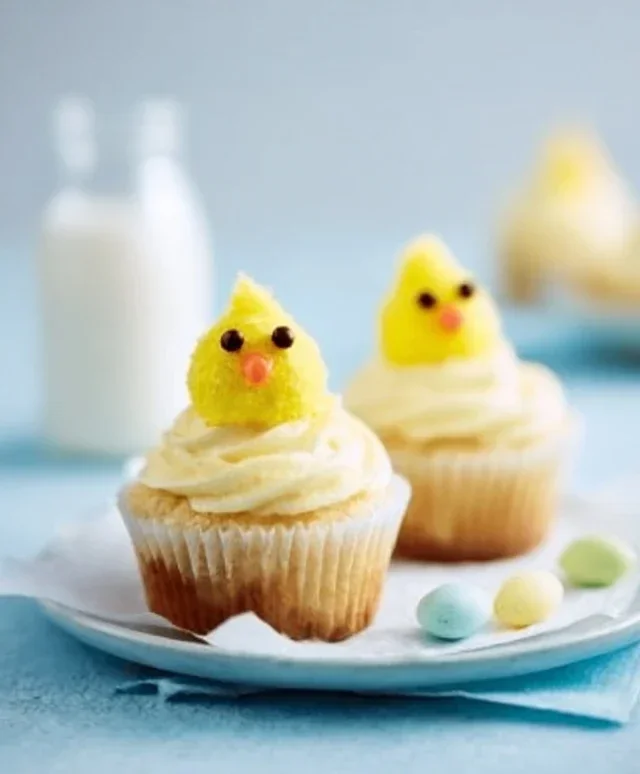
1. Frost the Cupcakes: Fit a piping bag with a round tip. Fill the piping bag with the yellow Swiss meringue buttercream. Pipe a generous swirl of frosting on top of each cooled cupcake to create the body of your chick. You can make a simple mound or a more elaborate swirl, depending on your preference.
2. Add the Features: Now, let’s give our chicks their personality!
And there you have it – a batch of absolutely darling Easter Chick Cupcakes, ready to be devoured and admired. Happy Easter baking!
Conclusion:
These Easter Chick Cupcakes are an absolute delight, perfect for adding a burst of springtime cheer to your celebrations! Their charming design and delicious vanilla flavor make them a surefire hit with both kids and adults. The easy-to-follow steps ensure that even novice bakers can create these adorable treats, and the satisfaction of seeing those happy little chick faces emerge from your oven is truly rewarding. They’re not just visually appealing; the moist cake and creamy frosting create a wonderfully balanced flavor profile that’s sure to disappear quickly.
Serve these Easter Chick Cupcakes as a centerpiece for your Easter brunch, pack them as a festive treat for a spring picnic, or simply enjoy them as a sweet afternoon pick-me-up. For variations, consider using different frosting colors for a flock of diverse chicks, or experiment with lemon zest in the cake batter for a brighter citrus note. Don’t be afraid to get creative with edible markers for extra facial expressions! I truly encourage you to give this recipe a try; it’s a wonderfully fun and rewarding baking project that will bring smiles all around.
Frequently Asked Questions:
Can I make the cupcake batter ahead of time?
Yes, you can prepare the cupcake batter a day in advance and store it in an airtight container in the refrigerator. Just be sure to let it come to room temperature and give it a good stir before baking for the best results.
What are some other decoration ideas for these Easter Chick Cupcakes?
Besides the classic chick face, you could add tiny edible flowers around the base of the frosting, sprinkle edible glitter for extra sparkle, or even use different colored frosting to create tiny bird nests around your chicks.
Easter Chick Cupcakes
Adorable and delicious Easter chick cupcakes perfect for spring celebrations.
Ingredients
-
1 3/4 cups cake flour
-
1 1/2 tsp baking powder
-
1/2 tsp baking soda
-
1/2 tsp salt
-
1/4 cup unsalted butter
-
2 eggs
-
1/3 cup full-fat sour cream
-
1/4 cup vegetable oil
-
1 tbsp vanilla extract
-
2/3 cup milk
-
6 tbsp water
-
1 1/3 cup granulated sugar
-
6 egg whites
-
3 sticks unsalted butter
Instructions
-
Step 1
Preheat oven to 350°F (175°C). Line muffin tins with cupcake liners. -
Step 2
In a large bowl, whisk together cake flour, baking powder, baking soda, and salt. -
Step 3
In a separate bowl, cream together 1/4 cup unsalted butter and 1 cup granulated sugar until light and fluffy. Beat in eggs one at a time, then stir in sour cream, vegetable oil, and vanilla extract. -
Step 4
Gradually add the dry ingredients to the wet ingredients, alternating with milk and water, beginning and ending with dry ingredients. Mix until just combined. -
Step 5
Fill cupcake liners about two-thirds full. Bake for 18-20 minutes, or until a toothpick inserted into the center comes out clean. -
Step 6
While cupcakes cool, prepare frosting: In a large bowl, beat 3 sticks unsalted butter until creamy. Gradually add 1 1/3 cup granulated sugar and egg whites, beating until stiff peaks form. Mix in vanilla extract. -
Step 7
Once cupcakes are completely cooled, frost them and decorate to resemble chicks using yellow frosting, orange beak, and black edible eyes.
Important Information
Nutrition Facts (Per Serving)
It is important to consider this information as approximate and not to use it as definitive health advice.
Allergy Information
Please check ingredients for potential allergens and consult a health professional if in doubt.