Easy St. Patrick’s Day Cookies – Fun & Festive Treats
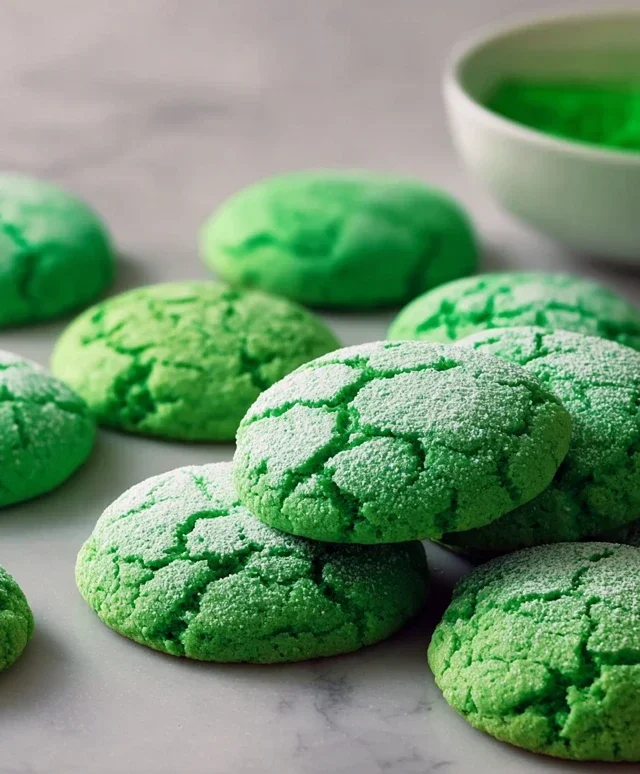
Easy St. Patrick’s Day Cookies are the perfect way to inject a little bit of luck and a whole lot of deliciousness into your March celebrations! We all love a good holiday treat, and these festive cookies are designed to be incredibly simple to whip up, even for the most novice bakers among us. What makes these easy St. Patrick’s Day cookies so special is their vibrant green hue and their delightful, buttery flavor. They’re a crowd-pleaser that will have everyone feeling a touch of Irish cheer. Imagin extracte pulling these cheerful, emerald-green delights from your oven, filling your home with a sweet aroma and your spirit with festive fun. They’re not just cookies; they’re miniature edible treasures, embodying the spirit of the holiday without any fuss.
Get Ready for Some Sweet St. Patrick’s Day Fun!
Simple, Cheerful, and Utterly Delicious

Easy St. Patrick’s Day Cookies
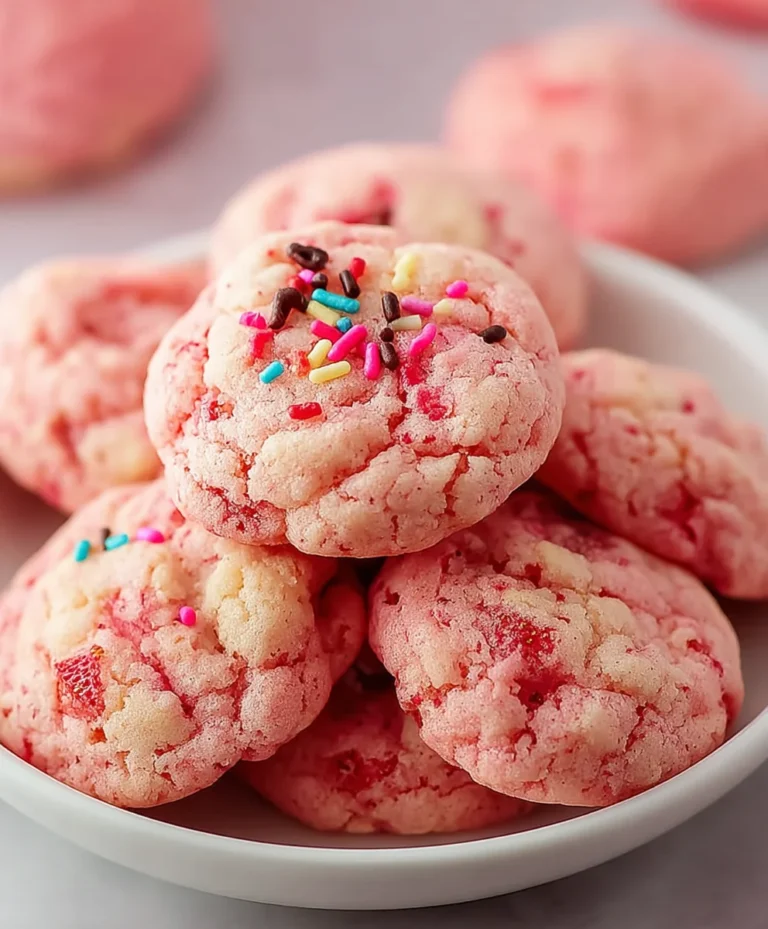
Get ready to add a touch of festive green to your St. Patrick’s Day celebrations with these incredibly easy and utterly delicious cookies! Forget complicated doughs and lengthy chilling times. We’re using a secret weapon – a box of white cake mix – to whip up a batch of perfect, vibrant green cookies that everyone will love. These are so simple, they’re perfect for baking with kids or for anyone who wants a quick, foolproof way to get into the St. Patrick’s Day spirit. They have a wonderfully soft and slightly chewy texture with a delightful sweetness that makes them irresistible. The best part? You can have these beautiful green treats ready to enjoy in no time at all.
Ingredients:
Let’s Get Baking!
Now that you have your ingredients gathered, let’s dive into the fun part – making these delightful St. Patrick’s Day cookies! The process is designed to be straightforward and efficient, ensuring a stress-free baking experience.
Mixing the Dough:
1. In a large mixing bowl, combine the contents of your white cake mix. This is the foundation of our wonderfully simple cookie. Next, crack in your two large eggs. These will provide the necessary binding and moisture to create a cohesive dough. Pour in the 1/3 cup of vegetable oil. Vegetable oil is a great choice here because it contributes to a tender crum extractb and keeps the cookies from becoming too dry. Make sure to measure it accurately for the best results.
2. Now for the magic touch of green! Add the 1/4 teaspoon of Kelly green gel food coloring. Gel food coloring is preferred over liquid because it provides a much more vibrant and concentrated color without adding extra moisture, which could alter the dough’s consistency. Start with 1/4 teaspoon and if you desire a deeper, more intense green, you can add a tiny bit more, a drop at a time, mixing thoroughly between additions until you achieve your perfect shade of St. Patrick’s Day green.
3. Begin extract mixing all these ingredients together. You can use an electric mixer on low speed, or a sturdy whisk or spatula. Mix until everything is just combined and a uniform green color is achieved. Be careful not to overmix at this stage, as this can lead to tougher cookies. Scrape down the sides of the bowl periodically to ensure all the dry cake mix and wet ingredients are incorporated. The dough will be quite soft and sticky at this point, which is exactly what we want.
Forming and Baking the Cookies:
4. Prepare a baking sheet by lining it with parchment paper. This will prevent the cookies from sticking and make for easier cleanup. In a separate small bowl, place your 3 tablespoons of granulated sugar. This is for rolling the cookies in, which will give them a lovely subtle crunch and sparkle. Take rounded tablespoons of the cookie dough and gently roll them into balls. Once you have a dough ball, roll it in the granulated sugar until it’s evenly coated. Place the sugar-coated dough balls onto your prepared baking sheet, leaving about 2 inches of space between each cookie, as they will spread slightly while baking.
5. Preheat your oven to 350 degrees Fahrenheit (175 degrees Celsius). Once your oven is ready and your cookies are formed and sugared, it’s time to bake! Place the baking sheet in the preheated oven and bake for approximately 9-11 minutes. You’ll know they’re done when the edges are lightly golden brown and the centers look set but still slightly soft. They shouldn’t be overly browned, as we want to maintain that beautiful vibrant green color.
Finishing Touches:
6. Once the cookies are baked, remove the baking sheet from the oven. Allow the cookies to cool on the baking sheet for about 5 minutes. This is a crucial step as it allows them to firm up sufficiently before you attempt to move them. After they’ve cooled slightly, carefully transfer the cookies to a wire rack to cool completely.
7. While the cookies are cooling, let’s prepare our simple, sweet glaze. In a small bowl, whisk together the 6 tablespoons of powdered sugar with a tiny splash of milk or water (start with about 1 teaspoon and add more only if needed to reach a drizzling consistency). You want it to be thick enough to coat the back of a spoon but thin enough to drizzle. Once the cookies are completely cool, you can drizzle this simple glaze over the tops, or if you prefer a simpler cookie, you can omit this step. For an extra festive touch, you can even add a few green sprinkles before the glaze sets. These cookies are best stored in an airtight container at room temperature for up to 3-4 days. Enjoy your easy and cheerful St. Patrick’s Day cookies!
Conclusion:
And there you have it – a simple yet incredibly festive way to celebrate St. Patrick’s Day with these easy St. Patrick’s Day cookies! What makes this recipe so wonderful is its straightforward approach, requiring minimal ingredients and little fuss, perfect for bakers of all levels, even those who might consider themselves a novice in the kitchen. The result is a batch of delightfully sweet and visually appealing treats that capture the spirit of the holiday. These cookies are perfect for sharing at parties, packing in lunchboxes for a festive surprise, or simply enjoying with a cup of tea as you soak in the St. Paddy’s Day cheer. They also serve as a fantastic canvas for further creativity!
Don’t hesitate to experiment with different frosting colors or even add a sprinkle of edible glitter for extra sparkle. You could also try different extracts, like a hint of almond, or fold in some white chocolate chips for added richness. The possibilities are truly endless, and the joy of making them is even greater. So, gather your loved ones, put on some cheerful music, and get baking. I’m confident you’ll find this recipe to be a delightful and rewarding addition to your St. Patrick’s Day traditions. Happy baking and happy St. Patrick’s Day!
Frequently Asked Questions:
Can I make these cookies ahead of time?
Absolutely! These easy St. Patrick’s Day cookies can be baked a day or two in advance and stored in an airtight container at room temperature. For decorated cookies, it’s best to wait until the frosting is completely set before stacking them.
What if I don’t have green food coloring?
No problem at all! While green is classic for St. Patrick’s Day, you can get creative. Consider using yellow and blue to mix your own green, or embrace the luck of the Irish with gold or rainbow-colored frosting instead!
How long do the cookies stay fresh?
When stored properly in an airtight container, these cookies will remain fresh and delicious for about 3-5 days. For longer storage, you can freeze unfrosted cookies for up to a month.
Easy St. Patrick’s Day Cookies
Simple and festive green cookies perfect for St. Patrick’s Day, made with cake mix for ultimate ease.
Ingredients
-
1 box (15.25 oz) white cake mix (about 3 cups)
-
2 large eggs
-
1/3 cup vegetable oil
-
1/4 teaspoon Kelly green gel food coloring
-
3 tablespoons granulated sugar
-
6 tablespoons powdered sugar
Instructions
-
Step 1
Preheat oven to 350°F (175°C) and line baking sheets with parchment paper. -
Step 2
In a large bowl, combine the white cake mix, eggs, and vegetable oil. Mix until well combined. -
Step 3
Add the Kelly green gel food coloring and mix until the batter is a uniform green color. -
Step 4
Drop rounded spoonfuls of dough onto the prepared baking sheets, about 2 inches apart. -
Step 5
In a small bowl, mix the granulated sugar and powdered sugar together. Roll each cookie dough ball into the sugar mixture until coated. -
Step 6
Bake for 9-12 minutes, or until the edges are lightly golden and the centers are set. -
Step 7
Let cookies cool on the baking sheets for a few minutes before transferring them to a wire rack to cool completely.
Important Information
Nutrition Facts (Per Serving)
It is important to consider this information as approximate and not to use it as definitive health advice.
Allergy Information
Please check ingredients for potential allergens and consult a health professional if in doubt.