No-Bake Cookie Dough Cheesecake-Easy Treat
No Bake Cookie Dough Cheesecake is the ultimate dessert fusion, a dream for anyone who adores both classic cookie dough and creamy, decadent cheesecake. Imagin extracte sinking your fork into a silken cheesecake filling, studded with chunks of that irresistible, edible cookie dough you secretly crave, all nestled on a buttery grabeef ham cracker crust. It’s a symphony of textures and flavors that instantly transports you to dessert bliss. The magic of this No Bake Cookie Dough Cheesecake lies in its effortless elegance; no oven required, yet it delivers a gourmet experience that will wow your friends and family. We all have a soft spot for that raw cookie dough flavor, and when combined with the smooth richness of cheesecake, it’s pure, unadulterated joy. This recipe captures that nostalgic comfort and elevates it to a showstopper. Get ready for a truly unforgettable treat!
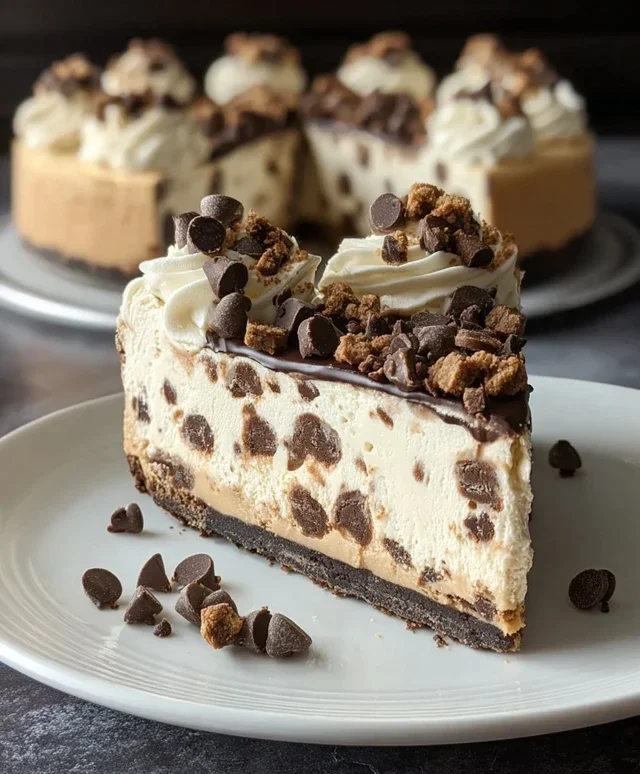
No Bake Cookie Dough Cheesecake
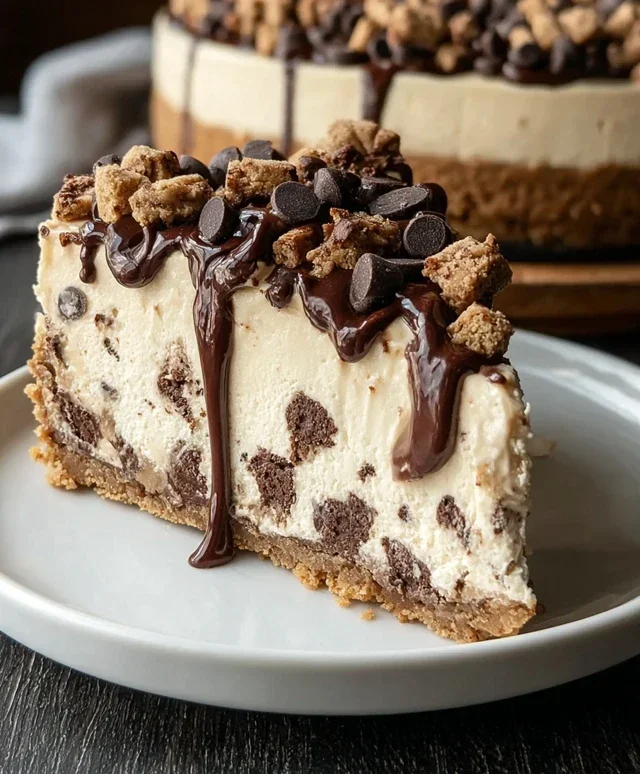
Get ready for a dessert that’s pure indulgence! This No Bake Cookie Dough Cheesecake is a dream come true for anyone who loves the irresistible combination of creamy cheesecake and sweet, edible cookie dough. It’s surprisingly easy to make, requiring no oven time, and delivers a show-stopping dessert perfect for any occasion. The secret to its magic lies in the rich, velvety cheesecake filling swirled with chunks of safe-to-eat cookie dough, all nestled on a buttery, no-bake crust.
This recipe is designed for maximum flavor and minimal fuss. We’ll be creating a luscious cheesecake base that’s complemented by a delightful cookie dough mixture that’s safe to eat raw. The textural contrast between the smooth cheesecake and the slightly chewy cookie dough is simply divine.
Ingredients:
Cookie Dough Preparation:
Before we dive into the cheesecake itself, we need to prepare our edible cookie dough. This step is crucial for that authentic cookie dough flavor and texture without any of the raw egg worries.
1. In a medium bowl, whisk together the all-purpose flour, light brown sugar, granulated sugar, and salt. This dry mixture forms the base of our cookie dough. Ensure there are no clumps of sugar.
2. Add the softened unsalted butter to the dry ingredients. Using a hand mixer or a stand mixer with the paddle attachment, cream together the butter and the dry ingredients until the mixture resembles coarse crum extractbs. This might take a few minutes.
3. Gradually add the 2 tablespoons of cold heavy cream and 1 ½ teaspoons of vanilla extract. Mix on low speed until the dough just comes together. Be careful not to overmix at this stage; we want a dough that’s slightly crum extractbly but holds together when pressed.
4. Gently fold in 1 ¼ cups of mini semi-sweet chocolate chips. Reserve the remaining 2 tablespoons of chocolate chips for decoration later.
5. To create the cookie dough balls, take small portions of the dough and roll them between your palms to form bite-sized balls. You should be able to make about 10-12 good-sized balls. These will be nestled into the cheesecake.
Cheesecake Assembly:
Now for the star of the show – the luscious cheesecake filling! The no-bake method means we can achieve a wonderfully creamy texture without the risk of cracks.
1. In a large bowl, beat the softened cream cheese until it’s completely smooth and creamy. This is a critical step to avoid any lumps in your cheesecake. Use a hand mixer or a stand mixer on medium speed and let it churn for at least 2-3 minutes.
2. Add 1 cup of the sifted powdered sugar and 1 ½ teaspoons of vanilla extract to the cream cheese. Beat again until everything is well combined and the mixture is smooth and fluffy. Scrape down the sides of the bowl as needed to ensure all the cream cheese is incorporated.
3. In a separate, chilled bowl, whip the 1 ¼ cups of very cold heavy cream with the remaining ½ cup of sifted powdered sugar until stiff peaks form. This is where the “no-bake” magic truly happens, creating a stable and airy cheesecake filling. Be careful not to over-whip, or you’ll end up with butter.
4. Gently fold the whipped cream into the cream cheese mixture. Then, carefully fold in the 8 ounces of whipped topping. The goal is to create a light and airy filling that is still firm enough to hold its shape. Continue folding until just combined, avoiding overmixing which can deflate the whipped cream.
5. Prepare your serving dish. This could be a springform pan (about 9 inches) for a traditional cheesecake look, or individual glasses or jars for a more elegant presentation. If using a springform pan, you can optionally line the bottom with parchment paper for easier removal.
6. Spoon about half of the cheesecake filling into your prepared dish and spread it evenly.
7. Carefully arrange the prepared edible cookie dough balls over the first layer of cheesecake filling. Try to distribute them evenly.
8. Gently spoon the remaining cheesecake filling over the cookie dough balls, covering them completely. Smooth the top with a spatula.
Chilling and Decorating:
The hardest part is waiting! Chilling is essential for the cheesecake to set properly and for all those delicious flavors to meld together.
1. Cover the cheesecake loosely with plastic wrap or a lid and refrigerate for at least 6 hours, or preferably overnight. This allows the cheesecake to firm up and achieve the perfect creamy consistency. The longer it chills, the firmer it will become.
2. Once the cheesecake is fully set, it’s time for the finishing touches. Sprinkle the reserved 2 tablespoons of mini semi-sweet chocolate chips over the top for a final flourish.
3. If you’ve used a springform pan, carefully release the sides of the pan. Slice the cheesecake into wedges and serve. For individual servings, you can add a dollop of extra whipped cream or a small cookie dough ball on top of each.
Enjoy every creamy, chocolatey, cookie-dough-filled bite of this spectacular No Bake Cookie Dough Cheesecake! It’s a guaranteed crowd-pleaser.
Conclusion:
There you have it! My No Bake Cookie Dough Cheesecake is truly a dream come true for any dessert lover. It’s the perfect symphony of creamy cheesecake and delightful, safe-to-eat cookie dough, all without the fuss of turning on your oven. This recipe is fantastic because it’s incredibly easy to whip up, making it ideal for last-minute gatherings or when you’re just craving something sweet without the commitment of baking. The smooth, rich texture of the cheesecake filling, studded with chunks of delicious cookie dough, is simply irresistible. I love serving this as a show-stopping finnon-alcoholic ale after a family dinner, or even just enjoying a slice with my morning coffee (no judgment here!). It’s incredibly versatile, too. Feel free to experiment with different types of cookie dough – maybe a double chocolate or even a peanut butter version? You could also add a drizzle of chocolate ganache or some caramel sauce on top for an extra layer of decadence.
I really encourage you to give this No Bake Cookie Dough Cheesecake a try. It’s guaranteed to impress and satisfy your sweet cravings. Happy no-baking!
Frequently Asked Questions:
Can I make this cheesecake ahead of time?
Absolutely! This No Bake Cookie Dough Cheesecake is perfect for making ahead. In fact, it’s best when chilled for at least 4-6 hours, or even overnight. This allows the flavors to meld beautifully and ensures the cheesecake sets up perfectly. Just cover it tightly with plastic wrap and refrigerate until you’re ready to serve.
What kind of cookie dough is safe to eat raw?
For this recipe, it’s crucial to use a cookie dough that is specifically labeled as safe to eat raw, or to make your own using heat-treated flour and no eggs. Many store-bought “edible cookie dough” varieties are designed for this purpose and work wonderfully. Always double-check the packagin extractg to ensure it’s safe for raw consumption.
How long will the cheesecake last in the refrigerator?
Properly stored in an airtight container in the refrigerator, your No Bake Cookie Dough Cheesecake should stay delicious for about 3-4 days. The texture might change slightly over time, but it will still be incredibly tasty!
No Bake Cookie Dough Cheesecake
A decadent no-bake cheesecake layered with edible cookie dough, perfect for any occasion.
Ingredients
-
1 ¾ cups all-purpose flour
-
1 cup unsalted butter, softened
-
¾ cup light brown sugar, packed
-
½ cup granulated sugar
-
2 tablespoons heavy cream, cold
-
1 ½ teaspoons vanilla extract
-
¼ teaspoon salt
-
1 ¼ cups mini semi-sweet chocolate chips
-
24 ounces cream cheese, softened
-
1 ½ cups powdered sugar, sifted, divided
-
1 ¼ cups heavy cream, very cold
-
8 ounces whipped topping
-
2 tablespoons mini semi-sweet chocolate chips
-
10 edible cookie dough balls
Instructions
-
Step 1
Prepare the cookie dough: In a large bowl, cream together the softened butter, light brown sugar, and granulated sugar until light and fluffy. Beat in 1 teaspoon of vanilla extract. In a separate bowl, whisk together the flour, salt, and 1 ¼ cups mini semi-sweet chocolate chips. Gradually add the dry ingredients to the wet ingredients, mixing until just combined. Stir in the 2 tablespoons of heavy cream. Cover and refrigerate for at least 30 minutes. Form into 10 balls. -
Step 2
Prepare the crust: In a medium bowl, combine 1 ¾ cups all-purpose flour, ½ cup softened unsalted butter, ¼ cup packed light brown sugar, and ¼ cup granulated sugar. Mix until crumbly. Press evenly into the bottom of a 9-inch springform pan. -
Step 3
Prepare the cheesecake filling: In a large bowl, beat the softened cream cheese until smooth. Gradually add 1 cup of sifted powdered sugar and ½ teaspoon vanilla extract, beating until well combined. Fold in 8 ounces of whipped topping until no streaks remain. -
Step 4
Assemble the cheesecake: Spoon half of the cheesecake filling over the crust. Arrange 5 of the prepared cookie dough balls on top of the filling. Spoon the remaining cheesecake filling over the cookie dough balls. Top with the remaining 5 cookie dough balls. -
Step 5
Chill the cheesecake: Cover the cheesecake with plastic wrap and refrigerate for at least 4 hours, or until firm. -
Step 6
Decorate and serve: Before serving, sprinkle with 2 tablespoons of mini semi-sweet chocolate chips. Carefully remove the sides of the springform pan.
Important Information
Nutrition Facts (Per Serving)
It is important to consider this information as approximate and not to use it as definitive health advice.
Allergy Information
Please check ingredients for potential allergens and consult a health professional if in doubt.