Easy Dango Recipe-Sweet Japanese Dumplings
Easy Dango Recipe, friends! Have you ever found yourself craving a delightful Japanese sweet that’s both satisfyingly chewy and bursting with subtle sweetness? If so, then you’ve likely encountered the magical world of dango. These delightful little dumplings, often served on skewers, are a beloved treat in Japan, gracing festival stalls, tea houses, and even home kitchens. What makes dango so universally loved? It’s their incredible versatility and wonderfully simple, yet addictive, texture. Unlike more complex pastries, this easy dango recipe allows you to recreate that authentic taste and mouthfeel in your own kitchen without a fuss. We’re talking about a truly special dessert that feels both comforting and a little exotic, perfect for a quick afternoon pick-me-up or a charming addition to your dessert table. Get ready to discover just how simple it is to make your own delicious dango!
Easy Dango Recipe
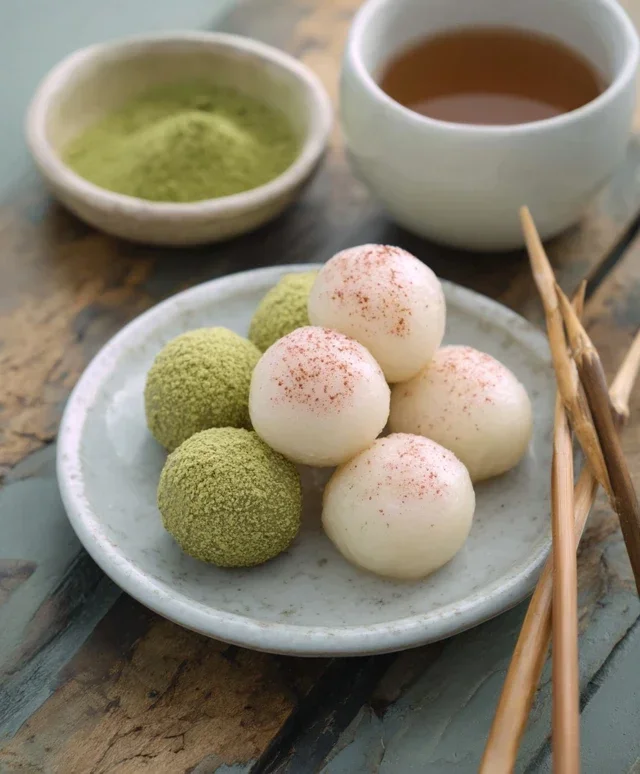
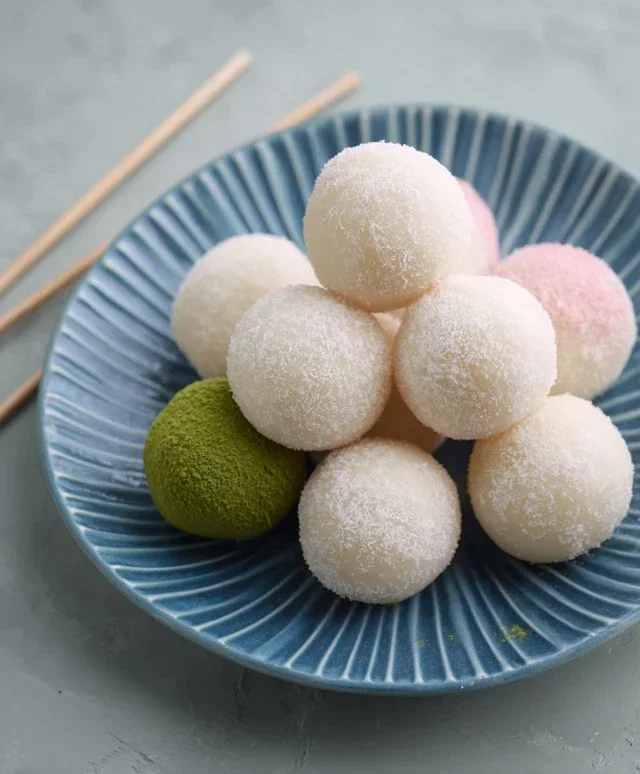
Dango are a beloved Japanese treat, and what’s not to love? These chewy, delightful rice dumplings are incredibly versatile, often served on skewers and drizzled with sweet sauces or coated in flavorful toppings. While they might seem a little intimidating to make at home, I’m here to tell you that it’s actually quite simple, especially with this easy dango recipe! We’ll be creating classic plain dango, vibrant green matcha dango, and pretty pink dango, all from one base dough. This recipe is perfect for begin extractners and will have you enjoying these delicious sweets in no time. Get ready to impress yourself (and anyone lucky enough to share with you!).
Ingredients:
Preparing the Dango Dough
The magic of dango lies in its texture, and that comes from the careful combination of different rice flours. Joshinko provides a slight firmness and chew, while Shiratamako brings that signature delightful stickiness and smooth texture.
First, in a large mixing bowl, combine the Joshinko and Shiratamako flours. If you’re opting for a slightly sweeter dango, add the powdered sugar at this stage as well. Whisk these dry ingredients together thoroughly to ensure they are evenly distributed. This is an important step for consistent texture throughout your dango.
Next, gradually add the hot water to the flour mixture. Start with about half of the water and begin extract mixing with a spoon or spatula. You’ll notice the mixture starting to clump. Continue adding the hot water, a little at a time, while mixing until a shaggy dough forms. The key here is hot water. The heat helps to gelatinize the starches in the rice flour, which is crucial for achieving the correct chewy texture. Be careful as the water is hot!
Once the dough is shaggy and starts to come together, it’s time to switch to using your hands. Knead the dough in the bowl until it forms a smooth, cohesive ball. It should be pliable and not too sticky. If the dough feels too dry and crum extractbly, add a tiny bit more hot water, just a teaspoon at a time, until it comes together. Conversely, if it feels too sticky, you can lightly dust your hands with a little extra Joshinko flour. This kneading process develops the gluten-like structure that gives dango its wonderful chew. Don’t overwork it; just knead until it’s smooth and uniform.
Dividing and Coloring the Dough
Now for the fun part: creating our colorful dango! Divide the main dough into three equal portions. You can eyeball this, or if you want to be precise, you can weigh each portion.
For the plain dango, leave one portion as is.
For the matcha dango, take one portion and place it in a small bowl. In a separate tiny bowl or cup, mix the 1 teaspoon of matcha powder with 1 teaspoon of water. Stir this paste until smooth. Add this matcha mixture to your dough portion and knead it thoroughly until the green color is evenly distributed and the dough has a uniform matcha hue. This might take a few minutes of kneading.
For the pink dango, take the last portion and place it in another small bowl. Add just one single drop of pink food coloring. Again, knead this portion until the color is uniform. Start with a very small amount of food coloring; you can always add another tiny drop if you want a more vibrant pink, but it’s hard to take it away!
Shaping the Dango Balls
Once your doughs are divided and colored, it’s time to shape them into those iconic dango balls. Take a portion of dough (start with the plain, or whichever color you prefer) and roll it between your palms to form small, bite-sized balls. Aim for a size that’s easy to eat in one or two bites, about the size of a large marble or a small gumball. Try to make them as uniform in size as possible so they cook evenly.
You can also shape them into slightly flattened discs or teardrop shapes if you prefer. This is where you can get a little creative! Some people like to give their dango a slight dimple on one side, which helps sauce adhere better. Place the shaped dango on a clean plate or parchment paper, making sure they don’t touch each other, to prevent them from sticking together. Repeat this shaping process for all your colored dough portions.
Cooking the Dango
There are a few ways to cook dango, but boiling is the most common and straightforward method for this recipe. Bring a large pot of water to a rolling boil. Gently drop the dango balls into the boiling water, being careful not to overcrowd the pot. Cook them in batches if necessary.
As the dango cook, you’ll notice them sinking to the bottom of the pot. Don’t worry, this is normal! After a few minutes, they will start to float to the surface. Once they float, continue to boil them for another 2-3 minutes. This ensures they are cooked through and have that perfect chewy texture. You’ll know they’re done when they are firm to the touch but still have a slight give.
Once cooked, carefully remove the dango from the boiling water using a slotted spoon. You can then plunge them into a bowl of ice water for a minute or two. This shocking in cold water helps to firm them up and prevent them from sticking together. After the ice bath, drain them thoroughly.
Serving Your Delicious Dango
Your homemade dango are now ready to be enjoyed! You can serve them as is, or skewer them onto small bamboo skewers (often 3-5 dango per skewer). Dango are traditionally served with a variety of delicious toppings. A classic choice is mitarashi dango, which is dango coated in a sweet soy glaze. You can also try them with anko (sweet red bean paste), kinako (roasted soybean flour), or even a simple drizzle of honey. Get creative and experiment with your favorite sweet flavors! The simple chegrape juicess of the dango provides a fantastic base for all sorts of sweet and savory accompaniments. Enjoy the fruits of your labor!
Conclusion:
And there you have it – a truly easy dango recipe that’s perfect for anyone wanting to explore a delightful Japanese sweet! We’ve seen how simple it is to whip up these chewy, delicious dumplings with just a few basic ingredients. Whether you’re a seasoned baker or a complete begin extractner, this recipe is incredibly forgiving and rewarding. The slightly sweet, chewy texture is incredibly satisfying, and the versatility of dango means you can customize it to your heart’s content.
I encourage you to give this easy dango recipe a try! It’s a fantastic treat for a weekend snack, a charming addition to a tea time, or even a fun activity to do with family and friends. Don’t be afraid to experiment with different toppings and sauces to find your personal favorite combination. Enjoy the process, and most importantly, enjoy your homemade dango!
Frequently Asked Questions about Easy Dango:
Can I make dango ahead of time?
Yes, you can! Cooked dango can be stored in an airtight container in the refrigerator for up to 2-3 days. They might firm up a bit when chilled, so you can gently rewarm them in a microwave for a few seconds or a lightly oiled pan before serving to restore their soft, chewy texture.
What are some other serving suggestions for dango?
Beyond the classic mitarashi (sweet soy glaze) and anko (red bean paste), you can try drizzling your dango with honey, maple syrup, or even a light fruit sauce like strawberry or yuzu. For a more decadent twist, a sprinkle of kinako (roasted soybean flour) with a touch of sugar is also wonderful. They also pair beautifully with a cup of green tea!
What if I don’t have glutinous rice flour? Can I substitute it?
Glutinous rice flour (mochiko or shiratamako) is key to achieving the signature chewy texture of dango. While you can’t perfectly replicate the chegrape juicess without it, some people have had success using a mix of regular rice flour and cornstarch, but the texture will be different. For the best results, I highly recommend sourcing glutinous rice flour.
Easy Dango Recipe
A simple and delicious recipe for making homemade Dango, a Japanese rice flour dumpling, perfect for a sweet treat.
Ingredients
-
{‘@type’: ‘Ingredient’, ‘name’: ‘Joshinko non-glutinous rice flour’, ‘quantity’: ‘1 1/3 cup’, ‘weight’: ‘150 g’}
-
{‘@type’: ‘Ingredient’, ‘name’: ‘Shiratamako glutinous sweet rice flour’, ‘quantity’: ‘1 1/2 cup’, ‘weight’: ‘200 g’}
-
{‘@type’: ‘Ingredient’, ‘name’: ‘Powdered sugar (optional)’, ‘description’: ‘to make it sweeter’, ‘quantity’: ‘3/4 cup’, ‘weight’: ’75 g’}
-
{‘@type’: ‘Ingredient’, ‘name’: ‘Hot water’, ‘quantity’: ‘1 1/3 cup’}
-
{‘@type’: ‘Ingredient’, ‘name’: ‘Matcha powder’, ‘quantity’: ‘1 teaspoon’, ‘description’: ‘+ 1 tsp water’}
-
{‘@type’: ‘Ingredient’, ‘name’: ‘Pink food coloring’, ‘quantity’: ‘1 drop’}
Instructions
-
Step 1
In a large bowl, combine Joshinko, Shiratamako, and powdered sugar (if using). -
Step 2
Gradually add the hot water to the dry ingredients, mixing until a soft, pliable dough forms. Knead lightly until smooth. -
Step 3
Divide the dough into three equal portions. Leave one portion plain, mix one with matcha powder and 1 tsp water until colored, and mix the third with 1 drop of pink food coloring. -
Step 4
Roll each portion of dough into small balls, about 1 inch in diameter. You can shape them as desired. -
Step 5
Bring a pot of water to a boil. Gently drop the dango balls into the boiling water. -
Step 6
Cook until the dango float to the surface, then let them simmer for another 1-2 minutes. Remove with a slotted spoon and rinse with cold water or transfer to an ice bath to stop the cooking process. -
Step 7
Serve plain, or with your favorite toppings like sweet bean paste (anko) or a drizzle of syrup.
Important Information
Nutrition Facts (Per Serving)
It is important to consider this information as approximate and not to use it as definitive health advice.
Allergy Information
Please check ingredients for potential allergens and consult a health professional if in doubt.