The Best Soft Chocolate Chip Cookies Recipe
The Best Soft Chocolate Chip Cookies are more than just a treat; they’re a nostalgic embrace, a comforting hug in edible form. Who doesn’t have a cherished memory tied to that perfect, warm cookie, still slightly gooey in the center with rivers of melted chocolate? It’s the universal language of comfort and joy, a simple pleasure that can brighten any day. What truly sets these apart, however, is achieving that elusive balance: a cookie that’s impossibly soft and chewy, never cakey, and bursting with rich, decadent chocolate flavor in every single bite. We’re talking about a cookie so sublime, it will redefine your expectations and likely become your new go-to recipe. Get ready to experience pure cookie bliss!
Are you ready to bake the ultimate comfort food?
Discover the secrets to the perfect soft chocolate chip cookie.
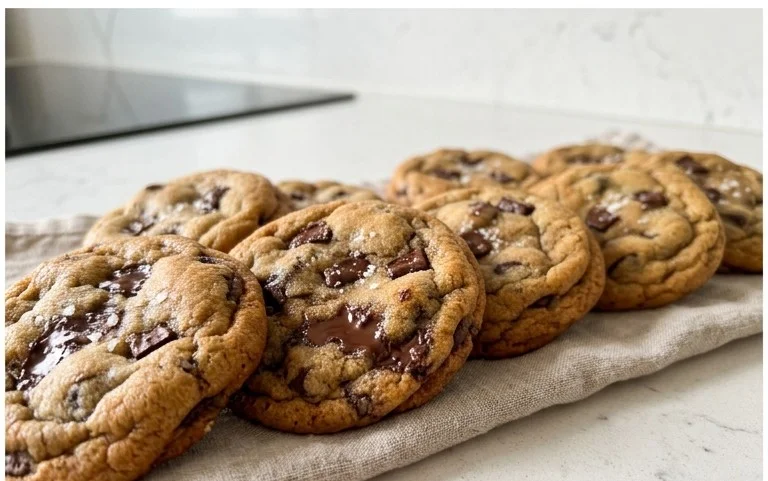
The Best Soft Chocolate Chip Cookies
There are countless chocolate chip cookie recipes out there, each claiming to be the best. But after years of experimenting, tweaking, and tasting (a delicious, albeit challengin extractg, endeavor!), I’ve finally landed on a recipe that consistently delivers the softest, chewiest, most melt-in-your-mouth chocolate chip cookies I’ve ever had. These aren’t the crispy, thin kind. These are the thick, pillowy delights that have just the right amount of gooeyness in the center and a slightly golden edge. The secret, I’ve found, lies in a few key ingredient ratios and a specific baking technique. Get ready to impress yourself and everyone you share these with!
Ingredients:
Cookie Creation: The Step-by-Step Guide
Let’s get started on creating these little circles of joy. The process is straightforward, but paying attention to a few details will make all the difference.
1. Creaming the Butter and Sugars: The Foundation of Softness
In a large mixing bowl, I start by creaming together the softened salted butter, white sugar, and packed light brown sugar. I use my stand mixer with the paddle attachment, but an electric hand mixer or even a good old-fashioned whisk and some elbow grease will work. You want to beat these together until the mixture is light, fluffy, and pnon-alcoholic ale yellow. This process, called creaming, incorporates air into the dough, which contributes to the cookies’ light texture and helps them spread evenly. Don’t rush this step! Aim for at least 3-5 minutes of continuous mixing. You should see the sugar crystals begin extract to dissolve into the butter, creating a cohesive, creamy base. This is where a lot of the magic for soft cookies begin extracts.
2. Incorporating Wet Ingredients: Binding it All Together
Once the butter and sugars are perfectly creamed, it’s time to add the wet ingredients. I crack in the room-temperature egg and add the teaspoon of vanilla extract. Again, I mix until everything is just combined and smooth. It might look a little separated at first, but keep mixing, and it will come together into a glossy mixture. Using a room-temperature egg helps it emulsify better with the butter and sugar, preventing the dough from becoming greasy. If your egg is cold, you can place it in a bowl of warm water for a few minutes before cracking it.
3. The Dry Ingredients: The Structure of the Cookie
In a separate medium bowl, I whisk together the all-purpose flour, baking soda, and salt. Whisking the dry ingredients together ensures that the leavening agent (baking soda) and salt are evenly distributed throughout the flour. This is crucial for uniform rising and flavor in every bite. If the baking soda or salt is clumped in one spot, you’ll end up with unevenly risen cookies or pockets of too much saltiness. Now, I gently add this dry mixture to the wet ingredients. I mix on low speed, or fold it in with a spatula, until the flour is just incorporated. Overmixing at this stage can develop the gluten in the flour too much, leading to tough cookies instead of soft, tender ones. Stop mixing as soon as you no longer see streaks of flour.
4. The Star of the Show: Chocolatey Goodness
This is where the fun really begin extracts! I gently fold in my beloved combination of chocolate chips and chocolate chunks. I like to reserve a few chocolate chunks to press onto the tops of the cookies before baking. This not only makes them look extra appealing but also ensures that you get a good burst of melted chocolate with your first bite. Again, be careful not to overmix here. You want to distribute the chocolate evenly without further developing the gluten in the flour. The dough should be thick and slightly sticky at this point.
5. Chilling and Baking: Patience is a Virtue
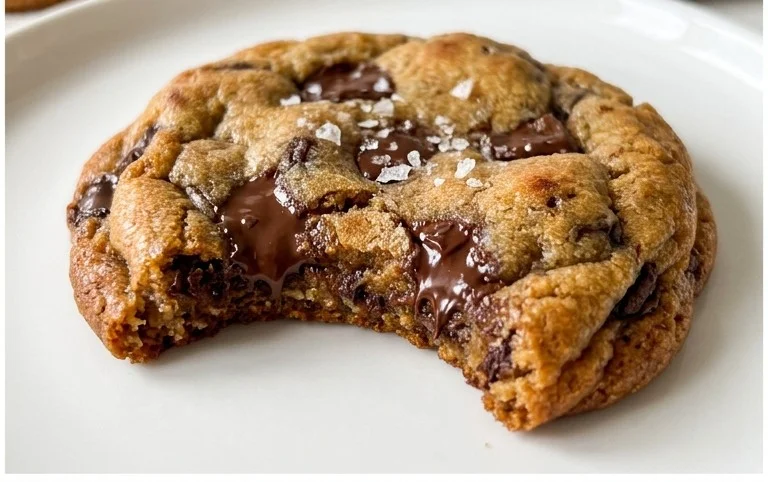
This is arguably the most important step for achieving truly soft cookies: chilling the dough. I cover the bowl with plastic wrap and refrigerate the dough for at least 30 minutes, but ideally for an hour or even longer. This allows the fats to firm up, which prevents the cookies from spreading too much in the oven, resulting in thicker, softer cookies. It also allows the flavors to meld and deepen. Once chilled, I preheat my oven to 375°F (190°C) and line baking sheets with parchment paper. I then scoop rounded tablespoons of dough onto the prepared baking sheets, leaving about 2 inches between each cookie. If you want perfectly round cookies, you can roll the scooped dough into balls. Bake for 9-12 minutes, or until the edges are lightly golden brown and the centers still look a little underdone. They will continue to set up as they cool. For that extra visual appeal, gently press a few extra chocolate chunks onto the tops of the cookies right out of the oven. Let them cool on the baking sheet for a few minutes before transferring them to a wire rack to cool completely. The result? Perfectly soft, chewy, and utterly irresistible chocolate chip cookies!
Conclusion:
There you have it – the ultimate guide to achieving the best soft chocolate chip cookies! We’ve meticulously crafted this recipe to ensure you get those perfectly chewy centers and lightly crisp edges every single time. The magic lies in the balance of ingredients, the gentle mixing technique, and the crucial chilling period which allows the flavors to meld and prevents excessive spreading. These cookies are not just a treat; they are a comforting hug in edible form. Imagin extracte them warm from the oven, the chocolate chips still delightfully gooey, paired with a tall glass of cold milk or a steaming mug of coffee. For a little extra flair, consider adding a sprinkle of sea salt on top before baking for a sophisticated sweet and salty contrast, or perhaps some chopped nuts for added texture. Don’t be afraid to experiment with different types of chocolate – dark, milk, white, or even a mix – to personalize your perfect cookie. I truly hope you’ll give this recipe a try. The joy of baking and sharing these delicious treats is immense, and I’m confident you’ll fall in love with these best soft chocolate chip cookies!
Frequently Asked Questions:
Why are my chocolate chip cookies spreading too much?
This is often due to a few factors. Ensure your butter is softened, not melted; melted butter leads to a flatter cookie. Also, make sure you’re measuring your flour accurately. Too much flour can make cookies dry, but slightly under-measuring can contribute to spreading. Chilling the dough for at least 30 minutes (or longer) is also a critical step to prevent excessive spreading.
Can I make these cookies ahead of time?
Absolutely! The dough can be made and then stored in the refrigerator for up to 3 days, or frozen for up to 3 months. When ready to bake from chilled, you might need to add a minute or two to the baking time. If baking from frozen, you can bake them directly from the freezer, but add several minutes to the baking time and keep a close eye on them.
What’s the best way to store these soft chocolate chip cookies?
To maintain their soft texture, store cooled cookies in an airtight container at room temperature with a slice of bread. The bread will release moisture, helping to keep the cookies soft. They are best enjoyed within 3-4 days.
The Best Soft Chocolate Chip Cookies
The ultimate soft and chewy chocolate chip cookie recipe, perfect for any occasion.
Ingredients
-
8 tablespoons of salted butter, softened
-
1/2 cup white sugar
-
1/4 cup packed light brown sugar
-
1 teaspoon vanilla extract
-
1 large egg
-
1 1/2 cups all purpose flour
-
1/2 teaspoon baking soda
-
1/4 teaspoon salt
-
3/4 cup chocolate chips
Instructions
-
Step 1
Preheat oven to 375°F (190°C). -
Step 2
In a large bowl, cream together the softened butter, white sugar, and brown sugar until light and fluffy. -
Step 3
Beat in the vanilla extract and egg until well combined. -
Step 4
In a separate medium bowl, whisk together the all purpose flour, baking soda, and salt. -
Step 5
Gradually add the dry ingredients to the wet ingredients, mixing until just combined. -
Step 6
Stir in the chocolate chips. -
Step 7
Drop rounded tablespoons of dough onto ungreased baking sheets. -
Step 8
Bake for 8-10 minutes, or until the edges are golden brown and the centers are still slightly soft. -
Step 9
Let cookies cool on the baking sheets for a few minutes before transferring them to a wire rack to cool completely.
Important Information
Nutrition Facts (Per Serving)
It is important to consider this information as approximate and not to use it as definitive health advice.
Allergy Information
Please check ingredients for potential allergens and consult a health professional if in doubt.