Easy Homemade Oreo Cookies-Best Recipe
Homemade Oreo cookies are more than just a nostalgic treat; they’re a gateway to pure, unadulterated joy in cookie form. There’s something undeniably magical about that iconic dark chocolate cookie sandwiching a sweet, creamy filling. We all have those childhood memories tied to dunking them in milk, right? What makes these cookies so universally beloved is that perfect balance of rich, slightly bitter chocolate and that luxuriously smooth vanilla creme. Forget the store-bought imposters; crafting your own Homemade Oreo cookies from scratch allows you to control the quality of ingredients and experience the satisfaction of creating something truly special. Imagin extracte the aroma filling your kitchen as these beauties bake, a scent that promises deliciousness and a truly rewarding baking adventure. This recipe will guide you to achieve that perfect texture and flavor that will make you swear off the boxed versions forever.
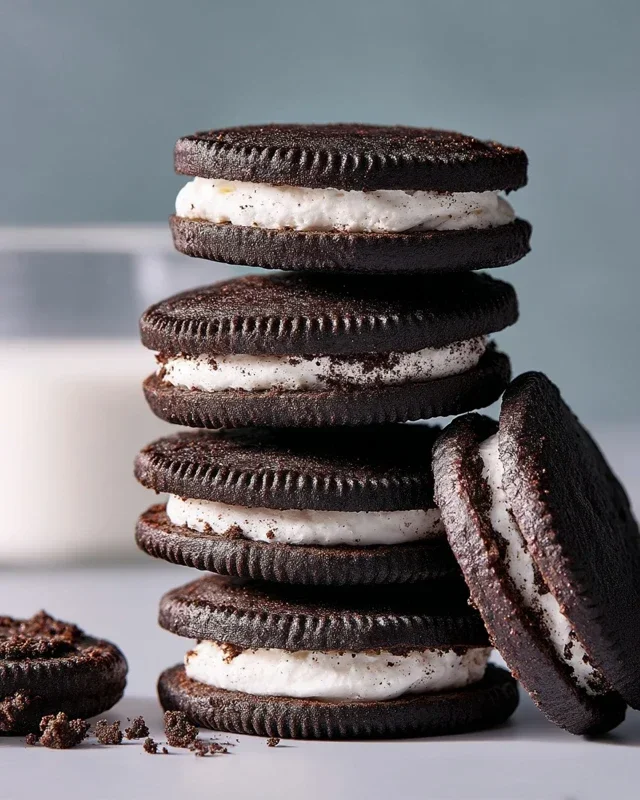
Homemade Oreo Cookies
There’s something undeniably magical about a classic Oreo cookie. That crisp, dark chocolate cookie paired with a sweet, creamy filling – it’s a combination that has delighted taste buds for generations. While store-bought Oreos are convenient, crafting them from scratch allows for a level of flavor and texture that’s truly unparalleled. Plus, the satisfaction of biting into a cookie you made with your own hands is a reward in itself. This recipe is designed to bring that iconic cookie experience right into your kitchen, and I promise, the results are worth every bit of effort. We’re going to achieve that signature dark color and satisfying crunch, followed by that perfectly smooth, sweet filling.
Ingredients:
Preparing the Cookie Dough
The journey to delicious homemade Oreos begin extracts with the cookie dough. This is where we build the foundation for that characteristic dark color and crisp texture. Accuracy in measuring is key here, especially with the cocoa powder, as it plays a significant role in both flavor and color.
1. In a medium bowl, whisk together the all-purpose flour, Dutch-process cocoa powder (or black cocoa powder for an even deeper hue and flavor, which I highly recommend for the most authentic look and taste), baking soda, baking powder, and 1/4 teaspoon of fine sea salt. Whisking these dry ingredients together thoroughly ensures they are evenly distributed, which is crucial for a uniform cookie. Set this mixture aside for now.
2. In the bowl of a stand mixer fitted with the paddle attachment (or using a hand mixer and a large bowl), cream together the granulated sugar and the 10 tablespoons of cool, room-temperature unsalted butter. You want the butter to be soft enough to incorporate but still somewhat firm; this “cool room temperature” is important for the texture of the final cookie. Cream these together for about 2-3 minutes until the mixture is light and fluffy. This aeration process is essential for creating a tender cookie.
3. Add the room-temperature large egg and the 2 ½ teaspoons of pure vanilla extract to the creamed butter and sugar mixture. Beat on medium speed until well combined and smooth. Scrape down the sides of the bowl as needed to ensure everything is fully incorporated.
4. Gradually add the dry ingredients to the wet ingredients. Start the mixer on low speed and add the flour-cocoa mixture in two or three additions, mixing until just combined after each addition. Be careful not to overmix at this stage, as overmixing can develop the gluten in the flour, leading to tougher cookies. You want the dough to come together into a cohesive ball.
5. Turn the dough out onto a lightly floured surface and gently gather it into a ball. Divide the dough in half, flatten each half into a disc, wrap them tightly in plastic wrap, and refrigerate for at least 2 hours, or preferably overnight. Chilling the dough is a critical step. It allows the fats to solidify, making the dough easier to handle and preventing the cookies from spreading too much during baking. It also allows the flavors to meld and deepen.
Baking the Dark Chocolate Cookies
Once the dough is properly chilled, we’re ready to bring these cookies to life in the oven.
6. Preheat your oven to 350°F (175°C). Line baking sheets with parchment paper. This prevents sticking and makes for easy cleanup. Take one disc of chilled dough from the refrigerator. Let it sit at room temperature for about 5-10 minutes if it’s too stiff to roll. On a lightly floured surface, roll out the dough to about 1/8-inch thickness. Thinner cookies will be crispier, while slightly thicker ones will have a bit more chew.
7. Using a round cookie cutter (about 1.5 to 2 inches in diameter), cut out your cookie shapes. You can also use the rim of a small glass. Carefully transfer the cut-out cookies to the prepared baking sheets, leaving about 1-inch of space between them to allow for slight spreading. If the dough becomes too soft to cut cleanly, pop it back into the refrigerator for a few minutes.
8. Bake the cookies for 8-10 minutes. The baking time will vary depending on your oven and the thickness of your cookies. You’re looking for the edges to be set and the centers to appear dry. They won’t look completely done in the traditional sense, as they are very dark, but you should see that they are no longer glossy in the middle. They will firm up as they cool. Let the cookies cool on the baking sheets for 5 minutes before transferring them to a wire rack to cool completely. This is important because they are very delicate when hot.
Crafting the Creamy Vanilla Filling
While the cookies cool, it’s time to prepare the iconic sweet filling that makes an Oreo an Oreo.
9. In a clean bowl of your stand mixer (or using a hand mixer and a large bowl), beat the 1 stick of unsalted butter until it is smooth and creamy. Make sure this butter is also at a cool room temperature, similar to the butter used for the cookies.
10. Gradually add the sifted powdered sugar, 1/8 teaspoon of fine sea salt, and another 1 teaspoon of pure vanilla extract (if you have extra, feel free to add it, as Oreos are known for their sweet vanilla flavor). Begin extract mixing on low speed to avoid a cloud of powdered sugar, then increase the speed to medium-high. Beat for 3-5 minutes until the filling is light, fluffy, and completely smooth. If the filling seems too stiff, you can add a teaspoon of milk or cream at a time, but be very careful not to make it too runny.
Assembling Your Homemade Oreos
The final, most satisfying step: bringin extractg the cookies and filling together.
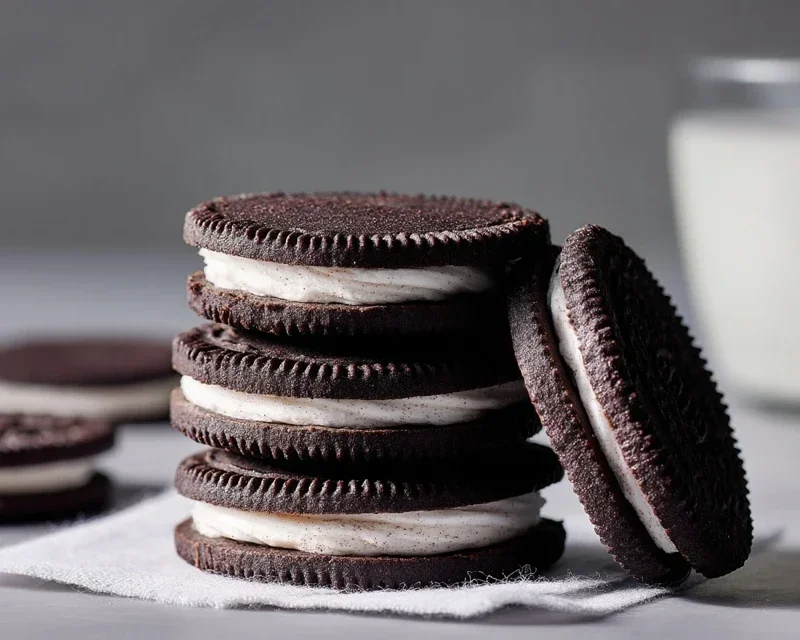
11. Once the cookies are completely cool, it’s time for assembly. Take one cookie and spread a generous dollop of the vanilla filling onto the flat side. Use an offset spatula or a knife to spread the filling evenly, almost to the edges. Then, carefully top with another cookie, pressing down gently to create a sandwich. Repeat with the remaining cookies and filling. You’ve just created your own delicious, homemade Oreo cookies! Enjoy them with a glass of milk, just like the classic!
Conclusion:
And there you have it – the ultimate guide to creating your very own, surprisingly simple, homemade Oreo cookies! We’ve explored how this recipe delivers all the iconic flavor and satisfying crunch you love, without the preservatives and artificial ingredients found in store-bought versions. The rich, dark chocolate cookie dough combined with the sweet, creamy vanilla filling is truly a match made in cookie heaven.
These homemade Oreo cookies are incredibly versatile. Enjoy them on their own for a pure chocolatey indulgence, or get creative! Crum extractble them over ice cream for an extra special dessert, use them as a base for cheesecakes, or sandwich them with different flavored frostings like peanut butter or mint for exciting variations. Imagin extracte a spicy chili chocolate Oreo or a tangy lemon-infused cream!
Don’t be intimidated – baking these from scratch is a rewarding experience. The smell that will fill your kitchen is simply divine, and the taste is unparalleled. I highly encourage you to give this recipe a try. It’s perfect for impressing guests, treating yourself, or simply enjoying a fun baking project with family. You’ll be amazed at how easy it is to achieve such delicious results with these homemade Oreo cookies.
Frequently Asked Questions:
Can I make these vegan?
Absolutely! You can easily make these vegan by substituting the butter with vegan butter or coconut oil for the cookies and the milk with a non-dairy alternative like almond or soy milk. For the filling, use vegan shortening and powdered sugar. The flavor will be very similar!
How should I store my homemade Oreo cookies?
Store your homemade Oreo cookies in an airtight container at room temperature. They should stay fresh and delicious for up to 5 days. For longer storage, you can freeze them in a single layer on a baking sheet until firm, then transfer to a freezer-safe bag or container for up to 2-3 months.
My cookie dough is too crum extractbly. What did I do wrong?
A crum extractbly cookie dough usually means it’s a bit too dry. You can try adding a teaspoon of milk or water at a time until the dough just comes together. Be careful not to add too much, as it can make the cookies spread too much. Ensure you measured your flour correctly, as over-measuring can also lead to a dry dough.
Homemade Oreo Cookies
Classic homemade chocolate sandwich cookies with a creamy vanilla filling, mimicking the beloved Oreo.
Ingredients
-
1 1/4 cups (159 grams) all-purpose flour
-
1/2 cup (43 grams) Dutch-process cocoa powder or Black cocoa powder
-
1 teaspoon baking soda
-
1/4 teaspoon baking powder
-
1/4 teaspoon fine sea salt
-
1 cup (200 grams) granulated sugar
-
10 tablespoons (142 grams) unsalted butter, at a cool room temperature, cut into chunks
-
1 large egg, at room temperature
-
1 stick (113 grams) unsalted butter, at a cool room temperature
-
2 ½ teaspoons pure vanilla extract
-
2 1/2 cups (313 grams) powdered sugar, sifted
-
1/8 teaspoon fine sea salt
Instructions
-
Step 1
In a medium bowl, whisk together the flour, cocoa powder, baking soda, baking powder, and 1/4 teaspoon salt. Set aside. -
Step 2
In a large bowl, cream together the granulated sugar and the first amount of butter until light and fluffy. -
Step 3
Beat in the egg and vanilla extract until well combined. -
Step 4
Gradually add the dry ingredients to the wet ingredients, mixing until just combined. The dough will be stiff. -
Step 5
Divide the dough in half. Flatten each half into a disc, wrap in plastic wrap, and chill for at least 30 minutes. -
Step 6
Preheat oven to 350°F (175°C). Line baking sheets with parchment paper. -
Step 7
On a lightly floured surface, roll out one disc of dough to about 1/8-inch thickness. Cut out circles using a cookie cutter (about 2 inches in diameter). Repeat with the second disc of dough. -
Step 8
Place cookies on prepared baking sheets and bake for 10-12 minutes, or until firm. Let cool on baking sheets for a few minutes before transferring to a wire rack to cool completely. -
Step 9
While cookies cool, make the filling: In a large bowl, beat the second amount of butter until creamy. Gradually beat in the sifted powdered sugar and 1/8 teaspoon salt until smooth and fluffy. Stir in the vanilla extract. -
Step 10
Once cookies are completely cool, spread a generous amount of filling on the flat side of one cookie and sandwich with another cookie.
Important Information
Nutrition Facts (Per Serving)
It is important to consider this information as approximate and not to use it as definitive health advice.
Allergy Information
Please check ingredients for potential allergens and consult a health professional if in doubt.